Assignment 5, CSC 101
due March 4, 11:59pmIn this assignment you will complete the ray casting project by working with an input file and generating an output file. In addition, you will allow the user of your program to vary some of the characteristics of the casting through command-line arguments to your program.
Sample files are given near the end of this page.
Files
Create a hw5 directory in which to develop your solution. You will need to copy your files from the previous assignment.
You will develop the new parts of your program over three files. You must use the specified names for your files.
commandline.py- contains implementations of command-line processing functionstests.py- contains your test cases for individual functions (unit tests) - this will not be submitted for this assignmentray_caster.py- contains a main function and supporting I/O functions that implement the required functionality of the assignment
Once you are ready to do so, and you may choose to do so often while incrementally developing your solution, run your test cases with the command python tests.py. You will run ray_caster.py as discussed below to execute the program itself.
Functionality
There are effectively three parts to this assignment: generating an output file, reading from an input file, and processing command-line arguments. You may work on these parts in whichever order you prefer. For instance, you might find that generating a file is a relatively straightforward (and quick?) first step.
Once this assignment is finished,
your program will take command-line arguments specifying the name of
the input file (which gives the set of spheres in the scene) and optional
flags that modify the default settings for the position of the eye, the
view dimensions, the point light position and color, and the ambient
light color. Your program will read the contents of the file to
populate a list of spheres, cast all of the rays into the scene,
and output the pixel values to a file named image.ppm.
Output File
In the previous assignment the pixel information for the generated image
was printed to the screen in the ppm P3 format. For this assignment, you
must modify your solution to output the generated image (in the same format)
to a file named image.ppm. Be sure to include the P3 header
in the file.
Input File
The file from which to read the set of spheres must be specified on the
command-line (discussed below). Each line of this file will contain the
values required for the creation of a sphere in the order
x y z radius r g b ambient diffuse specular roughness.
Each value is of type float and they are separated by whitespace.
Your program must read every sphere in the file. Reading must stop when the end-of-file is reached.
File Format
For instance, the following specifies the characteristics for the two spheres in the image below. Note that the blue background in the image is actually the second sphere; this sphere is very large and serves as a surface for the shadow of the first sphere to land upon.
1.0 1.0 0.0 2.0 1.0 0.0 1.0 0.2 0.4 0.5 0.05
8.0 -10.0 110.0 100.0 0.2 0.2 0.6 0.4 0.8 0.0 0.05

Errors in the file
Your program should not assume a correctly formatted input file. More specifically, your program must verify that each line contains valid values for a sphere (i.e., there are exactly the required number of values and each is a number/float). If a line does not represent a valid sphere, then your program should output an error message. The following examples show an input file with invalid lines and the expected error message.
1.0 1.0 0.0
1.0 1.0 0.0 2.0 1.0 0.0 1.0 0.2 0.4 0.5 0.05
1.0 1.0 0.0 2.0 1.0 0.0 1.0 0.2 0.4 0.5 0.05 3
4.7 1.0 2.0 2.0 2.0 bob 2.0 020 412 000 0000
8.0 -10.0 110.0 100.0 0.2 0.2 0.6 0.4 0.8 0.0 0.05
8.0
malformed sphere on line 1 ... skipping
malformed sphere on line 3 ... skipping
malformed sphere on line 4 ... skipping
malformed sphere on line 6 ... skipping
malformed sphere on line 7 ... skipping
Command-line Processing
Your program will take one required command-line argument and up to four command-line arguments that the user may optionally specify (in any order).
The first command-line argument to your program will be the name of the input file. If this file does not exist or cannot be opened for reading, then an error should be reported and the program terminated.
If the file argument is not specified, then print a usage message like the following.
usage: python ray_caster.py <filename> [-eye x y z] [-view min_x max_x min_y max_y width height] [-light x y z r g b] [-ambient r g b]
The remaining arguments may be optionally specified. If any are specified, then they will begin with what are conventionally called flags (or switches). Each such flag will signify that additional arguments follow. These flags (grouped with their additional arguments) may appear in any order.
The flags and additional arguments are as follows. If an argument is missing, use the specified default values for the flag. If an argument cannot be converted into a numeric value, then use the default value for that argument.
-eyeIf this flag is present, then the next three arguments specify thex,y, andzcoordinates of the position of the eye from which rays are cast. If this flag is not present, then the eye defaults to position <0.0, 0.0, -14.0>. Note that many settings for the eye will result in skewed images because the view rectangle is always perpendicular to thez-axis and fixed atz=0; you can generate some bizarre images by moving the eye given our current configuration.-viewIf this flag is present, then the next six arguments specify themin_x,max_x,min_y,max_y,width, andheightcomponents of the view rectangle. If the flag is not present, then the view rectangle defaults to positionmin_xof-10,max_xof10,min_yof-7.5,max_yof7.5,widthof512, andheightof384.-lightIf this flag is present, then the next six arguments specify thex,y, andzcoordinates of the light's position and ther,g, andbvalues of the light's color. If the flag is not present, then the light defaults to position <-100.0, 100.0, -100.0> and color/intensity (1.5, 1.5, 1.5).-ambientIf this flag is present, then the next three arguments specify ther,g, andbvalues of the ambient light color. If the flag is not present, then the ambient light color defaults to (1.0, 1.0, 1.0).
Test Cases
You should write test cases in tests.py to verify the
non-I/O functions in your solution. You will not submit
these tests, so the degree of testing is up to you; make sure that
you are confident in your solution.
Sample Files and Comparing
Some sample input and output files are given below (the images shown in the browser are in a different format and are scaled down; do not compare against these). You should run your program on smaller test files (like the sphere example) and then try the larger examples. Keep in mind that the larger examples will take a while to run (this is expected due to both the number of spheres and the overhead associated with the Python interpreter).
Each of the sample images was generated with the default settings for the eye, view, point light, and ambient light. You can reduce the resolution (width and height) to reduce the execution time.
bunny_small.in bunny_small.ppm
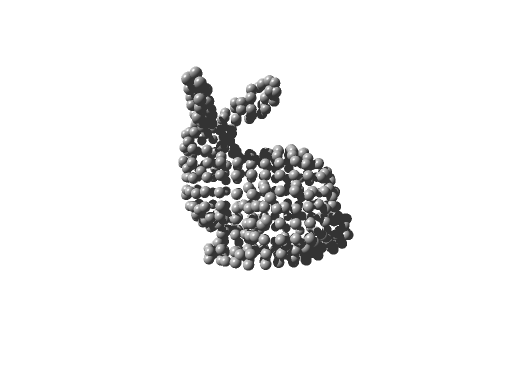
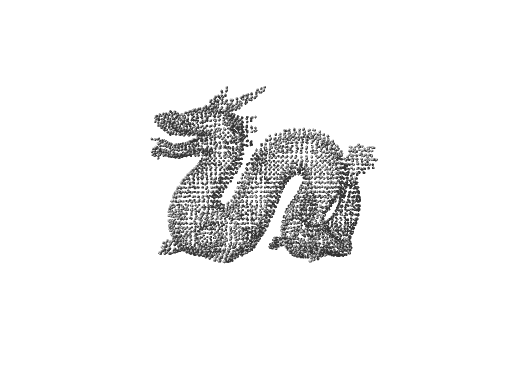
bunny_large.in bunny_large.ppm

Varying Settings
The following are examples of the sphere.in scene with varying settings for the command-line arguments.
-light -150 50 -100 1.5 1.5 1.5
sphere_light.ppm

-light -100 100 -100 0.2 1.5 0.2
sphere_light_green.ppm

-light -150 50 -100 1.5 1.5 1.5 -view -5 15 -5 10 512 384
sphere_light_view.ppm

-light -100 100 -100 0.8 1.5 0.8 -ambient 0.2 1.0 0.2
sphere_light_ambient.ppm
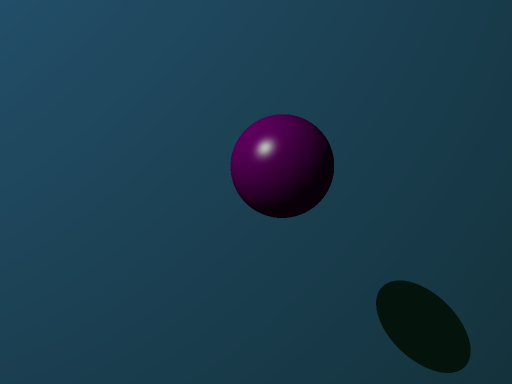
Image Diff Programs
You can compare your resulting image to those of the instructor solution with the following programs. Keep in mind, however, that there may be some legitimate minor differences due to the imprecision of floating point operations and the order in which your solution does computations compared to the order in the instructor solution.
There are two image diff programs available on the CSL machines.
They are ~akeen/public/bin/ppmdiff and
~akeen/public/bin/ppmdiff_analog. Each of these
programs takes two ppm P3 files as command-line arguments, reports the
differences between the files to the console, and generates a difference
image.
ppmdiff creates an image with a black pixel if the
corresponding pixel position differs between the two input files.
ppmdiff_analog creates an image with pixels colored by the
degree to which the corresponding pixel position differs between the
two input files. In short, the image from the first highlights where
the differences are while the image from the second gives a sense of
how "big" the differences are.
Handin
You must submit your solution on unix1.csc.calpoly.edu (or on unix2, unix3, or unix4) by 11:59pm on the due date.
The handin command will vary by section.
Those in Aaron Keen's sections will submit to the akeen user.
At the prompt, type handin akeen 101hw5 data.py vector_math.py collisions.py cast.py commandline.py ray_caster.py utility.py
Those in Julie Workman's sections will submit to the grader-ph user.
At the prompt, type handin grader-ph 101hw5 data.py vector_math.py collisions.py cast.py commandline.py ray_caster.py utility.py
Those in Paul Hatalsky's sections will submit to the grader-ph user.
At the prompt, type handin grader-ph 101hw5 data.py vector_math.py collisions.py cast.py commandline.py ray_caster.py utility.py
Those in John Campbell's sections will submit to the jcampb25 user.
At the prompt, type handin jcampb25 hw5 data.py vector_math.py collisions.py cast.py commandline.py ray_caster.py utility.py
Be sure to submit all files that are necessary to compile your program (including your files from the previous assignment(s)).
Note that you can resubmit your files as often as you'd like prior to the deadline. Each subsequent submission will replace files of the same name.
Grading
The grading breakdown for this assignment is as follows.
Clean Execution: 5% — Program runs without crashing (and the submitted source demonstrates a legitimate attempt at a solution).
Style: 5% — Consistent formatting including the use of braces, parentheses, and indentation. Each line of code below maximum length (i.e., less than 80 characters).
Decomposition: 15% — Functional decomposition restricts each function to a single task. Duplicate functionality has been abstracted to a single function (i.e., duplicate code is removed).
Functionality: 75% — Required functionality has been implemented.