For bulk and as horse pepples, the Rolodex help file is herewith dumped wholesale. The Rolodex help was left simple so we could get on with life. A feature that (may) need(s) to go here that is not in Rolodex help is the +/- explorer-style navigation of the contents window, and problably of the index if the index goes to greater than one level. Also, there (maybe) should be a Troubleshooting section at the end of the Users Manual. Finally, we may want to have indexed help allow multiple occurrances of the index phrase, most likely with prev/next buttons to move between them.
Here be the Rolohelp ...
As with the File and Edit commands, processing of
Help varies in different operating environments. In particular, some
operating environments have specific standards or conventions for the delivery
of help information. The requirements here (and in
Appendix C)
are generic and operating-environment independent. What is specified here is
the required content for the help information. This content may be reformatted
and possibly reorganized, based on environment-specific conventions.
2.10.1. About
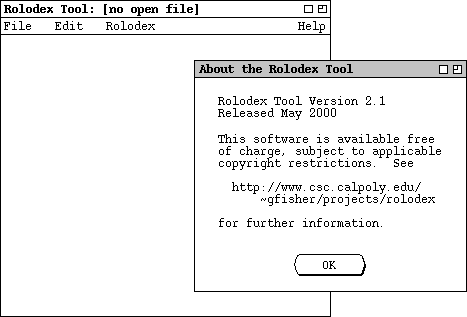
When the user selects About from the Help menu, the system
displays the pop-up dialog shown in Figure 309.

Figure 309: About the rolodex tool.
When the user selects Show Quick Help from the Help menu, the
system enters Quick Help Mode. In this mode, the system displays a
small pop-up message when the user moves the mouse over elements of the display
for which quick help is available. For example, Figure 310 shows the result of
the user selecting Show Quick Help and then moving the mouse over the
File menu.
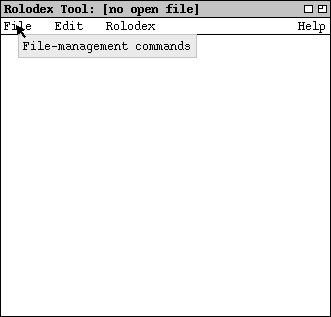
Figure 310: Quick help for the File menu.
Figures 311 and 312 show two additional quick help examples, when the user has
moved the mouse over the File->New menu item and over the OK
button in the add-card dialog.
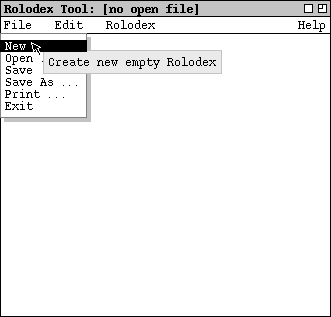
Figure 311: Quick help for File New.
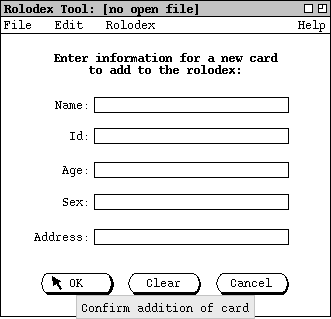
Figure 312: Quick help for add card OK.
After entering quick help mode, the system changes the Show Quick Help
menu item to Hide Quick Help. When the user subsequently reselects
the Help menu, it appears as shown in Figure 313.
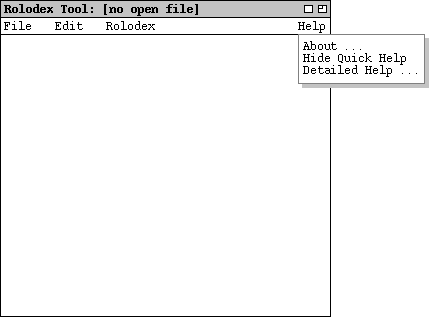
Figure 313: Hide quick help.
The complete list of display elements for which quick help is available is
given in
Appendix C.1
2.10.3. Detailed Help
When the user selects Detailed Help from the Help menu, the
screen appears as shown in Figure 314.
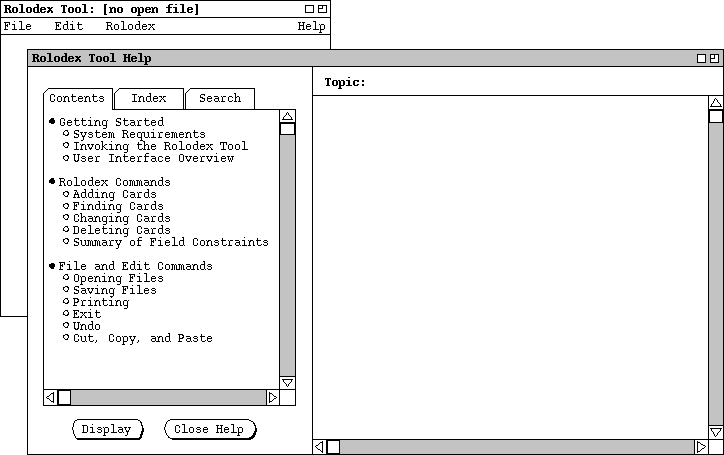
Figure 314: Initial detailed help screen.
The detailed help control panel consists of three tabs for selecting information. The Contents tab displays a table of contents for the major topics of information. The Index tab displays an alphabetic subject listing. The Search tab allows the user to search for a keyword or string that appears anywhere in the help information.
The content of detailed help is a reformatted version of the same content that
appears in the Rolodex Tool Users Manual in
Appendix A.
Details of the manual-to-help reformatting are given in
Appendix C.2.
2.10.3.1. Detailed Help Contents
The default tab for the detailed help control panel is Contents, as
shown in
Figure 314.
The Contents pane shows a table of contents for the help information.
Each line in the table is a separate topic of information that can be
displayed. To select a particular topic for viewing, the user clicks on a
single line in the Contents pane and presses the Display
button. For example, Figure 315 shows the result of the user selecting the
topic "User Interface Overview" in the Contents pane, and
then pressing Display.
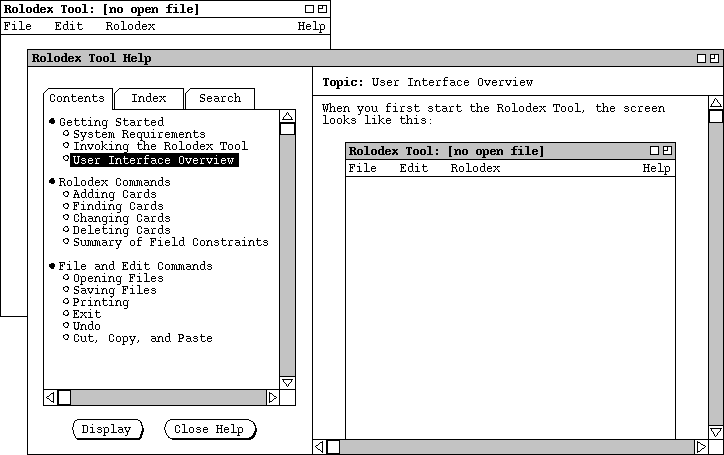
Figure 315: Detailed help for a selected topic.
When the user selects the Index tab in the help control panel, the
system updates the help window as shown in Figure 316.
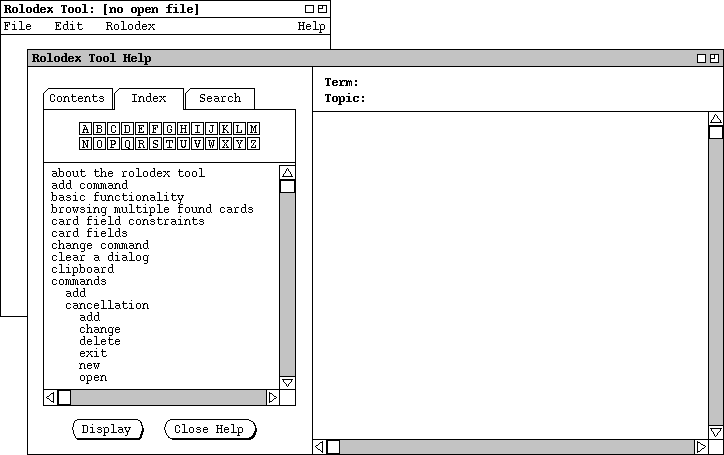
Figure 316: Detailed help index.
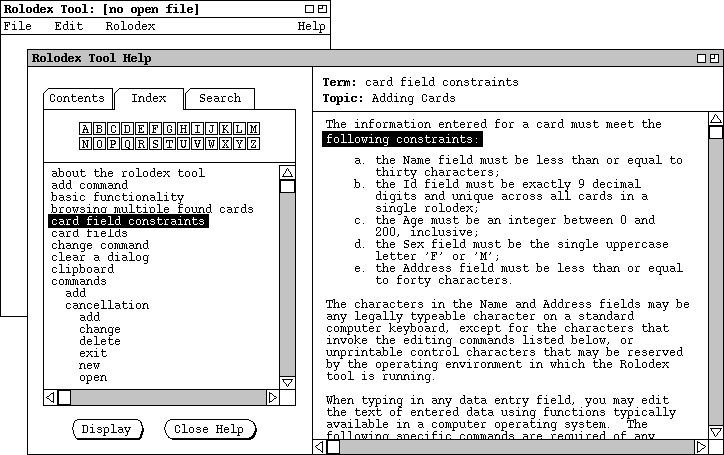
Figure 317: Detailed help for a selected term.
The information pane for a displayed term contains the information for exactly one topic, where the available topics are those listed under the Contents tab. Even if an index term appears more than once in a topic (or topics), the term is linked to a single textual location. Hence, displaying an index term always leads to the same single location in the same topic.
In the Index pane of the control panel, the user can scroll through
the terms in the normal way using the scroll bar on the right of the pane. The
user can also scroll through the index terms by pressing one of the twenty-six
small buttons labeled with the letters of the alphabet. When the user presses
one of these buttons, the system scrolls the term list so that the first term
starting with the selected letter appears at the top of the pane. If there is
no index term starting with the selected letter, the system scrolls the list so
that the term at the top of the display is the last term starting with the
earliest preceding letter for which there is at least one term defined. If
there is no such term, the display is unchanged.
2.10.3.3. Detailed Help Search
When the user selects the Search tab in the help control panel, the
system updates the help window as shown in Figure 318.
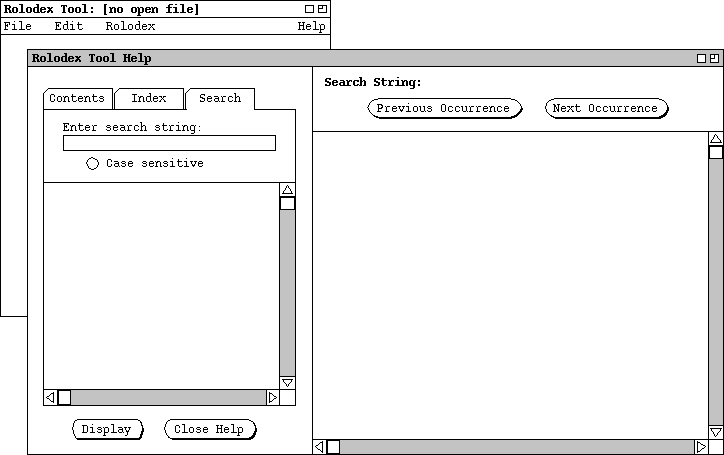
Figure 318: Detailed help search.
The user can search for a string that appears anywhere in the the detailed help
information. To perform the search, the user types the desired string in the
text box below the "Enter search string:" label. For example, Figure
319 shows the result of the user entering the search string "save" and
then pressing Display.
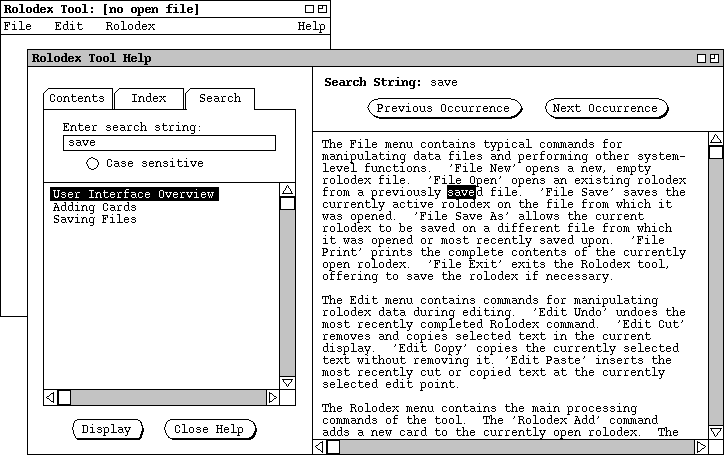
Figure 319: Detailed help for a selected search string.
The extent of a search is the text of all help topics, where the available topics are those listed under the Contents tab. The order of the search is from beginning to end through each topic, with topics searched in top-to-bottom order of the Contents tab list. If a string occurrence is found in two or more topics, the list of topics is ordered in the relative order of the Contents tab. For example, the order of the three topics shown in Figure 319 is the relative order of those topics in the Contents tab list.
As with the display of index terms, the information pane for a successful search contains the information for one topic, where the available topics are those listed under the Contents tab. In contrast to an index term, a search string may occur in more than one location and in more than one topic. If the string does appear in more than one location, the user employs the Previous Occurrence and Next Occurrence buttons to view each successive occurrence. As each occurrence is displayed, the string is highlighted and the screen is scrolled so that the first line of the paragraph in which the string appears is at the top of the information display window.
The effect of the previous and next buttons moves across topic boundaries. When the user moves to the last occurrence of a search string in one topic, pressing Next Occurrence moves to the first occurrence of the string in the next topic, if any. Similarly, when located at the first occurrence in a topic, pressing Previous Occurrence moves to the last occurrence in the preceding topic, if any. Pressing Previous Occurrence has no effect when the current occurrence is the first in the first topic. Similarly, pressing Next Occurrence has no effect at the last occurrence in the last topic.
As the cross-topic moves take place, the system changes the highlighting appropriately under the Search tab. That is, the topic highlighted under the Search tab pane is always the topic in which the currently highlighted search occurrence appears in the information pane.
The search string may consist of any typeable characters, including spaces and
punctuation. If the radio button labeled "Case sensitive" is on, then
the search is performed on an exact match basis. That is, an occurrence is
considered a match if it is textually identical to the search string, based on
all characters in the string. If the Case sensitive button is off,
then the search is performed on an exact match basis, except alphabetic
characters are matched independent of case. Off is the initial value for the
the Case sensitive button.
2.10.3.4. Help Presentation Details
As the user selects different tabs in the control pane, the information pane always changes accordingly. Specifically:
When the user switches between tabs in the help control panel, the state of the
control pane is the same as it was when the tab was most recently selected.
Specifically, the most recently selected item (if any) is still highlighted,
and the scrolled position of the display is as it was when the tab was most
recently selected. For example, if the user selects the Search tab in
the context of
Figure 317
and then reselects the Index tab, the resulting display again looks
exactly the same as Figure 317.