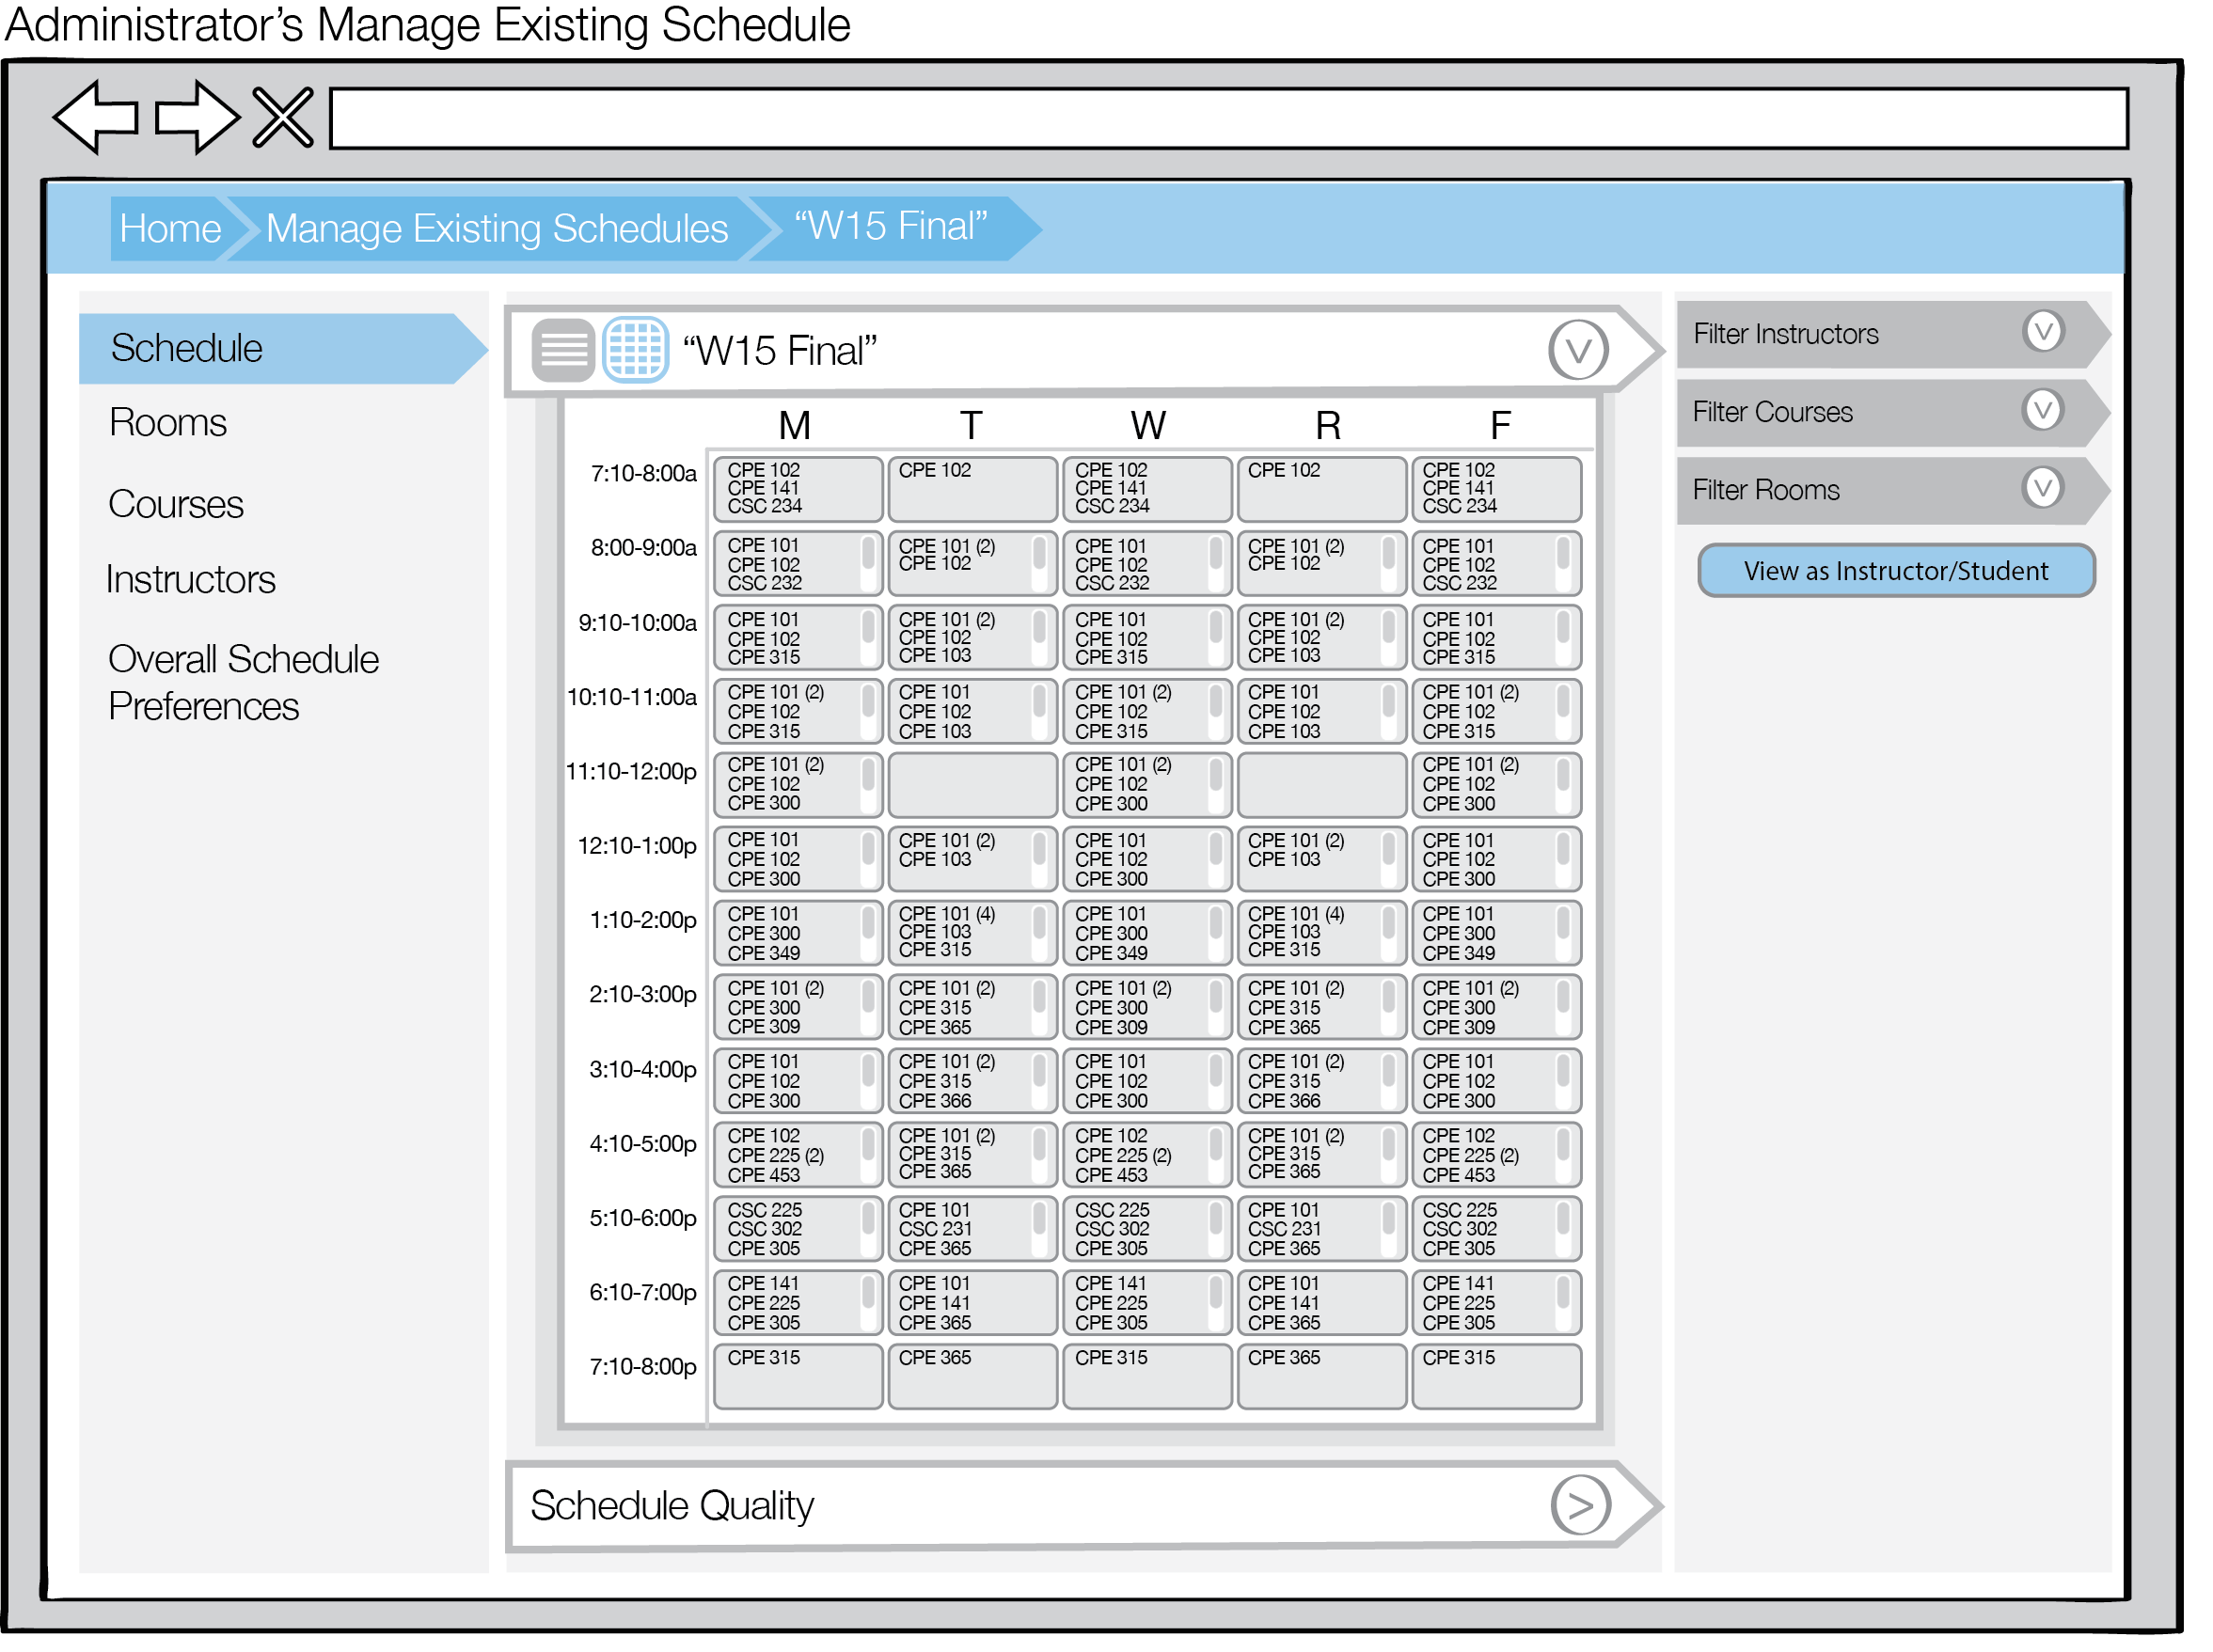
Once a schedule has been generated, the Admin user will be able to tab between two views: the tabular and calendar views. This section focuses on the calendar view and any sorting/ filtrations the Admin user can enable to view the generated schedule in a calendar view.
Figure 1 shows the calendar view of the generated schedule sorted by time. The screen is divided into three sections: resource management, the calendar view, and the databases for further filtering of the calendar view. As mentioned in earlier sections, options on the left pane allow the Admin user to go back to the Rooms, Courses, or Instructors menu at any time. Go to Section 2.3. to learn more about Managing Resources and overall database management.
The middle pane of the screen contains a calendar view all of the classes offered in the given term on any given day and at any time in the week. As shown in Figure 1, the Admin user will be able to see the course offered (course subject and title) if only one course is being during a time period. If there is more than one class being offered at the given time, the Admin user will see the number of courses being offered.
In Figure 1, the name of the schedule is W15 Final.** As noted in all figures in this section, there is a command, View As Instructor/ Student, which allows the Admin User to view the generated schedule as either a Instructor/ Student (without the editing capabilities). This is elaborated more on in section 2.6.1.2. Calendar View - Administrator.
Figure 1: Calendar View of the Generated Schedule
The tools on the right pane of the page give the Admin user the option to choose exactly what to display and filter for the calendar view. There are provided databases on the right pane of the page, displaying all the possible instructors, courses, and rooms available based on the given term. The Admin user can choose to filter the calendar view by selecting in the databases any number of instructors, courses, or rooms. A UI view showing the Instructors database via a drop down menu is in Figure 2.

Figure 2: Calendar View of the Generated Schedule with Drop Down Filter
For example, in Figure 3, the calendar view is filtered by the Room database, specifically only 14-232A (Building 14, Room 232A); only courses taught in this room will be displayed in the calendar view.
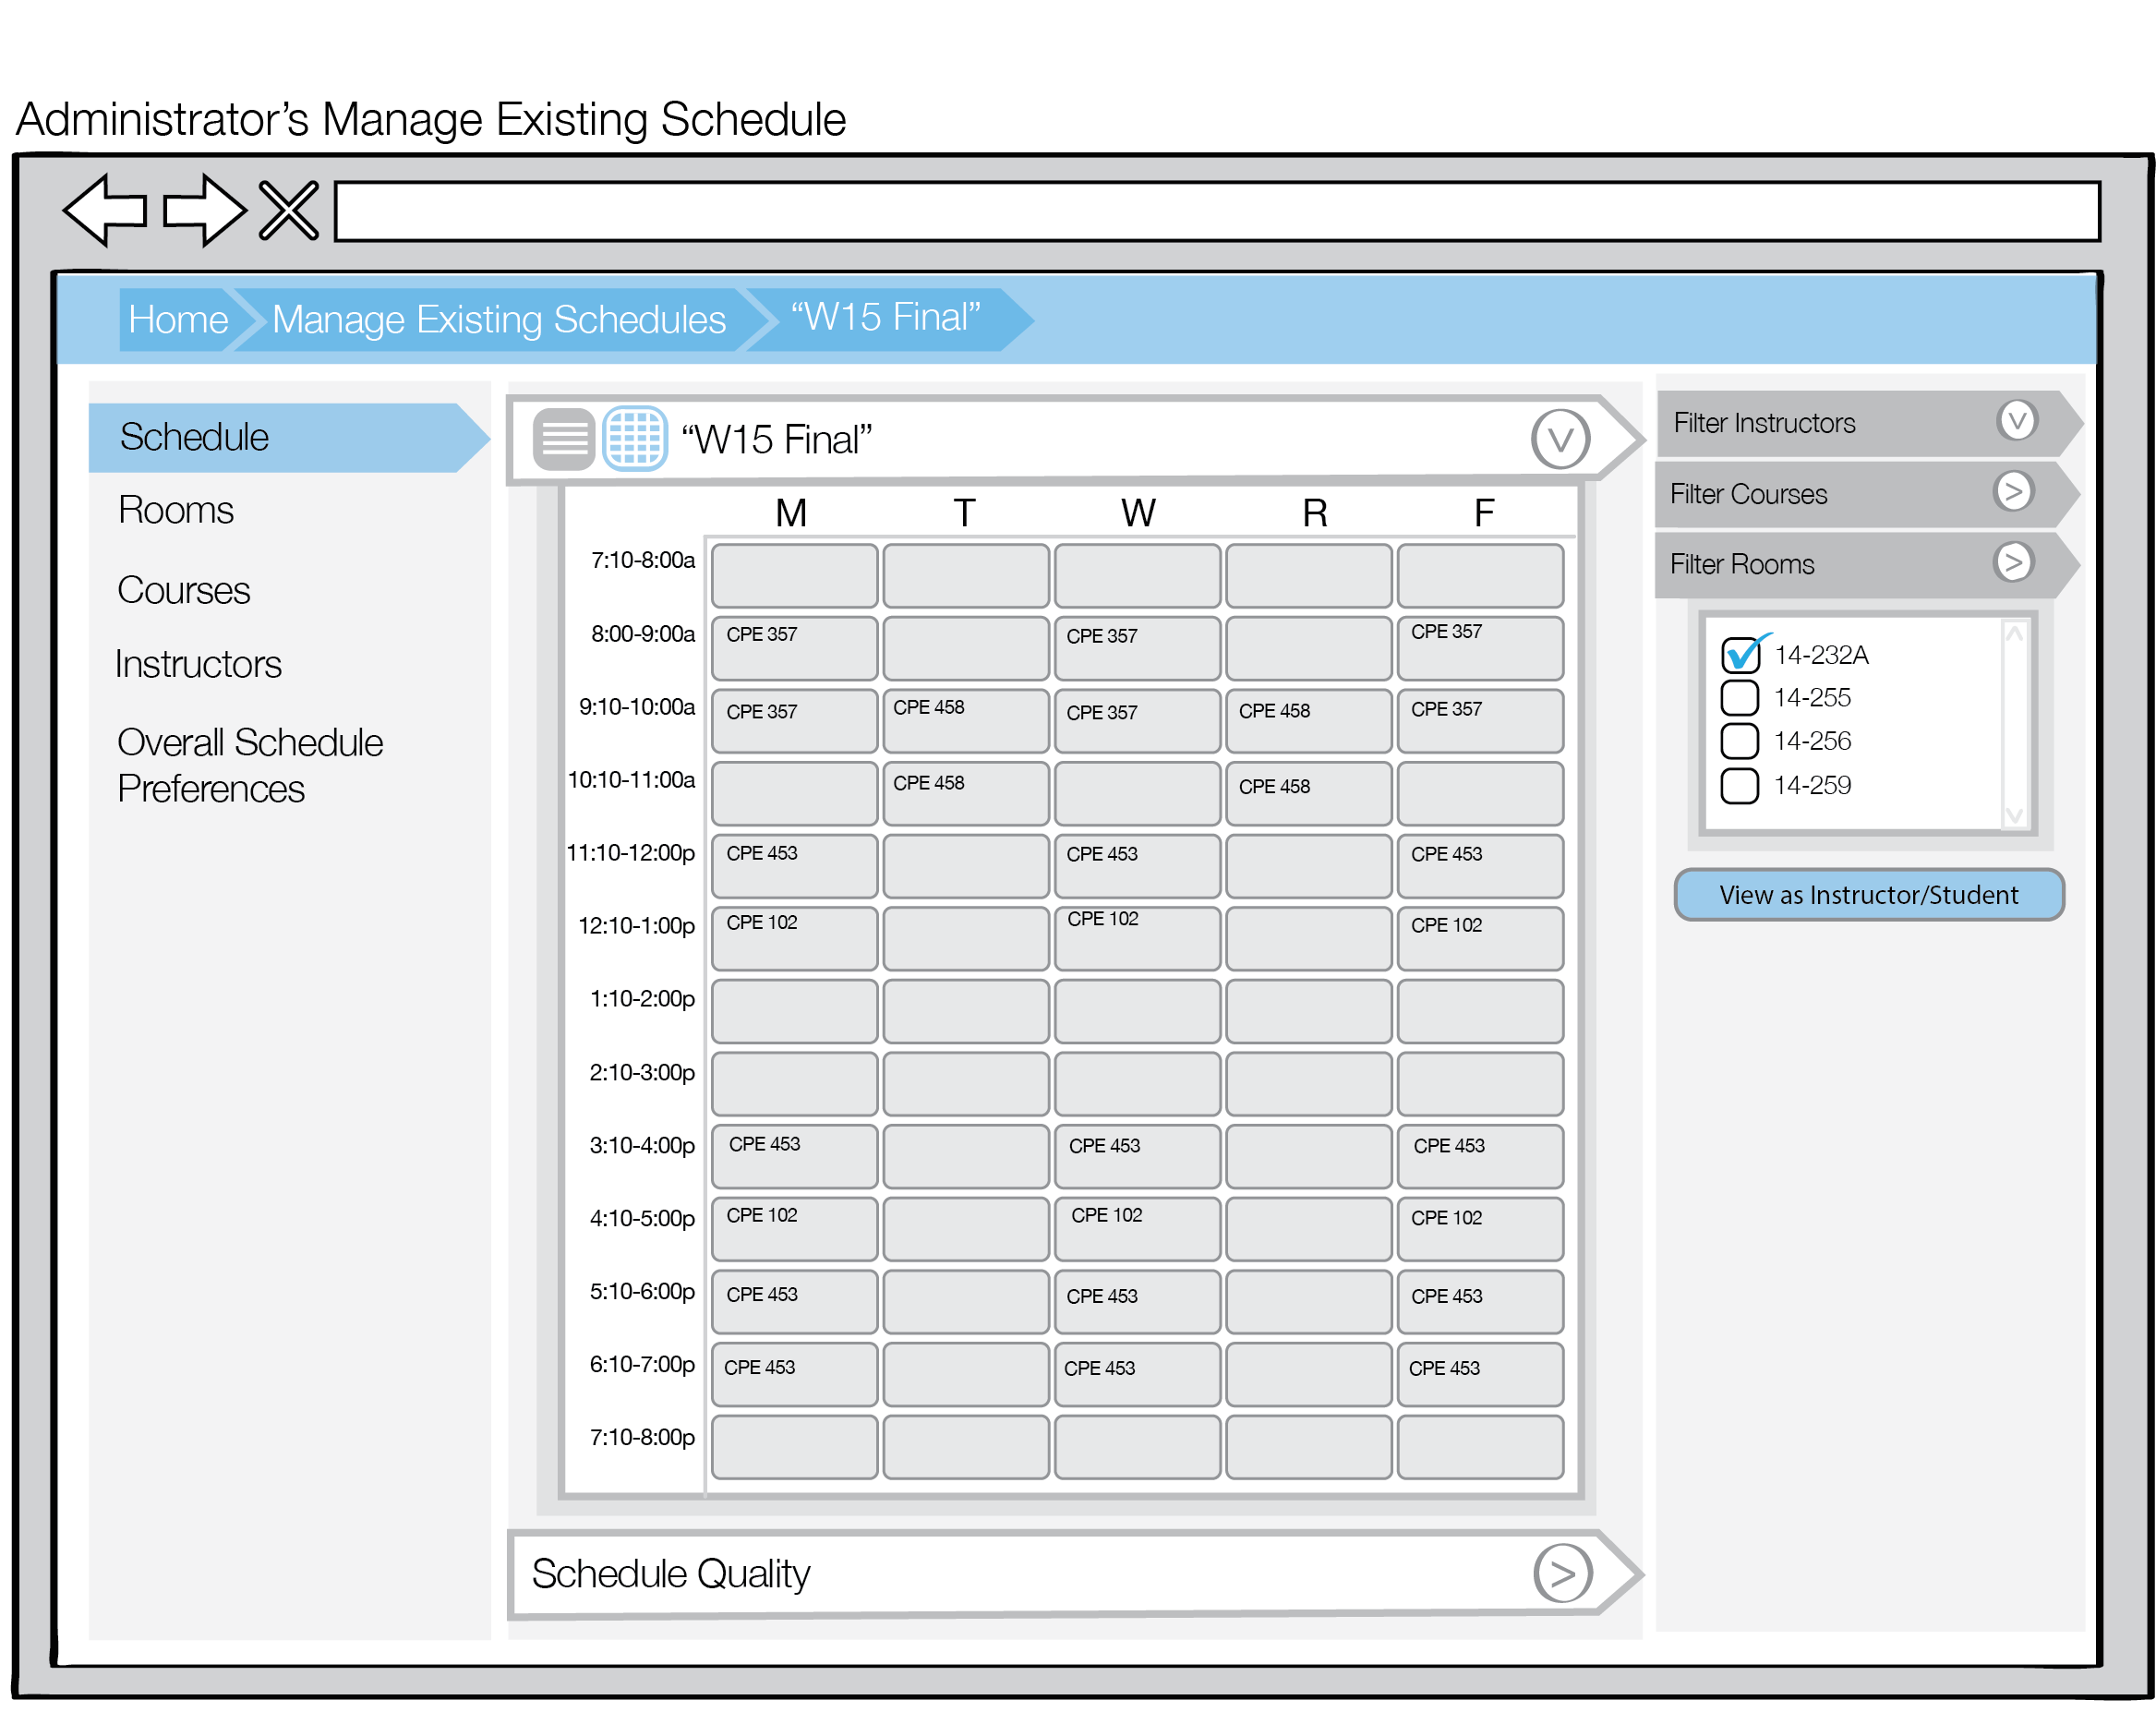
Figure 3: Calendar View Filtered by Room(s)
For example, in Figure 4, the calendar view is filtered by the Course database, specifically the courses CPE 101 and CPE 141; all instances of these courses will be displayed on the calendar view.
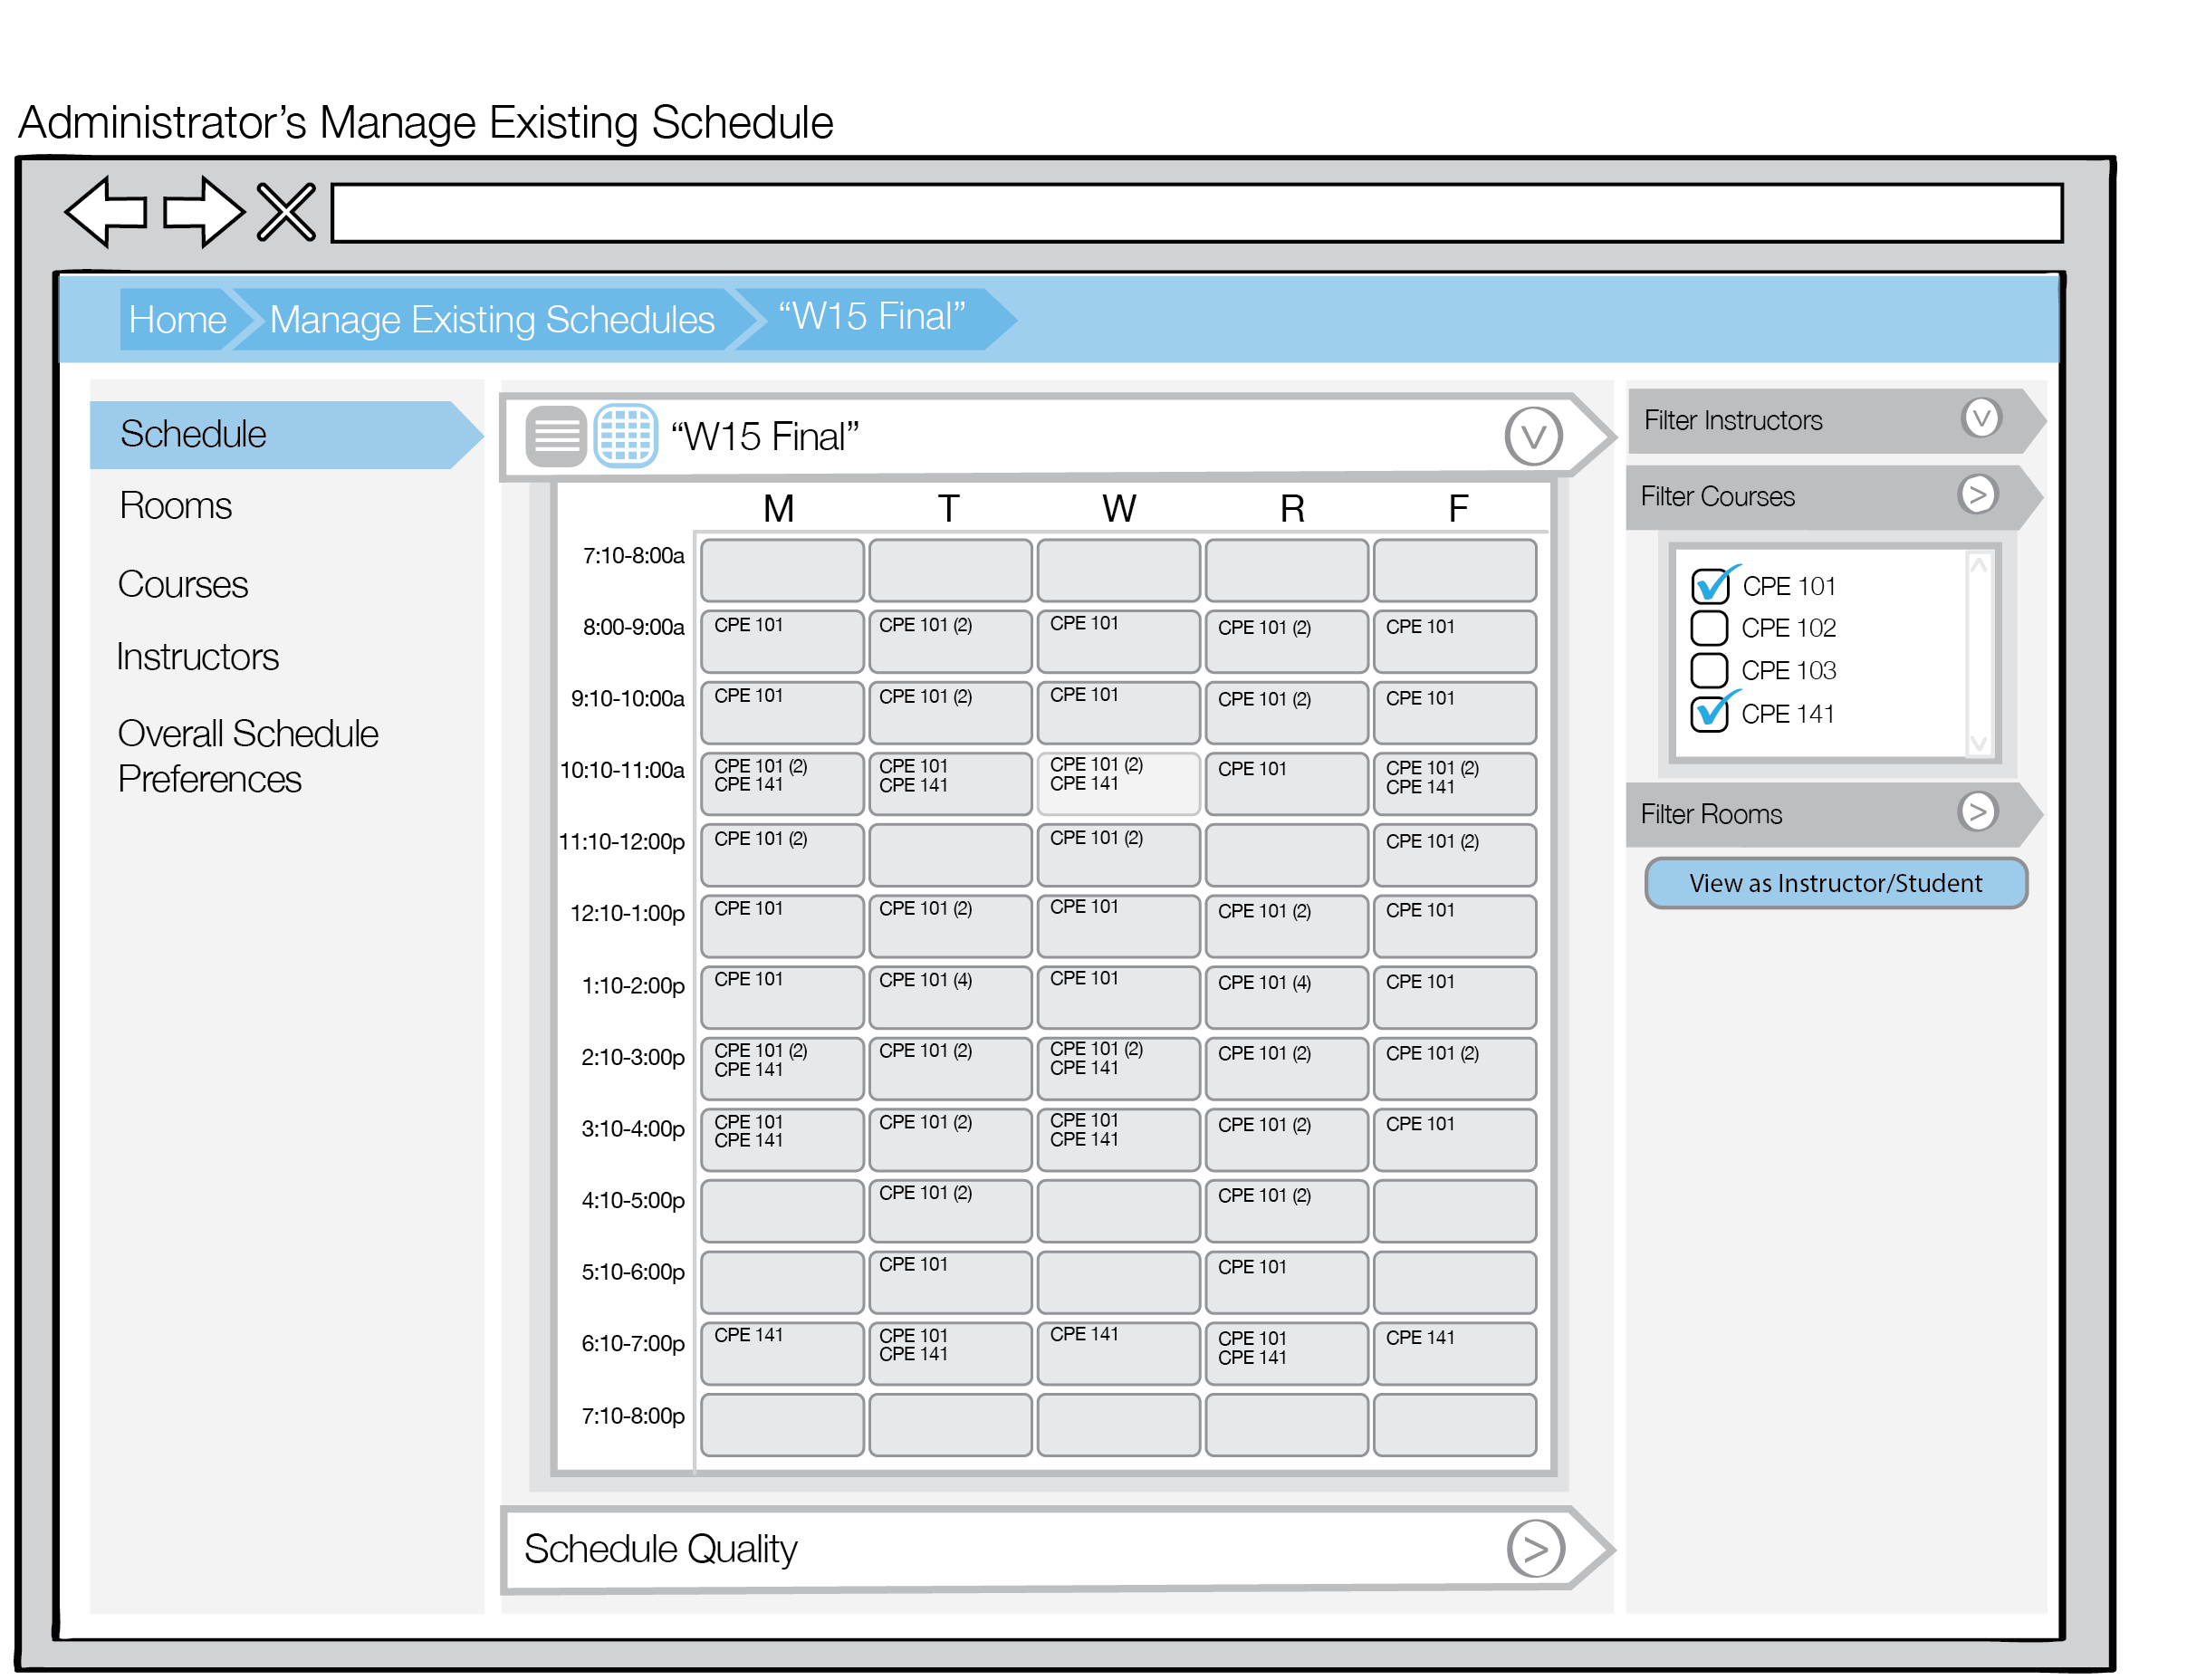
Figure 4: Calendar View Filtered by Course(s)
Similarly, in Figure 5, the calendar view is filtered by the Instructor database, specifically Professors Gene Fisher and Clark Turner; only courses taught by these two instructors will be displayed in the calendar view.
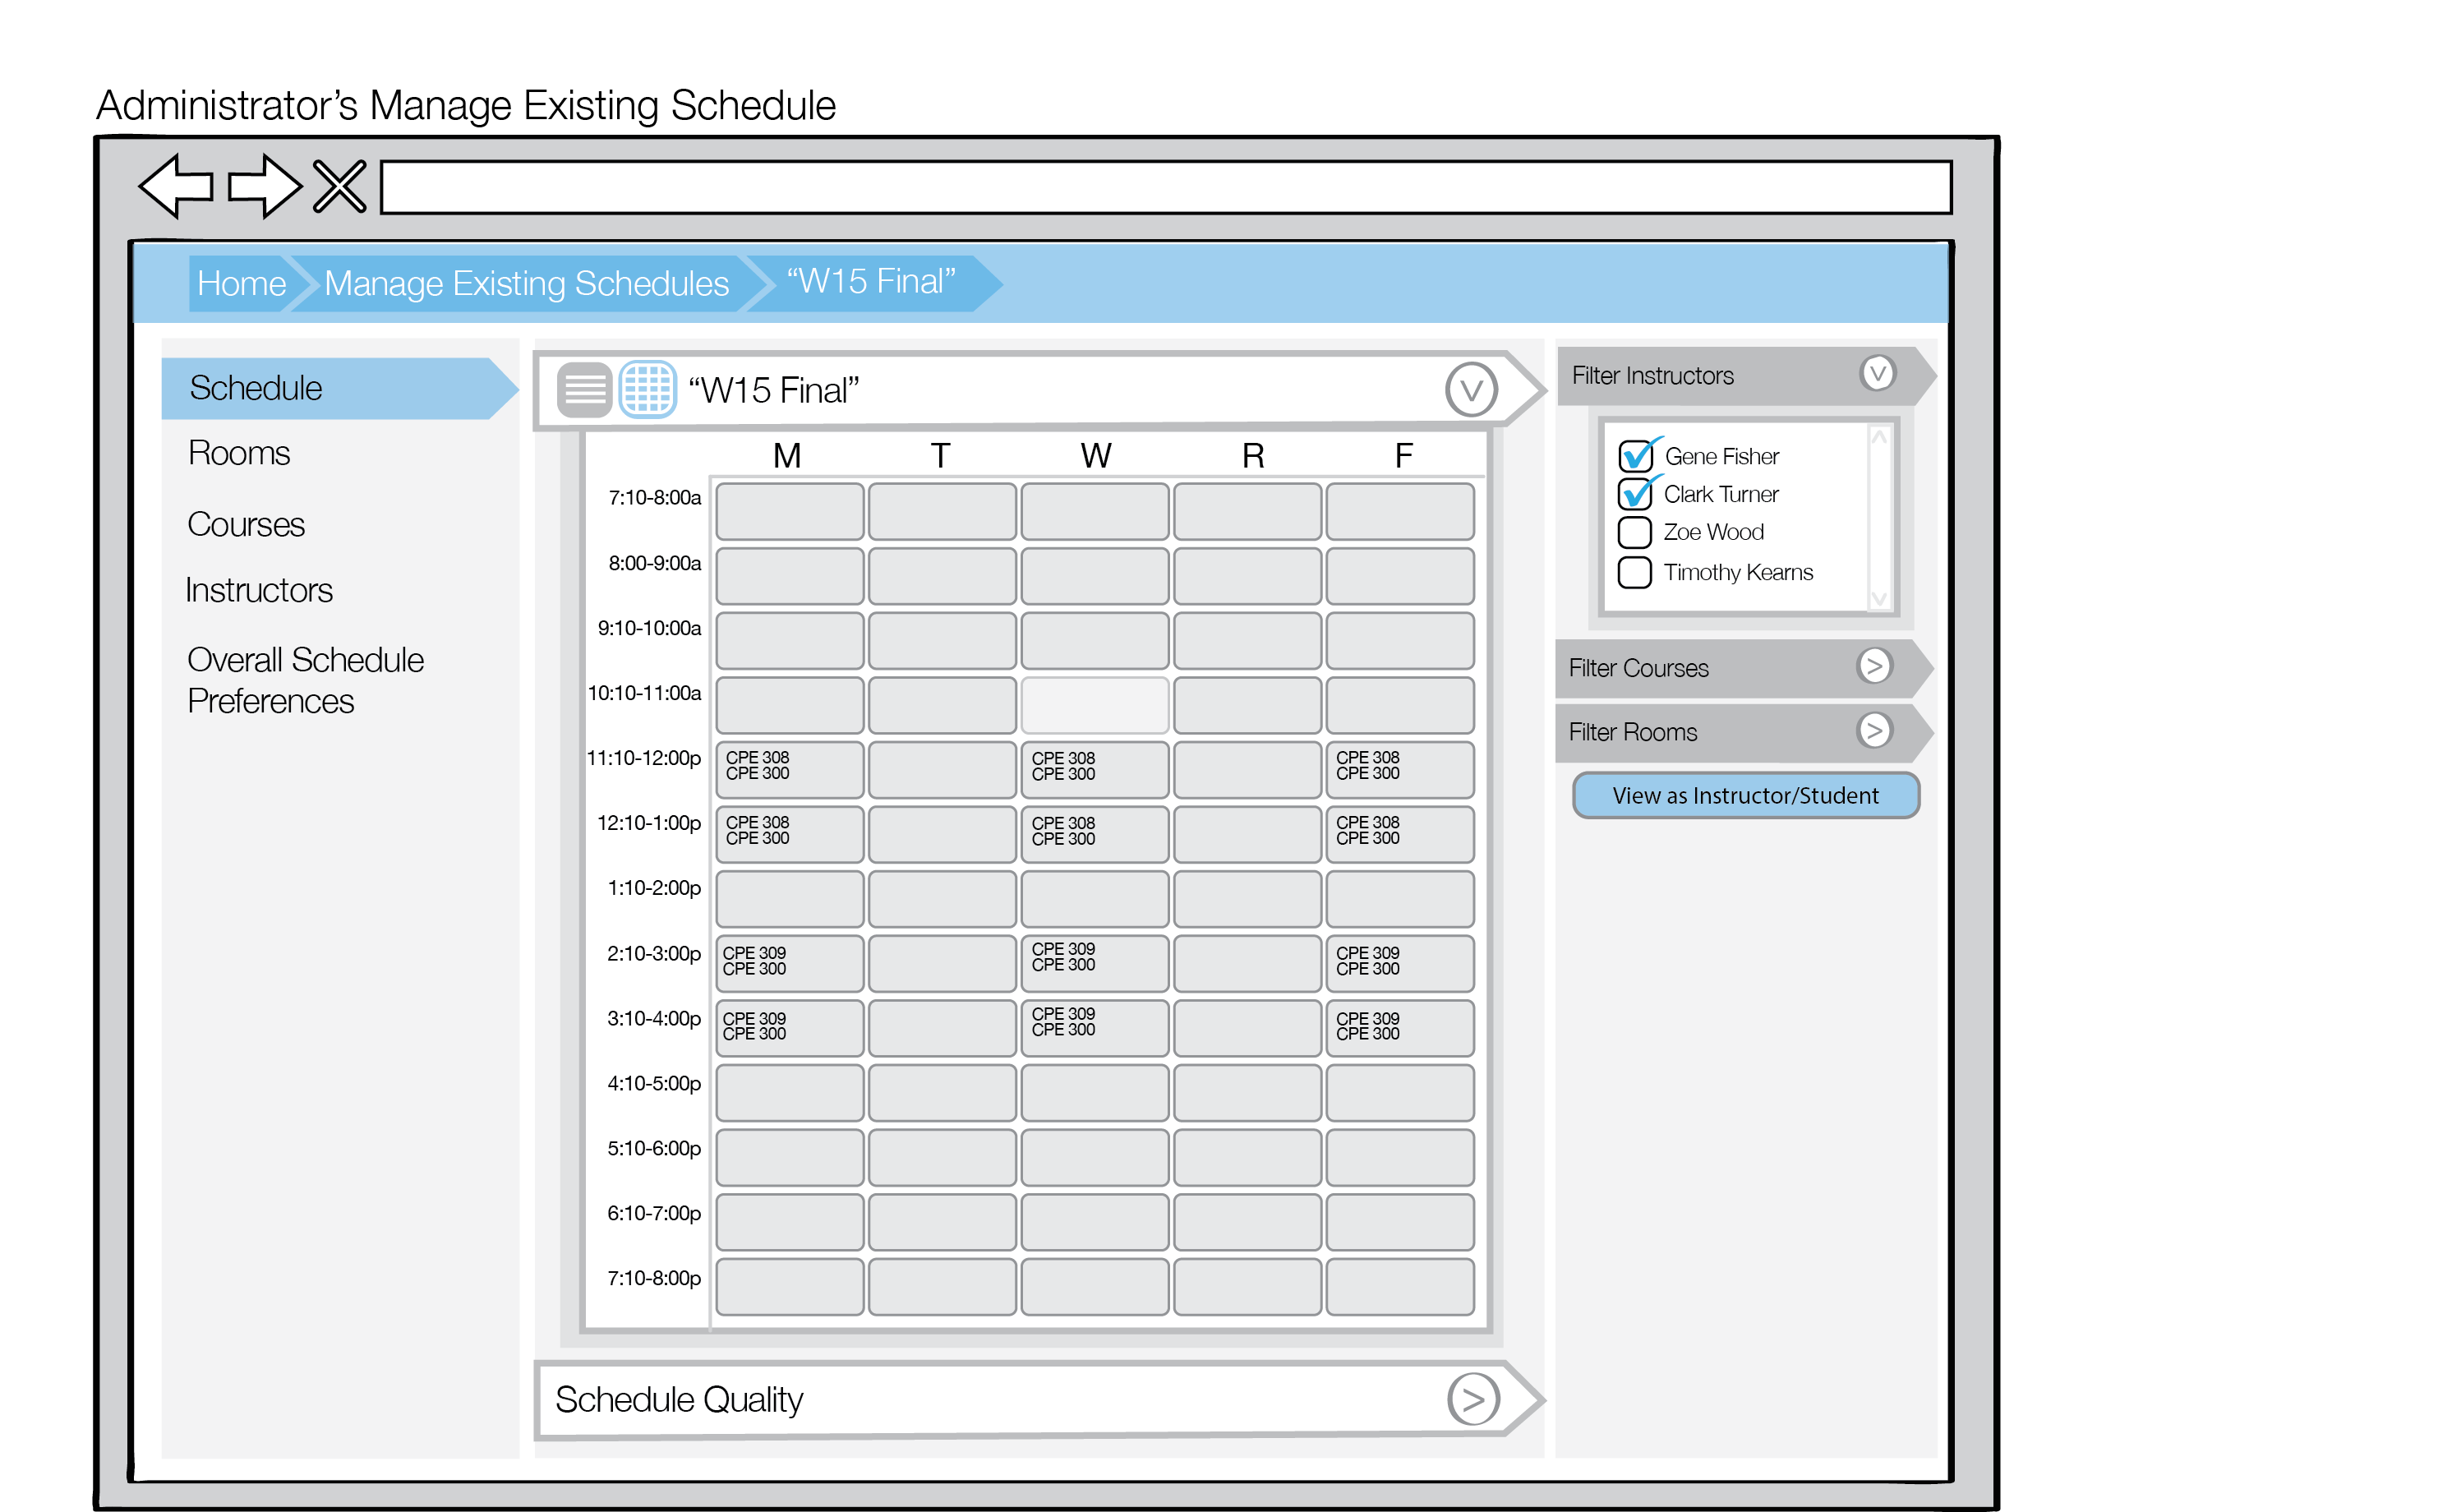
Figure 5: Calendar View Filtered by Professor(s)
If the Admin user wants to expand on one time frame in the calendar view, such as Wednesdays 10:10am - 11:00am, he/ she can click on the button in the Wednesday, 10:10am - 11:00am slot to highlight this time frame, as shown in Figure 6.
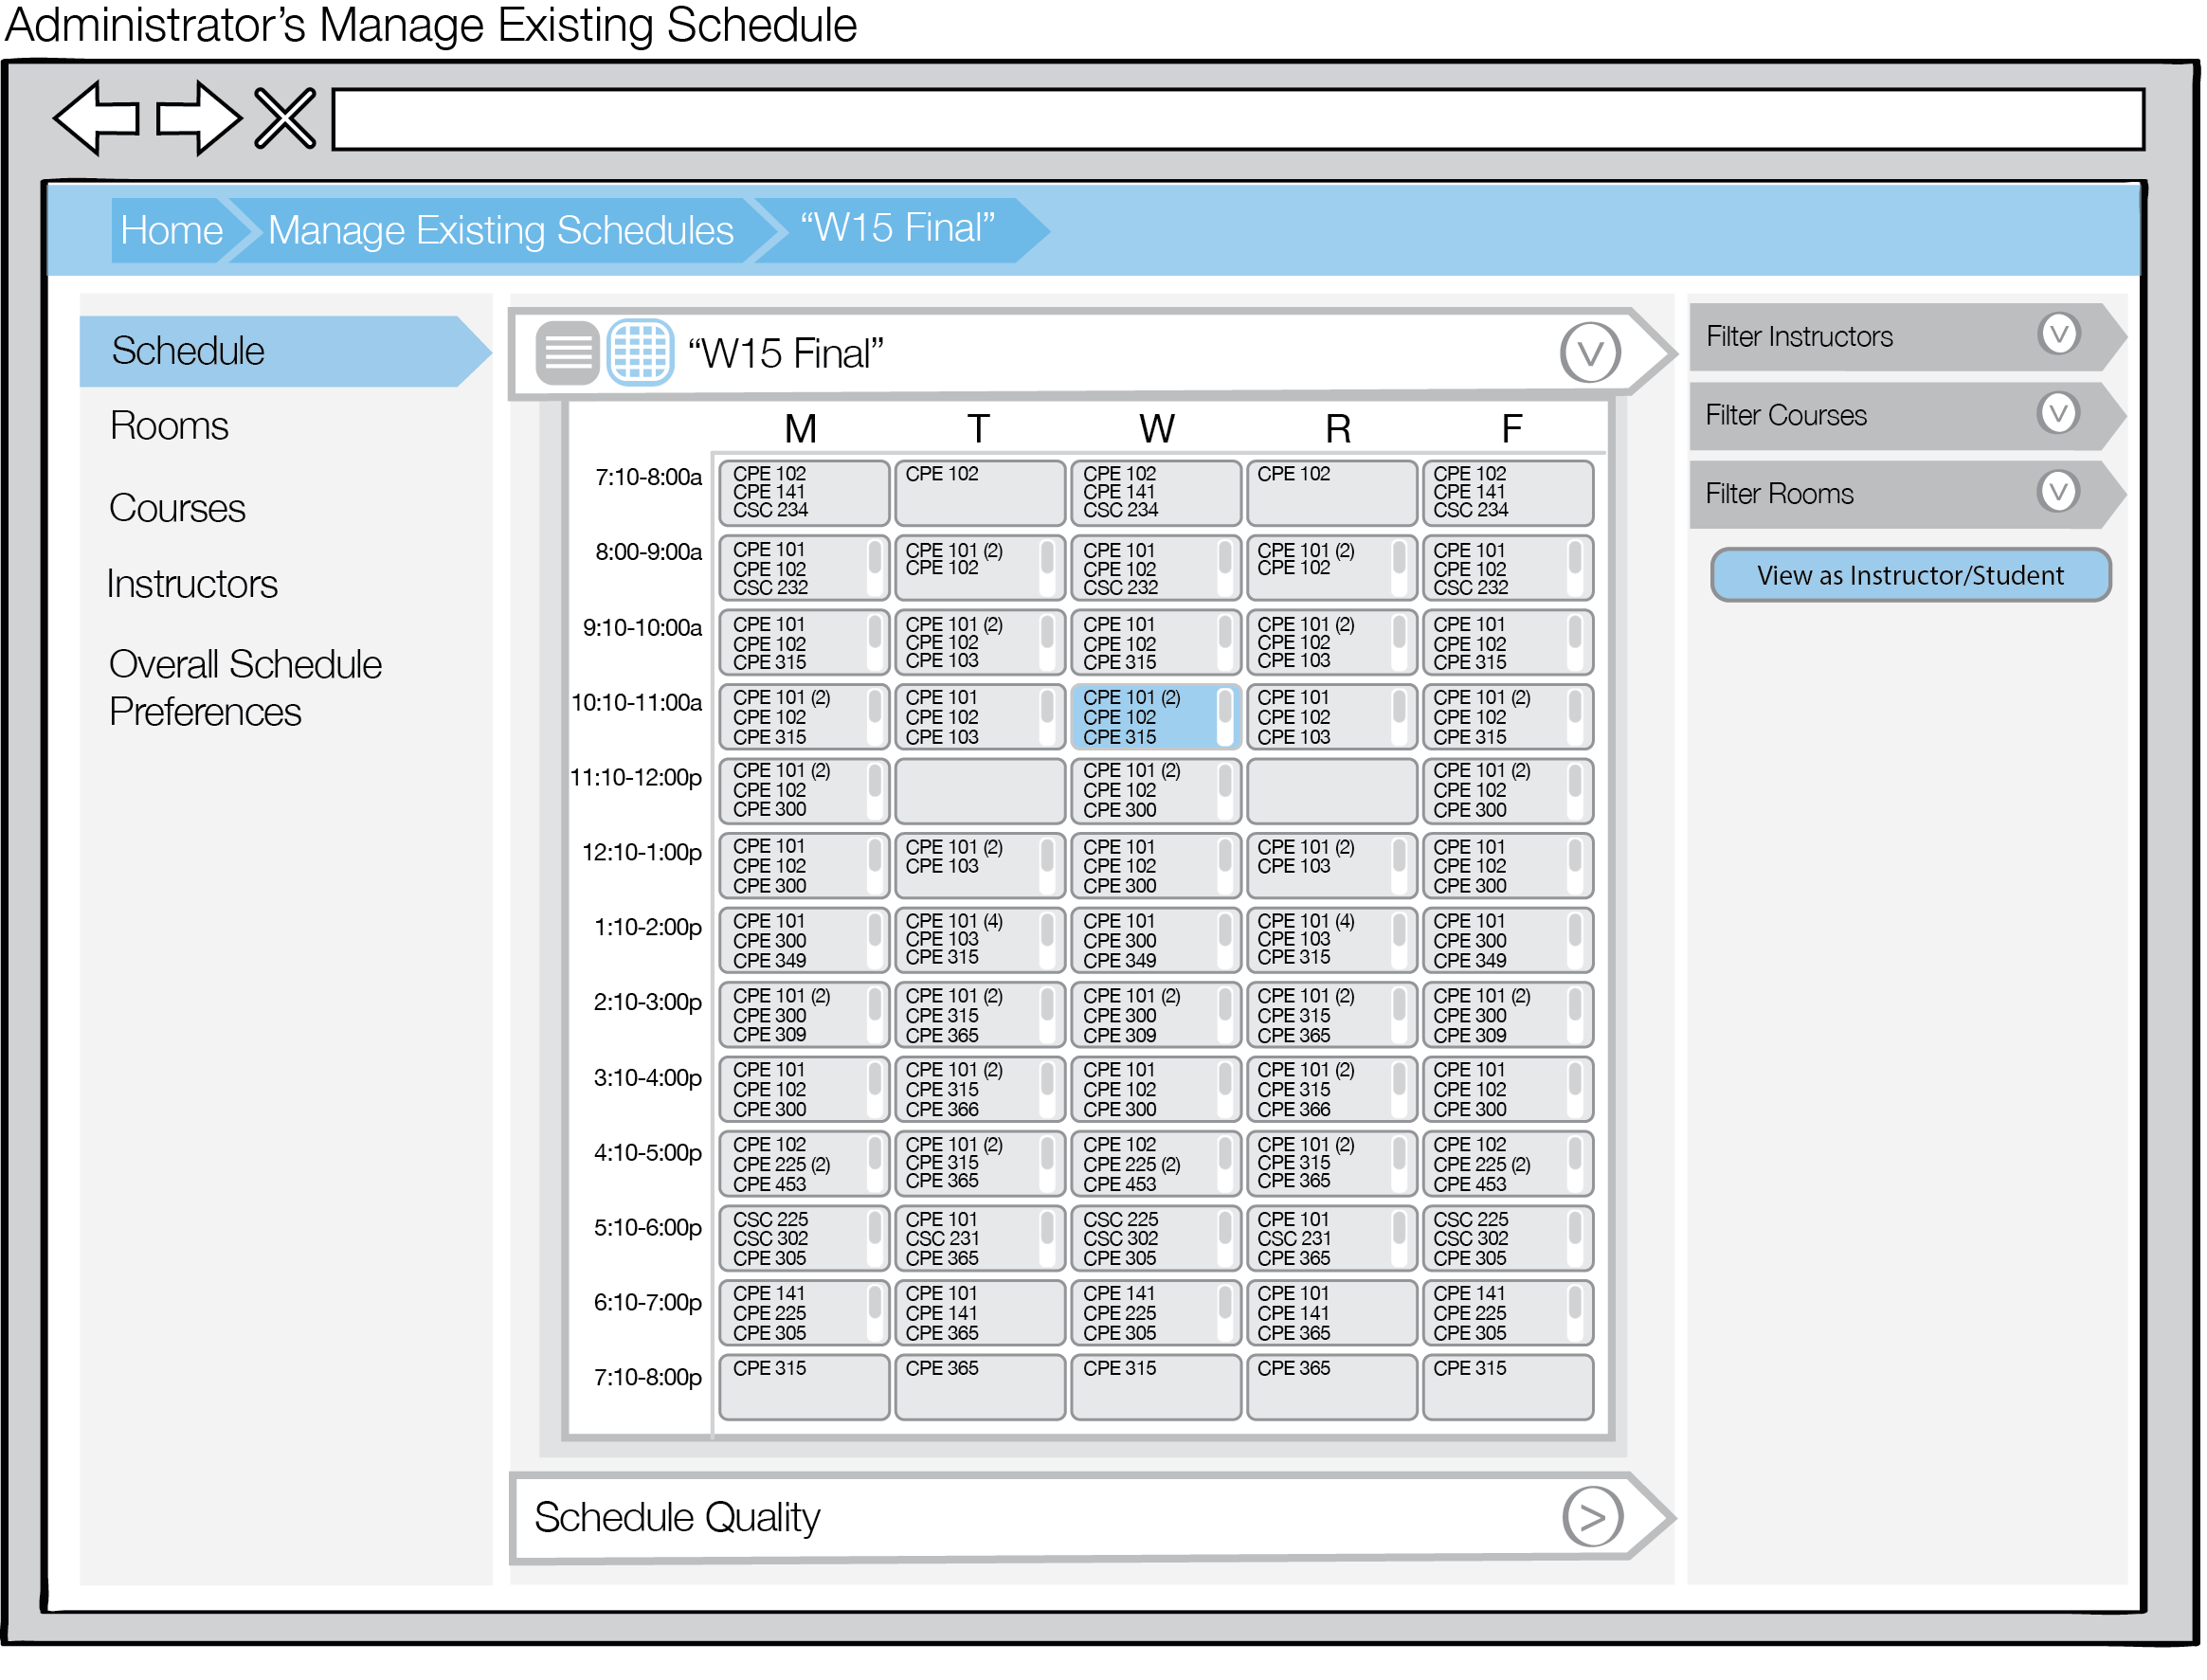
Figure 6: Calendar View of the Generated Schedule with Selected Time Frame
For the course CPE 101, Section 02, the instructor is listed as Keen, Aaron; the days the course is being taught are Mondays, Wednesdays, and Fridays; the course is being taught from 10:10am - 11:00am in Building 14, Room 301. The other courses listed in the pop-up dialogue are CPE 101-04, CPE 102, and CPE 315.

Figure 7: View Course Information
If the Admin User wants to edit specific information about a particular course, he/ she can do so, but must remember to click the Apply button to save/ apply the corrections, or Cancel to cancel the corrections.
In order to view the Calendar view, the Admin user will have click Generate from the "Administrator's Initial Menu" page in order to create a new schedule. The Admin user can tab between a tabular, as described in section 2.5.3. Tabular View - Administrator, or a calendar view, as described above.