Scenarios in this section illustrate functions available to the system administrator. These functions allow an administrator to manage instructors, manage students, release tests, and change default test settings.
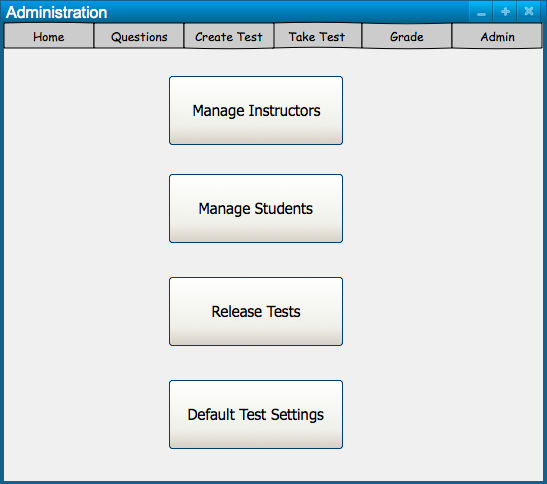
The user clicks on the “Admin” button at the Home Screen, the main Admin screen is brought up. This initial screen shows the main functions of the Admin section, as shown in Figure 1. When the user clicks the “Admin” button at the top right of the screen, they are returned to this Admin main screen.
Figure 1: Admin Main Page
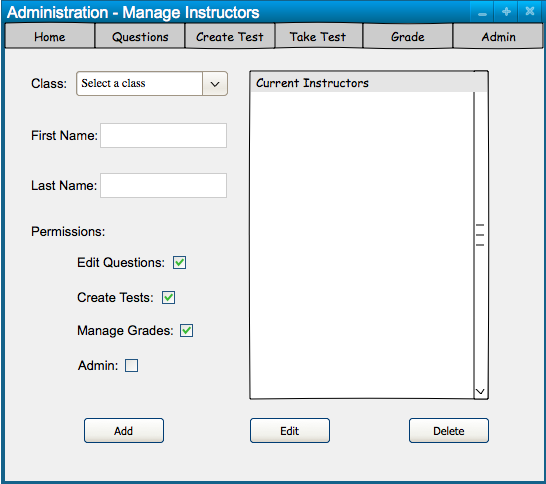
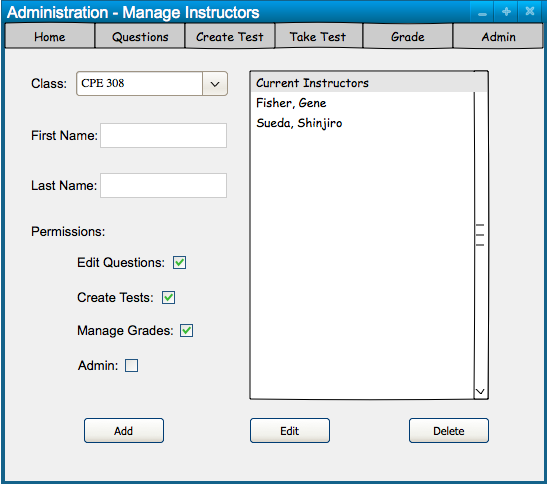
The user presses the “Manage Instructors” button and is redirected to the screen shown in Figure 2. While on the “Manage Instructors” screen, the user is able to add new instructors, edit current instructors, or delete current instructors.
Figure 2: Manage Instructors
The Edit Questions permission allows the instructor to add, edit, and delete questions in the question bank. The Create Tests permission allows the instructor to generate tests for classes. The Manage Grades permission allows the instructor to edit students’ grades for that class. The Admin permission allows the instructor to access the Admin screen, and manage instructors and students for that class. The instructor can also release tests and change default test settings.
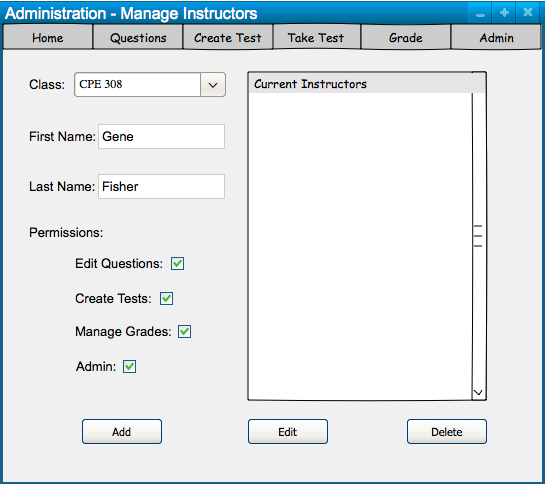
The user fills in the required information needed for a new instructor, which results in a screen that looks like Figure 3. A class is selected, the first and last names are filled in, and permissions are checked for the privileges that the added instructor has. In this case, Gene Fisher is trusted with all permissions and has full access to all functions of the Test Tool.
Figure 3: Add Instructor, Fisher Gene
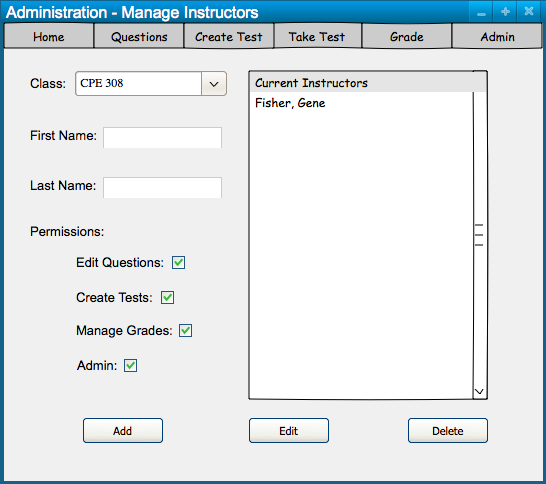
The user then clicks “Add” when they are done providing the information and a new instructor is created and added to the instructor database. The instructor’s name is then shown on the right side, under “Current Instructors”, as shown in Figure 4.
Figure 4: Instructor, Fisher Gene, Added
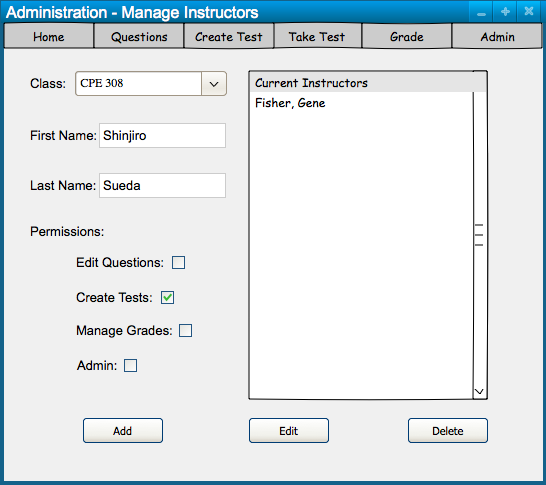
The user adds another instructor by filling in the information boxes again with the instructor’s first and last names, as well as the permissions. In this case, the user does not trust the instructor, Shinjiro Sueda, and only wants Shinjiro Sueda to be able to create tests. At least one permission must be checked for an instructor to be added. The permission will not uncheck if it is the only one checked. This instructor is shown in Figure 5.
Figure 5: Add Another Instructor
The user is satisfied with the filled in information and presses the “Add” button. Shinjiro Sueda is added to the list of instructors for the CPE 308 class and displayed under “Current Instructors”, as shown in Figure 6.
Figure 6: Second Instructor Added
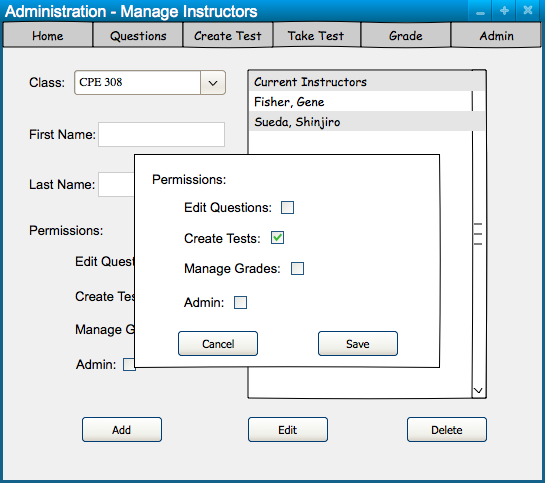
The user edits Shinjiro Sueda’s permissions by selecting his name under the Current Instructors and clicks the “Edit” button. This brings up a pop-up box where the user selects Shinjiro Sueda’s new permissions, as shown in Figure 7. The user clicks “Save” to save the selected permissions, or “Cancel” to discard all changes and keep the previous permissions for that instructor.
Figure 7: Edit Instructor, Shinjiro Sueda
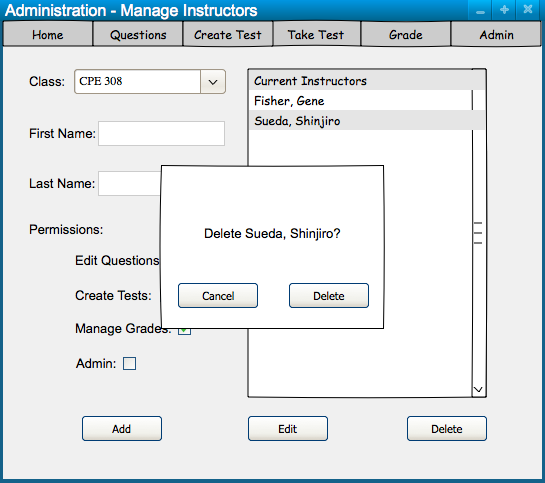
The user deletes an instructor by selecting the instructor’s name in under the Current Instructors and clicking the “Delete” button. This brings up a pop-up box where the user either confirms the deletion of the instructor, or cancels the delete action. This screen is shown in Figure 8.
Figure 8: Delete Instructor, Shinjiro Sueda
The user clicks “Delete” again to confirm the deletion, and Shinjiro Sueda is deleted from the list of Current Instructors for CPE 308, as shown in Figure 9.
Figure 9: Instructor, Shinjiro Sueda, Deleted
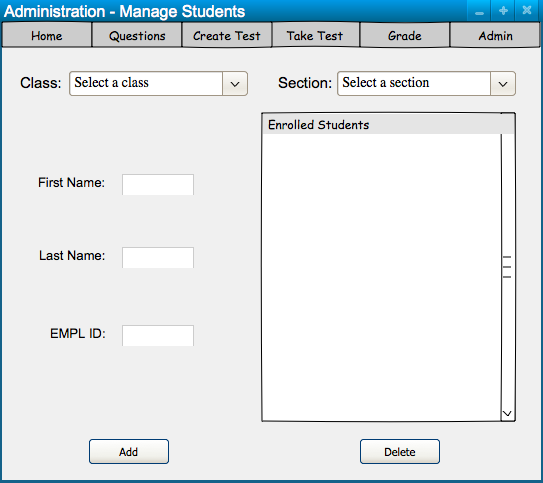
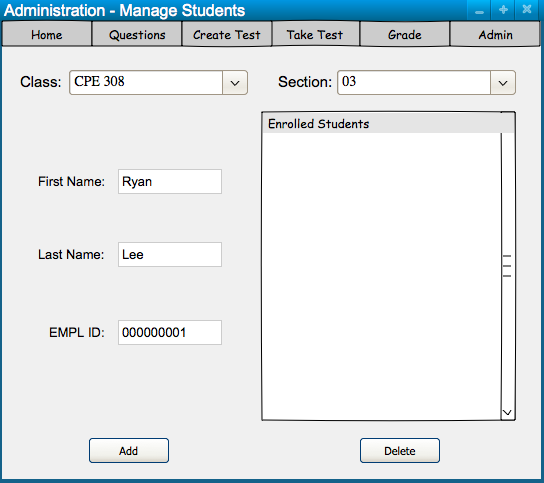
The user presses the “Manage Students” button on the Admin main screen in Figure 1 and is redirected to the screen shown in Figure 10. While on the “Manage Students” screen, the user is able to go through available classes and sections to view a list of currently enrolled students. After filling in all of the information (first name, last name, EMPL ID), the user presses “Add” to add the student to the list of enrolled students. The user is also able to delete students from the roster by clicking on the student’s name and clicking “Delete”.
Figure 10: Manage Students
The user fills in the required information to add a new student, which results in a screen that looks like Figure 11. In this case, Ryan Lee is being added to the CPE 308 class, section 03.
Figure 11: Add Student, Ryan Lee
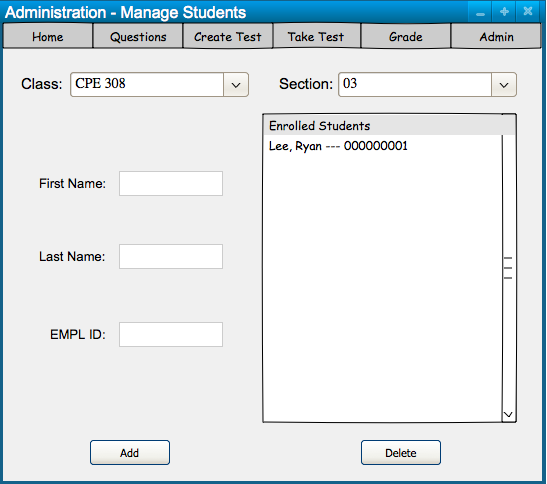
The user clicks “Add” after filling in all the information and the created student is added to the student database. The student’s name is then shown on the right side, under “Enrolled Students”, as shown in Figure 12.
Figure 12: Student, Ryan Lee, Added
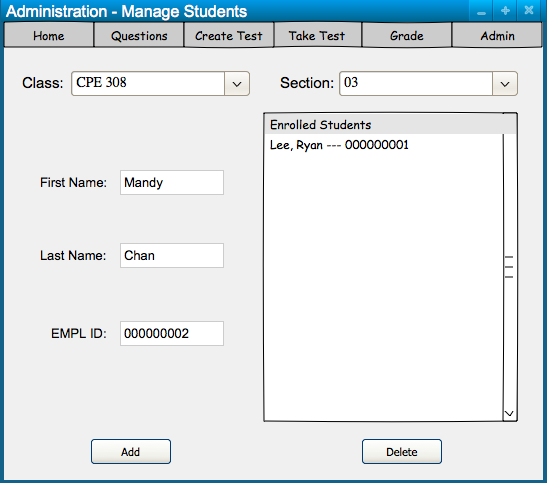
The user adds another student by filling in the information again, as shown in Figure 13.
Figure 13: Add Student, Mandy Chan
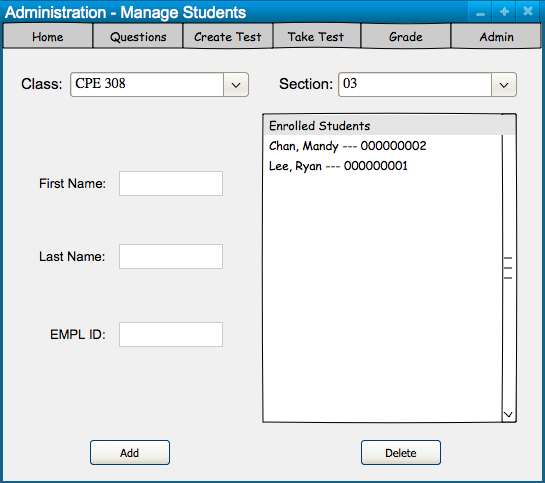
The user is satisfied with the inputted information and clicks the “Add” button to add the student to the student database. The student is then shown under Enrolled Students. Students are sorted in alphabetical order, so even though Mandy Chan was added after Ryan Lee, Mandy Chan appears above Ryan Lee because Chan is before Lee alphabetically. This is shown in Figure 14.
Figure 14: Student, Mandy Chan, Added
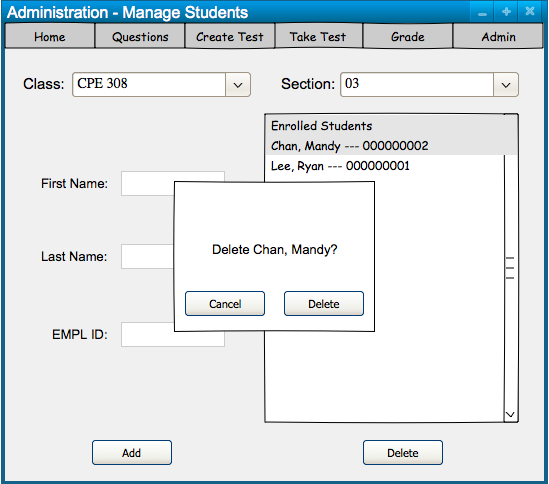
The user deletes students from the class list by selecting the student’s name under Enrolled Students and clicking “Delete”. In this case, the user wants to delete Mandy Chan, as shown in Figure 15.
Figure 15: Delete Student, Mandy Chan
The user has the option to either click “Cancel” to cancel their delete action, or click “Delete” to confirm the deletion of the student. The user clicks “Delete” and Mandy Chan is deleted from the student database for CPE 308, Section 03. The student’s name is then removed from the list of Enrolled Students, as shown in Figure 16.
Figure 16: Student, Mandy Chan, Deleted
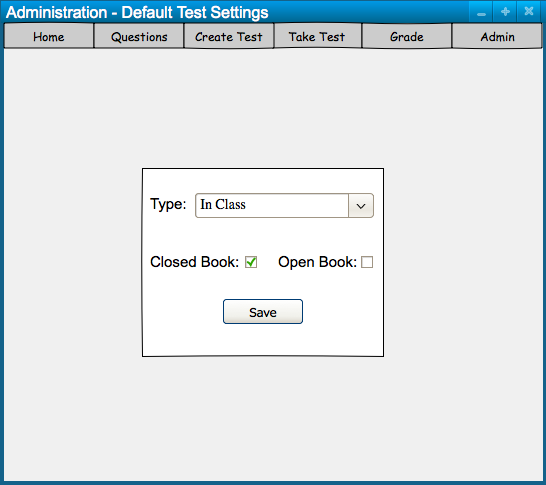
The user presses the “Default Test Settings” button on the Admin main screen in Figure 1 and is redirected to the screen shown in Figure 17. On the “Default Test Settings” screen, the user is able to change the default settings that are used for newly created tests. The user either changes the default settings on this screen, or changes the settings of an individual test when they create it in the “Create Test” section. The user clicks on “Save” to save the changes that they have made.
Figure 17: Default Test Settings
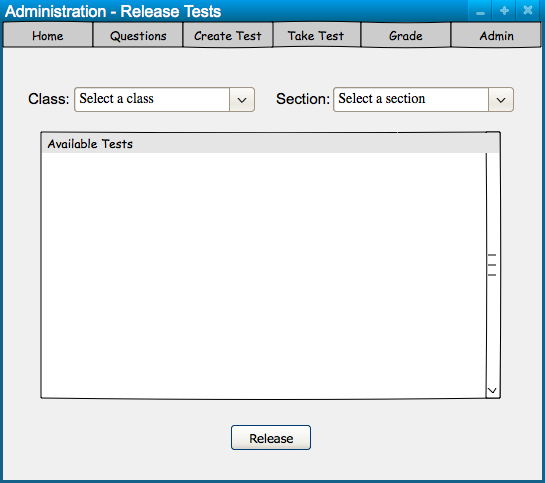
The user presses the “Release Tests” button on the Admin main screen in Figure 1 and is redirected to the screen shown in Figure 18. On the “Release Tests” screen, the user is able to go through available classes and sections to view a list of the currently available tests. The user releases tests to the class by clicking on a test and then pressing the “Release” button.
Figure 18: Release Tests - No Class Selected
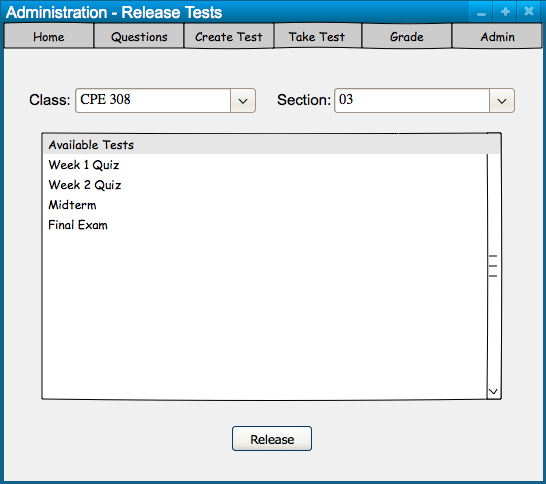
The user selects a class and section from the class database. No sections are displayed until a class is selected. Once a class and a section are both selected, the list of created tests for that class is displayed under Available Tests, as shown in Figure 19.
Figure 19: Release Tests - CPE 308 Class, Section 03
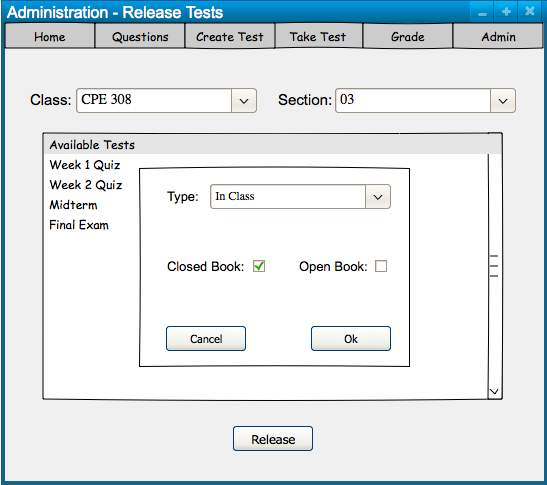
The user selects a test and clicks on the “Release” button. A popup window with the default settings from Figure 17 are brought to the front, as shown in Figure 20. The popup allows the instructor to confirm the settings and make changes if desired before clicking “Ok” and releasing the test. The instructor is able to click “Cancel” to cancel the release action and close the popup window.
Figure 20: Release In Class Test
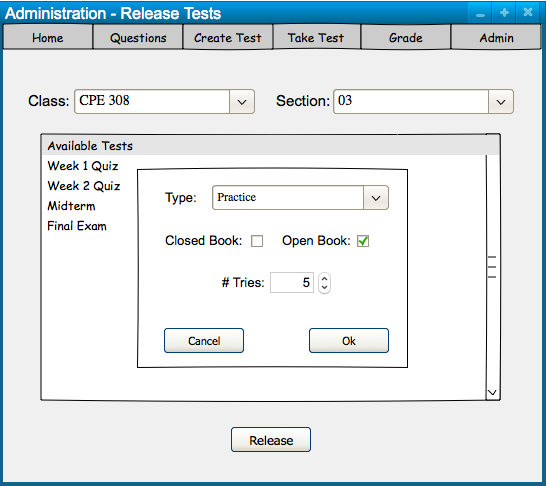
The instructor is able to change the in-class test to either closed book or open book. This allows or prevents students from opening other applications while they are taking the test. The instructor also is able to change the type of test by clicking the drop-down box. Changing the test type to “Practice” brings the instructor to the screen shown in Figure 21.
Figure 21: Release Practice Test
The instructor is able to change the practice test to either closed book or open book. This allows or prevents students from opening other applications while they are taking the test. The instructor has full control over the number of times a student can take the test. The instructor also is able to change the type of test by clicking the drop-down box. Changing the test type to “Take Home” brings the instructor to the screen shown in Figure 22.
Figure 22: Release Take Home Test
Changing the “Start” and “End” times controls when the test becomes available to students and when the test closes. The instructor changes the take-home test to either closed book or open book. This allows or prevents students from opening other applications while they are taking the test. The instructor has full control over the number of times a student can take the test. The instructor also is able to change the type of test by clicking the drop-down box.