This page demonstrates the user interface when the instructor chooses to create tests. One of the main features of this software is the ability to automatically generate tests. This guide explain the features associated with this tool.
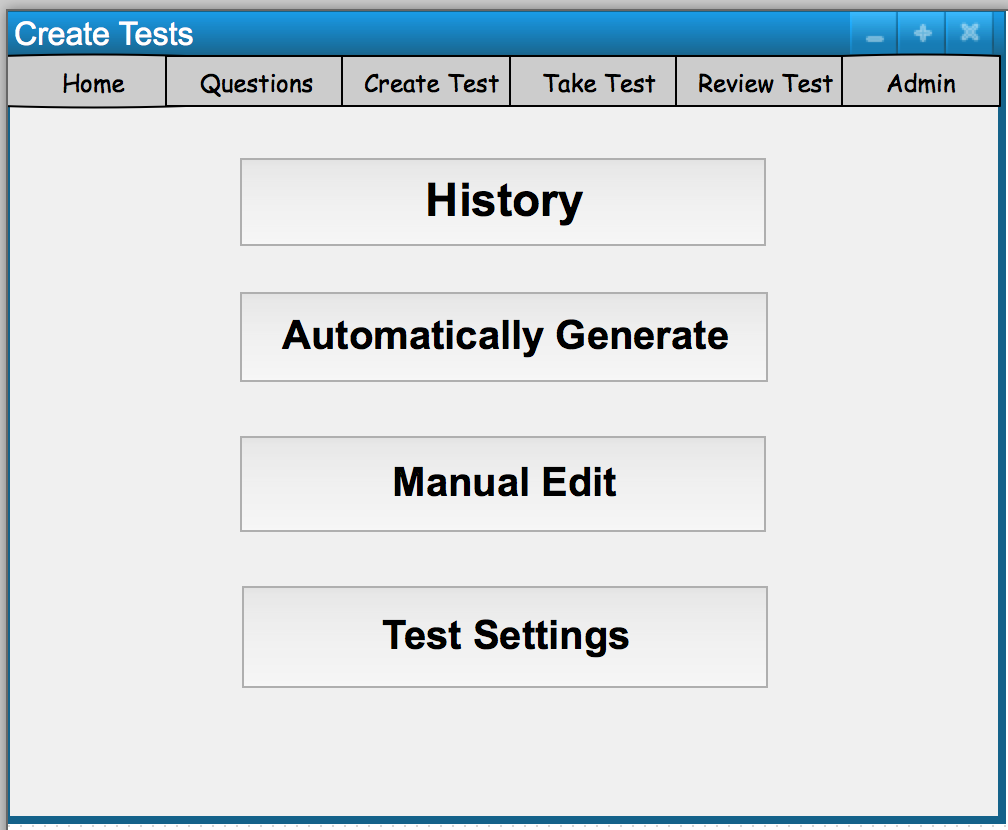
After clicking the “Create Test” button on the main menu, this GUI should pop-up as shown in Figure 1.
Figure 1
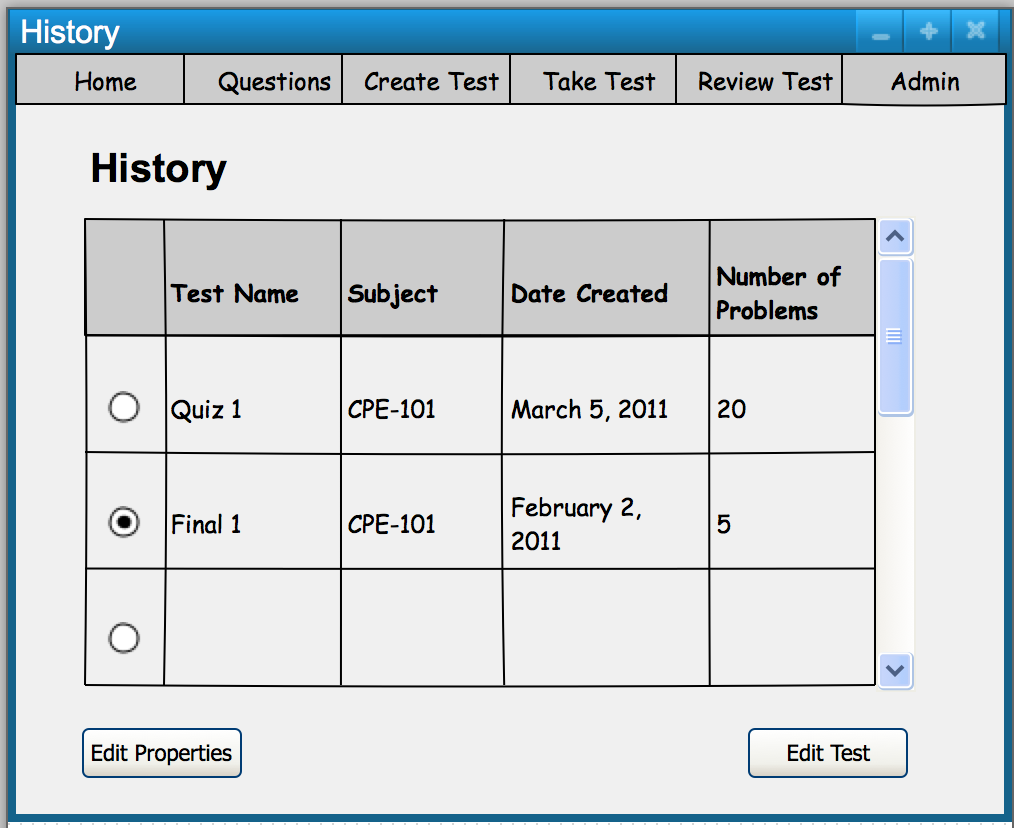
Clicking the “History” button on the “Create Test” homepage take you to Figure 2.
Figure 2
This user interface lists the history of the tests that the instructor created. Clicking “Edit Properties” edits the properties of the test (Ex. Test Name, Subject, etc). Clicking “Edit Test” edits the test contents, specifically the test questions by taking you to the “Manual Edit” portion of the test.
“Automatically Generate” allows the instructor to automatically generate a test. This button generates a test with the criterias in “Test Setting”. The generated test is stored in a database. The test can then be reviewed by clicking the “History” button.
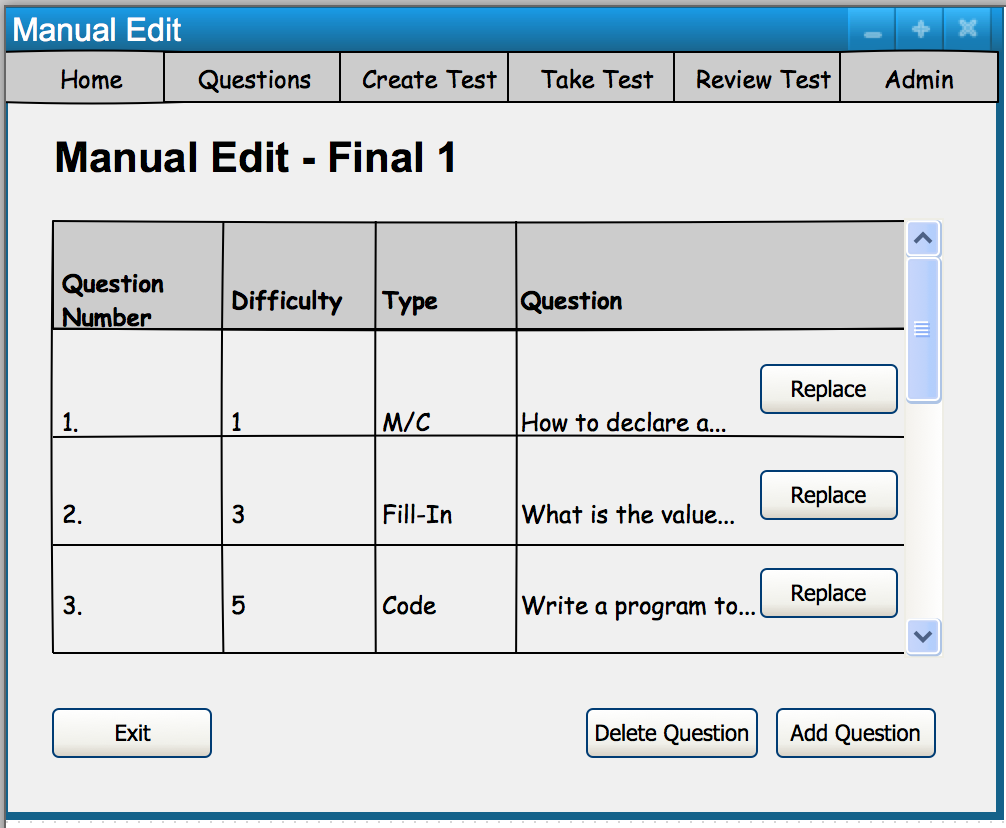
This button allows for instructors to make manual edits to a test or create a test from scratch. Shown in Figure 3, it demonstrates the various features that the instructor can do to make edit the tests.
Figure 3
“Manual Edit - X” lists the test name. The interface displays the question number of the test and the information associated with the question. Once the instructor clicks the “Manual Edit” button, a small window should pop-up asking if the instructor wishes to create a new test or use an existing one. If the instructor wishes to create a new test, the software takes the instructor directly to the “Manual Edit” page. If the instructor chooses to use an existing test, the software navigates to the “History” page.
If the instructor clicks “Add Question”, the software navigates to the “Question” tab and allow for the instructor to select questions out of the database. Otherwise, the instructor can directly type into the box to manually add/edit questions. The instructor then can exit out of this screen. Test Tool software then asks to save if changes were made.
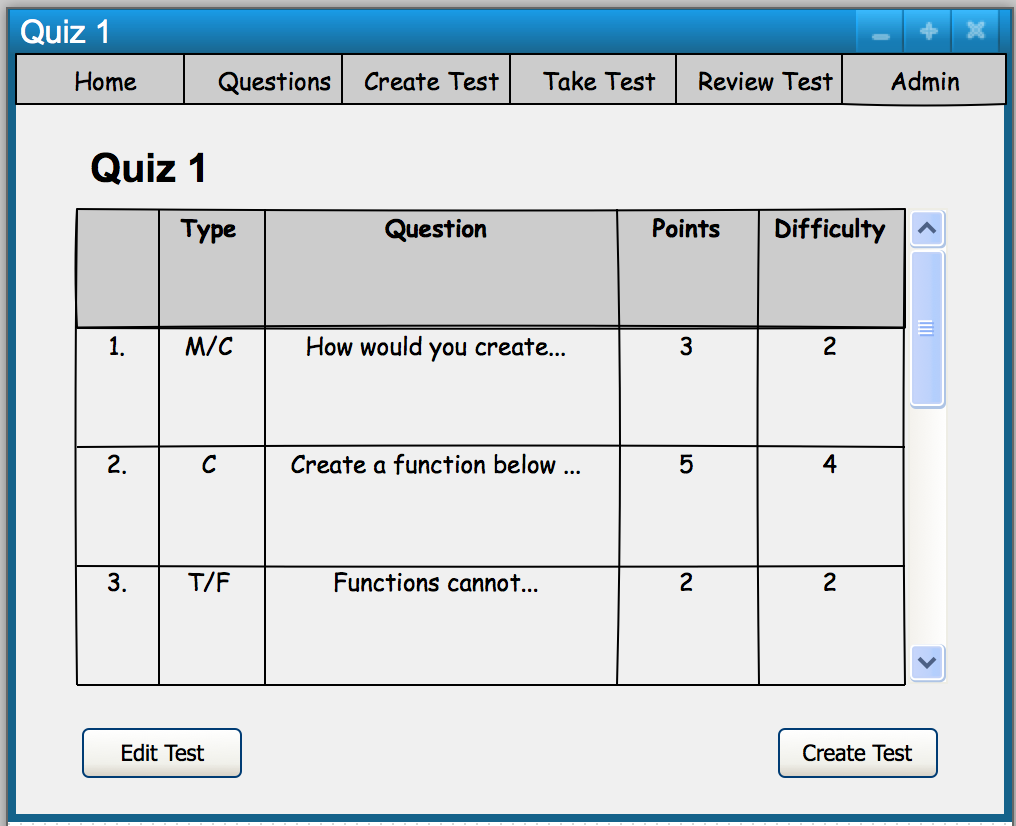
See Figure 5 and Figure 6 for an example of a completed test.
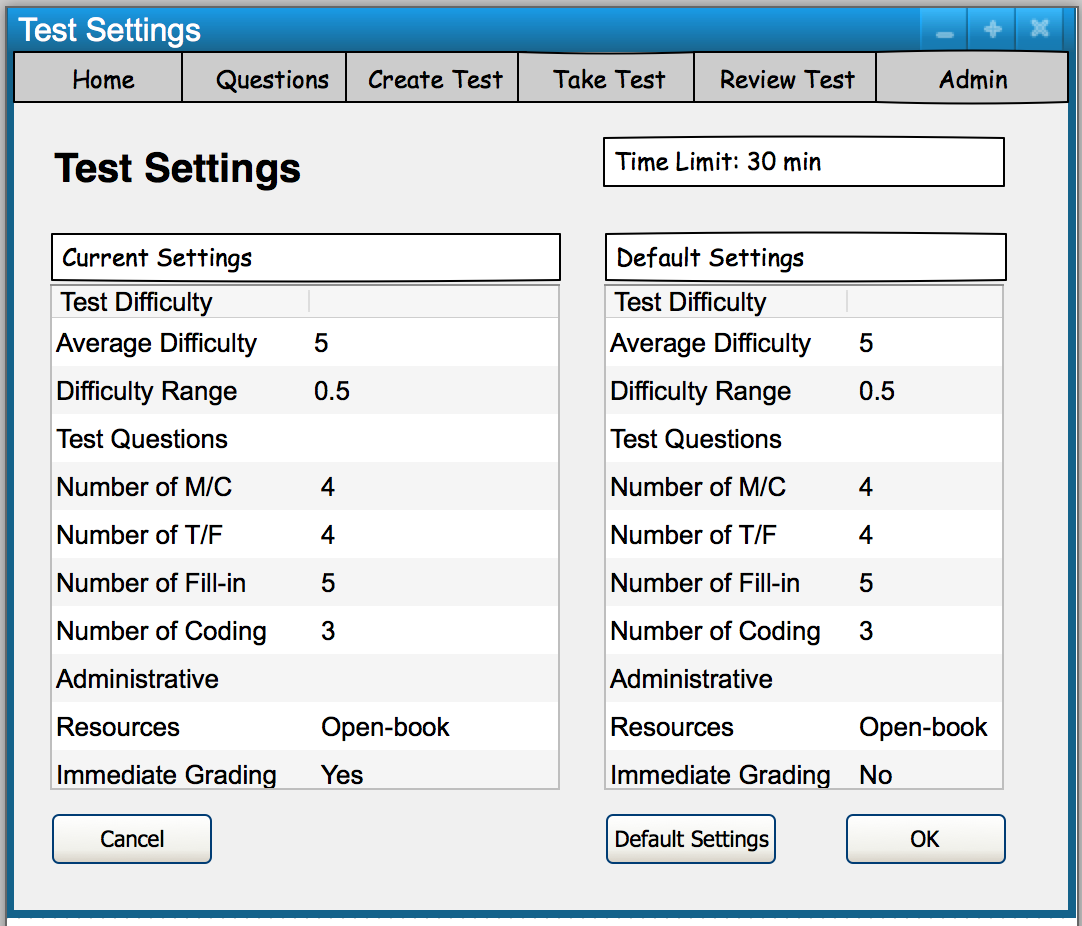
This option allows for the instructor to select the settings of a test. Shown in Figure 4, the software offers various settings for the specified test.
Figure 4
The “Test Settings” button allows for multiple options regarding the test. Some options include selecting whether or not the test is open or closed book. This option allows for instructors to have a clear idea about the settings of the test and also allow for proctors to understand the settings of the test. The various test options can be selected with the drop-down bar on the right. The instructor has the option of filling in the criterias of the test if the instructor cannot find the corresponding options and settings.
Clicking “Default Settings” takes the instructor to reset all the settings to a preset setting.
Example of an Easy Quiz (Figure 5)
Figure 5
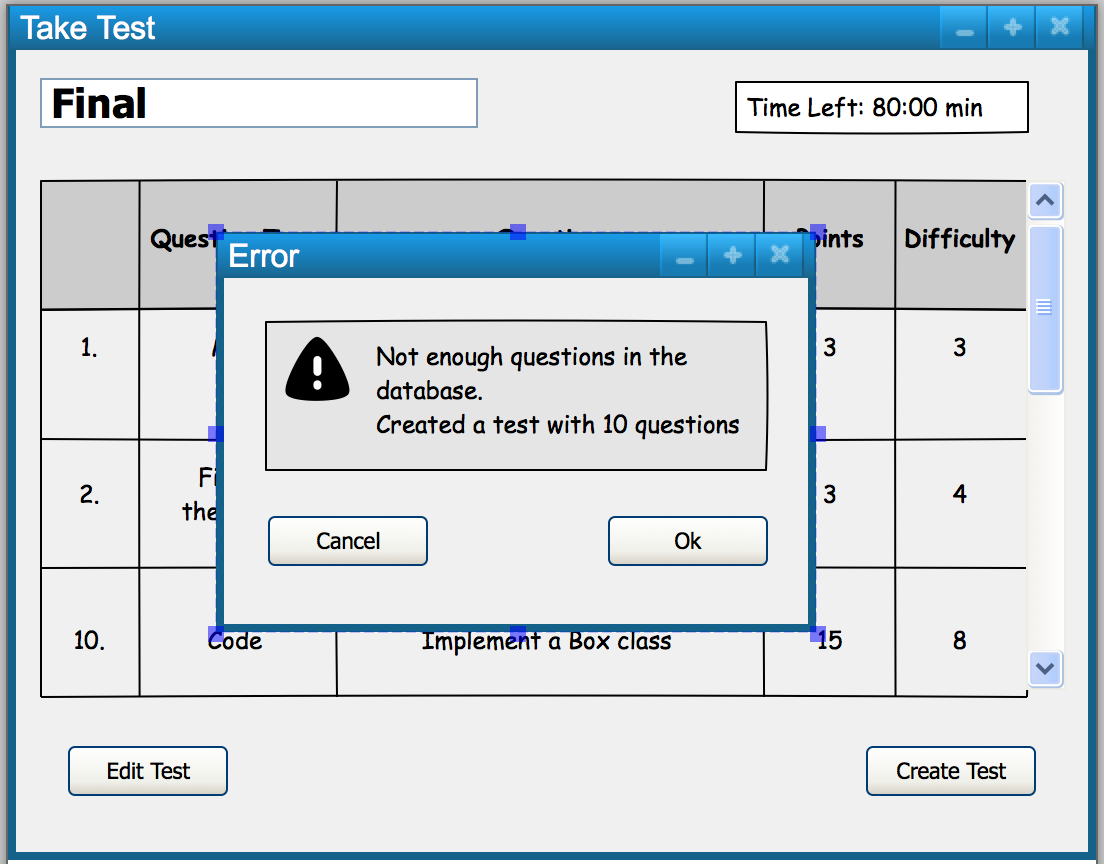
Warning Message: Not Enough Questions
If the instructor creates a test that has more questions than the amount of questions in the question database, then the software creates the test with the amount of questions in the database. A warning message is shown to alert the instructor. The test is saved in the “History” tab. The instructor could then access the saved test and make necessary changes (add more questions, etc) there. Shown in Figure 7 is the possible error messages that could be thrown if the question bank lacks the amount of questions.
Figure 7