
This scenario assumes that the instructor has already created a class. To Synchronize a roster, the instructor user selects the 'Sync Roster' tab from the 'Manage Students' dialog. The system displays a dialog of the form shown in .
Initial Sync View.
The instructor must fill in the box labeled 'Server Address' in order to set the server location that synchronization will occur with. The instructor must also fill in the CAS authentication credential boxes with both username and password. The instructor can select an auto-complete setting for CAS authentication by selecting the 'Attempt auto-complete by default' checkbox.

Filled Sync View.
Next, the instructor must choose to synchronize the current class, or to synchronize multiple classes by clicking either the 'Sync current class' button, or 'Sync Multiple classes'.To synchronize multiple classes, the instructor selects 'Sync multiple classes'. The resulting dialog box is shown in
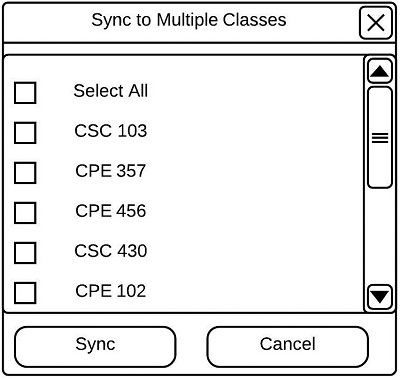
Synchronize Multiple Classes
The instructor selects the classes to be synchronized from the list, and selects 'Sync' to complete synchronization. The dialog shown in then appears.
Filled Sync View.
If the instructor instead chooses to synchronize the current class, the instructor must press 'Sync current class'. Synchronization will occur and the following dialog will appear. The differences in roster information between the server and local class information appears on the screen in a new dialog box shown in
Synchronization Results
Students that are listed on the servers roster but missing from the local roster are listed in the box labeled 'Missing from Roster'. Students listed in the local roster but missing from the servers roster are listed in the box labeled 'Missing from Server'. From this dialog, the instructor chooses which students to add to the local roster and which to remove from the local roster by selecting students from 'Missing from Roster' and 'Missing from Server' and then selecting 'Missing from Server' and 'Missing from Server'.