The basic operations of student management are included under the students menu. Most adding/removing of students should be done through the sync feature, but occasionally it is the case that an instructor finds need to manually add or remove students.
Although most adding and removing of students from the roster
will be completed through synchronization of the roster with
the server, sometimes adding a student manually is necessary.
In this case, the instructor can add a student to the roster by
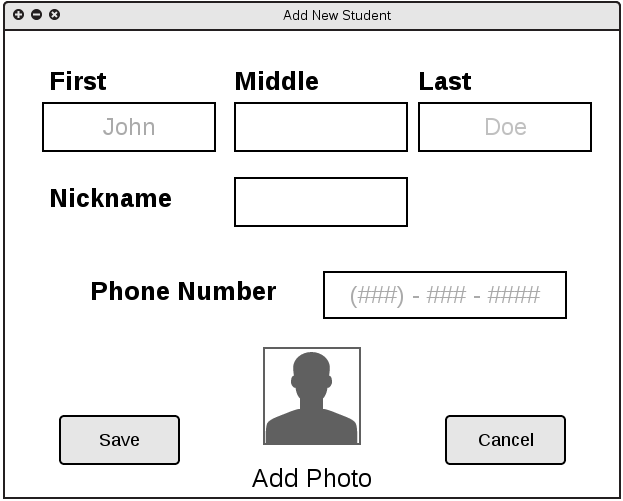
selecting "Add New" on the student menu.
Figure 2.3.1a
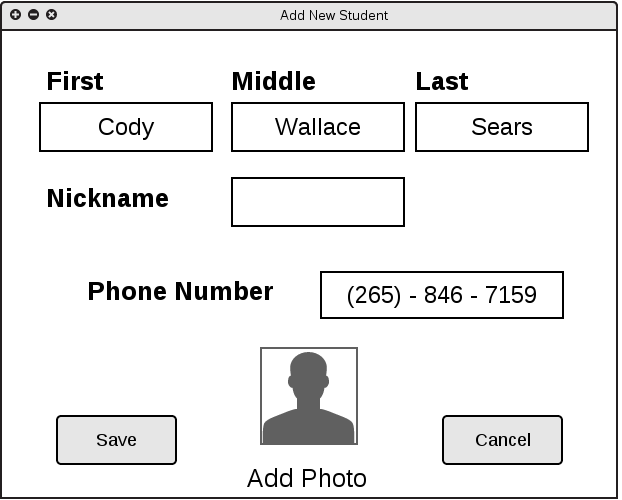
Figure 2.3.1b
Above is an example of a filled-out window adding a student. Once the text fields have information, the grayed-out background text specifying the box disappears. Once a photo is selected, the photo avatar will be replaced by at thumbnail of the student being added, and the text option below it will change to "Change Photo" which again opens the file-choose dialog to edit the chosen photo.
The instructor can select "Save" to finalize the addition of this student to the roster once the first and last name fields are filled out. The "first name" field is the only optional field to identify a student. The instructor can select "Cancel" or close the window at any time to exit the process without saving any information.

Figure 2.3.1c
As shown in Figure 2.3.1c, the result of adding a student is reflected in the gradebook. "Cody Sears" in now a member of the class and appears in the correct alphabetical position among other students on the gradebook.
Just as an instructor may find the need to manually add students to the class, so may an instructor find the need to manually remove a student or edit student information fields. An instructor can edit the current section roster at any time by selecting "Edit Roster"from the student management menu.
![]()
Figure 2.3.2a
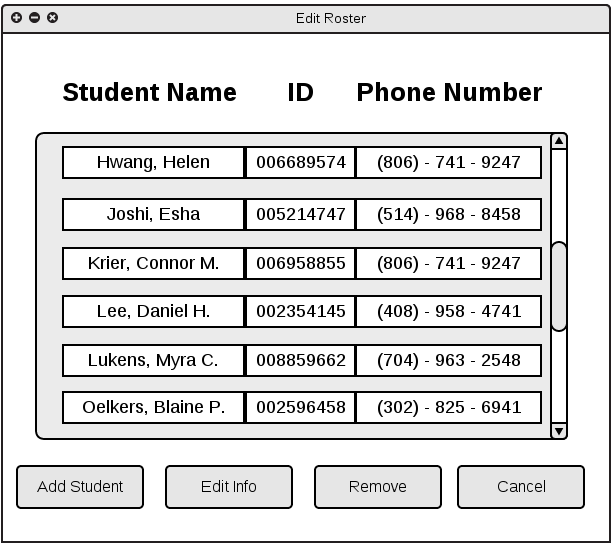
Figure 2.3.2b
When there is at least one student in the class, student information will be displayed according to the three column headers "Student Name", "ID", and "Phone Number". Once there are enough students to fill the window, a scroll-bar appears to allow access to all currently enrolled students.
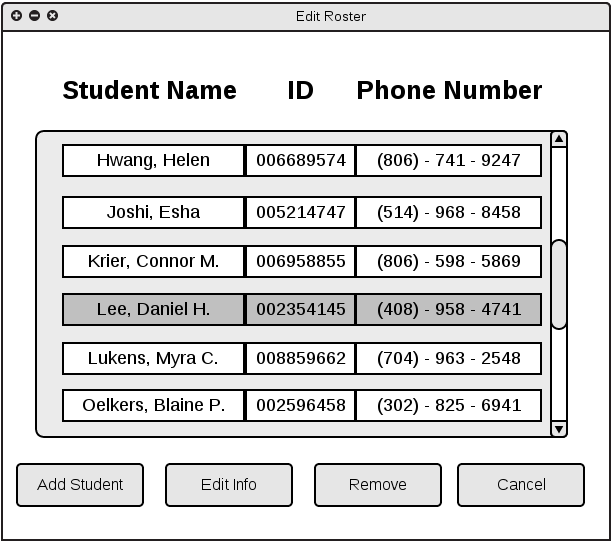
Figure 2.3.2c

Figure 2.3.2d
Opting to remove a student will produce a dialog box to confirm the choice and then remove the student from the roster if confirmation is given. Students removed through this option can be re-added through the synchronization feature. When a student's information is edited through the "Edit Info" button, the window shown above is displayed with the information. The instructor can then edit any of the fields "First Name", "Middle Name", "Last Name", "Nickname", "Phone Number", and change the student's photo with "Change Photo". In Figure 2.3.2d is an example of student's information being edited, specifically, "Daniel" is getting the nickname "Danny". The information can then be saved with the "Save"button or the instructor can either select "Cancel", or close the window to exit the editing without saving any information.
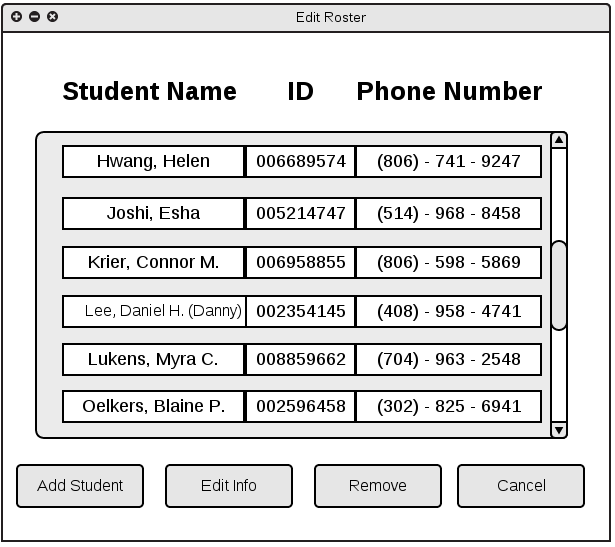
Figure 2.3.2e
The result of adding the nickname in Figure 2.3.2d is the updated Roster in Figure 2.3.2e above. Notice that the text in the name field for the modified student grew smaller to accomodate the added information.
2.3.3. Adding a New Group
Instructors often find it necessary to divide their students into teams which can be done through the student management menu by selecting "Create Group". Creating groups within a class section is composed of two main fields of information: the "group name" and "group members".
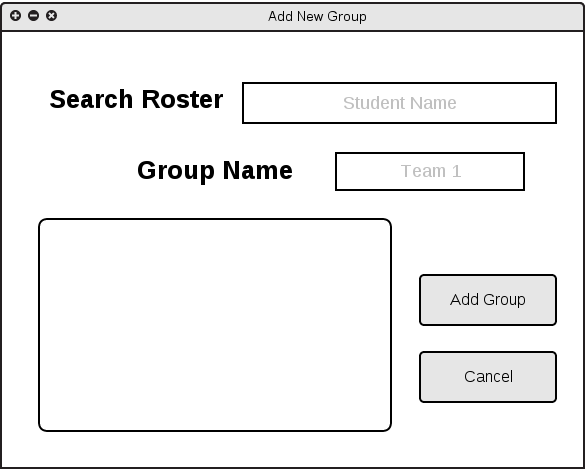
Figure 2.3.3a
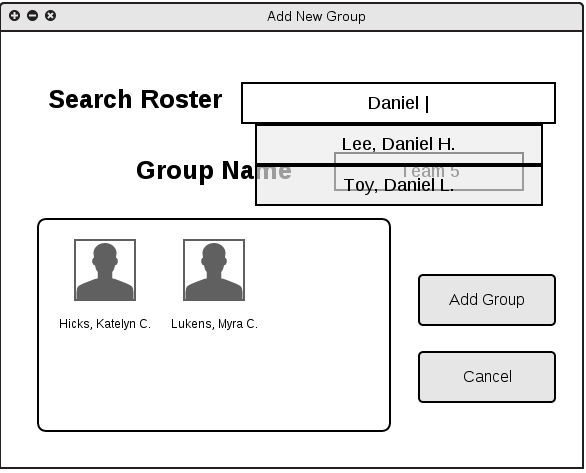
Figure 2.3.3b
An example of a partially-completed "Add New Group" window is shown above. Members are added to the current group individually by typing student names in the text field labeled "Search Roster", which searches through the current section roster and auto-suggests names based on currently typed letters. Typing in this field also replaces the grayed-out default text of "Student Name". Shown above, the instructor has typed "Daniel" which auto-suggests names of students from the current section roster which also have a part of their name containing "Daniel". As students are added to the group, a thumbnail containing the student's portrait followed by their name appears in the box below the group name, through which the instructor can scroll once enough students are added to necessitate scrolling. A student can be removed from the current group in this window by double-clicking the photo representing them.
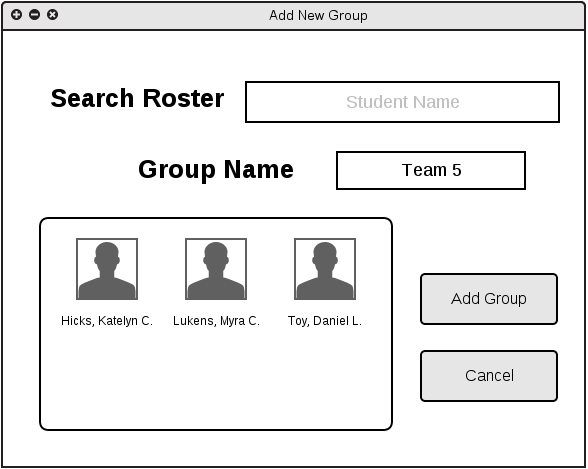
Figure 2.3.3c
The group can be named according to instructor preference by typing into the appropriate text field for "Group Name". At this stage in the creation of a group, the group name "Team 5" has been chosen.
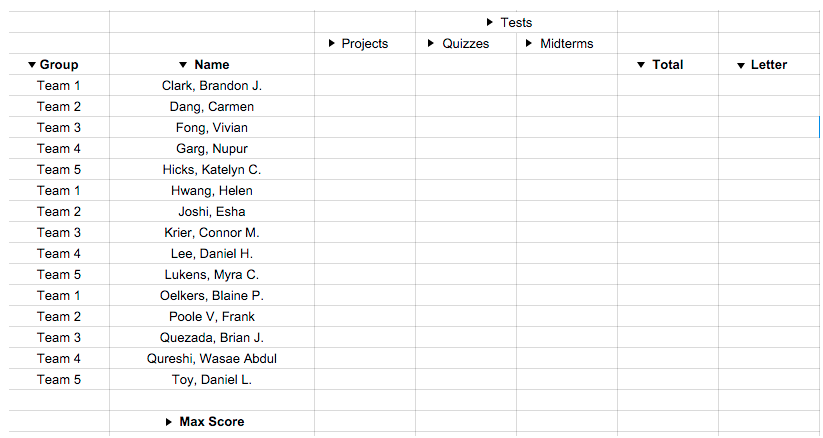
Figure 2.3.3c
Figure 2.3.3d shows the gradebook result of sorting the current roster into groups. The group name shows up in the "Group" column to the left of each student included in a group. In this specific example "Daniel", "Myra", and "Katelyn" have all been added to Team 5 and the rest of class has been sorted into other teams.