2.7. Student Functions
When Students log in to the Grader program, they will see a top menu bar, a left sidebar, and a main content area. The content area will
hold an interactive grid of assignments for a course the student is currently enrolled in. The gradebook grid will automatically be filled in by
an automatic online synchronization. The grades will be input by an Instructor and students won't be able to change their grades.
When a student logs into the Grader program for the first time, a list of courses they are enrolled with will populate the sidebar. The student must click on the
course (section number will also be visible) before they can see any Assignments. When a student chooses a course, the grid will populate with all of the assignments
the instructor has assigned up to that point in time and some basic statistics will also be visible.
Students will be able to see information about Assignments assigned. Information of individual assignments such as 'Assignment' title, Grade, Assigned date, Due date, Handed in, and relevant files will be the attributes for graded and assigned material in the gradebook grid.
An example of a filled in Main Student View is shown below in Figure 2.7.1A.
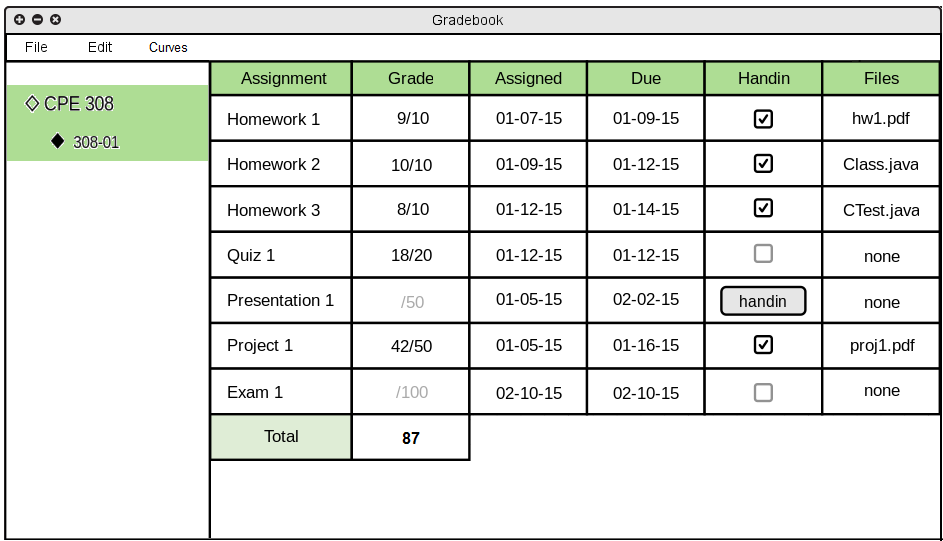
Figure 2.7.1A: Main Student View.
The top menu is similar to that of the Instructor menu bar, but has significantly fewer features. Only File, Edit, and Curves are kept. File is used to close the program,
or export the gradebook to a printable format. Edit has simple copy/paste undo/redo functionality. Curves will show an anonymous histogram of total grades in the selected course.
Even though students can not change their grades, they have the ability to temporarily modify grades in a Prediction Mode. If a student double clicks on a grade cell in
the grid, they can manually enter a new number. Entering a different number will automatically update the total grade for the course. All modified cells including the total grade will be highlighted in pink to indicate there are modified numbers.
If a student modifies one score in their gradebook, the cell will be highlighted in pink and the total score will automatically update and be highlighted.
An example of a single score change in prediction mode is shown below in Figure 2.7.2A
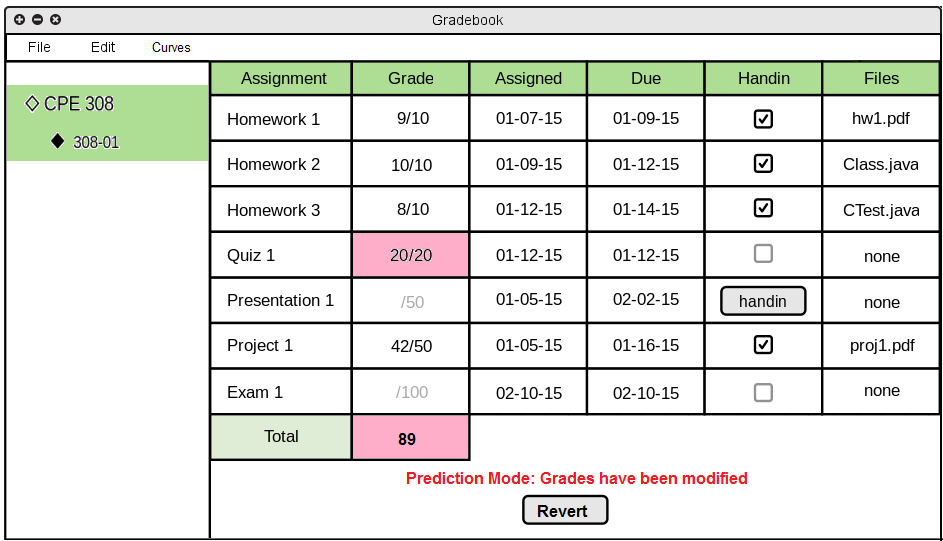
Figure 2.7.2A: Prediction - Single Score Changed.
As seen above in Figure 2.7.2A, the cells for Quiz 1 and Total have changed in the Grade category.
When students are in Prediction Mode, a text label and button will appear below the grid, indicating that some grades are modified. The Revert button will set the grade cells back to their default values.
An example of multiple (in this case 2) scores being changed is shown below in Figure 2.7.2B.

Figure 2.7.2B: Prediction - Multiple Scores Changed.
In the example above, multiple scores are changed and each cell is highlighted. The total is automatically adjusted as well.
An example of the student modifying all of the scores is shown below in Figure 2.7.2C.
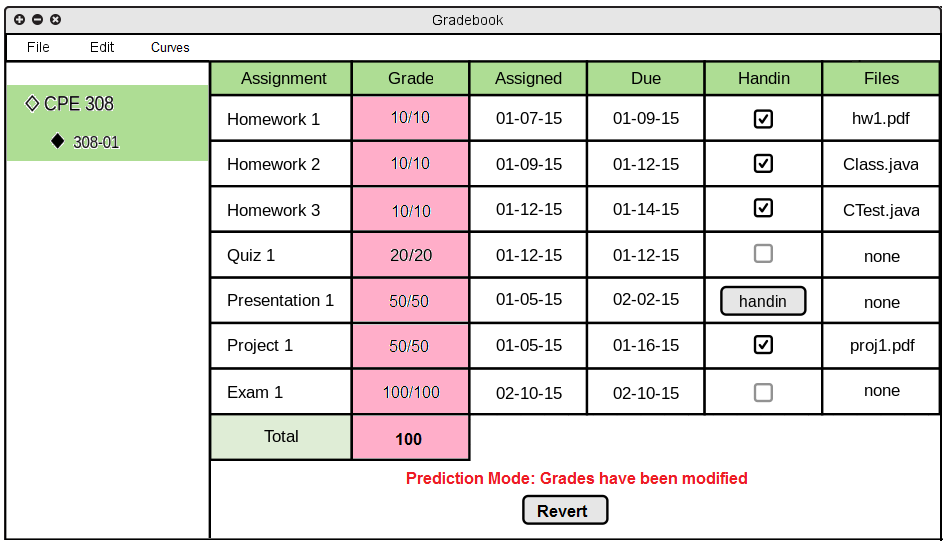
Figure 2.7.2C: Prediction - All Scores Changed.
In the example above, every score has been modified and each cell is highlighted. The total is automatically adjusted as well.
An example of the student leaving scores unmodified but changing their desired grade is shown below in Figure 2.7.2D.
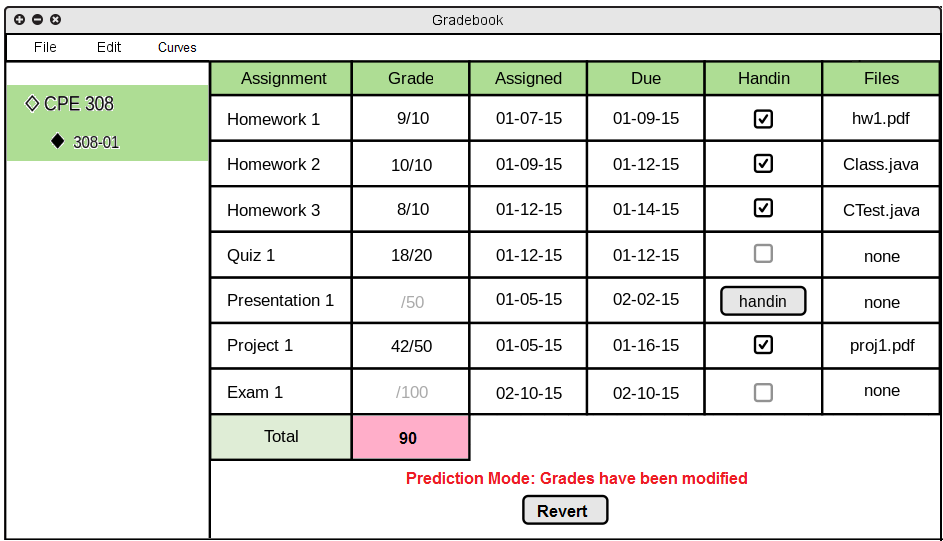
Figure 2.7.2D: Prediction - No Scores Changed, Desired Total Grade Changed.
In the example above, changing the desired grade will only highlight the Total Grade cell. The total grade will not update the scores on the individual assignments
because it would not make sense which grades should be increased to reach the total change.
An example of filling in some scores and changing the desired grade is shown below in Figure 2.7.2E.
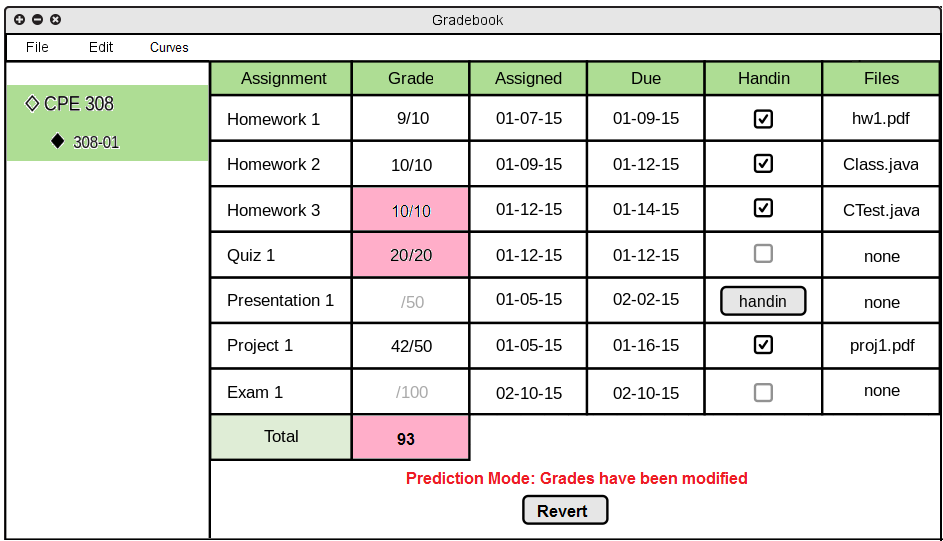
Figure 2.7.2E: Prediction - Some Scores Changed, Desired Total Grade Changed.
In the example above, the student first modifies some individual assignments which would automatically update the total score. They then did an additional modification
on the total score. In this case it is indistinguishable from the case where students simply modify some scores, except the value of the total grade will be different.
Students filling in a grade that would not be achievable normally will not output an error but will instead be treated as a course curve.
In this previous example (Figure 2.7.2E), Presentation 1 is not submitted and has the option to hand in files for it's completion. When a student clicks on the handin button, a Handin Window will pop up. An example of this window is shown below in Figure 2.7.3A.
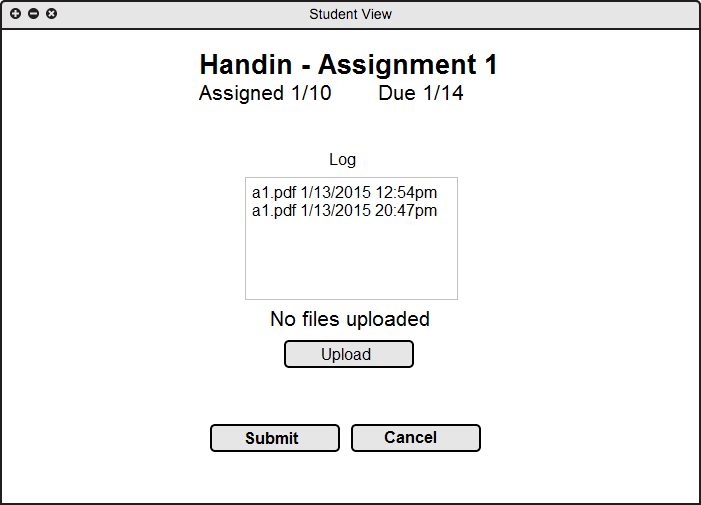
Figure 2.7.3A: Electronic Hand-In.
The Handin Window gives more information about the assignment if possible. It shows the title, assigned date, and the due date. If allowed by the instructor, students may be
able to upload multiple files (separate attempts) before the due date. If a file submission is needed for an assignment, a table will appear with a log of previous timestamped entries.
The initial state has a text label saying "No Files Uploaded" and a button labeled "Upload". When a student clicks on this button, a native directory explorer window will appear and students will select the files they wish to upload. When the files are selected, the student will click the Submit button and the files will be automatically uploaded to the server.
Next to the Submit button, there is a Cancel button that will cancel out all handin actions and return to the previous window.
Example of the gradebook before and after a file is handed in for an assignment is shown below in Figure 2.7.3B and Figure 2.7.3C respectively.
Figure 2.7.3B: Gradebook Pre-Handin.
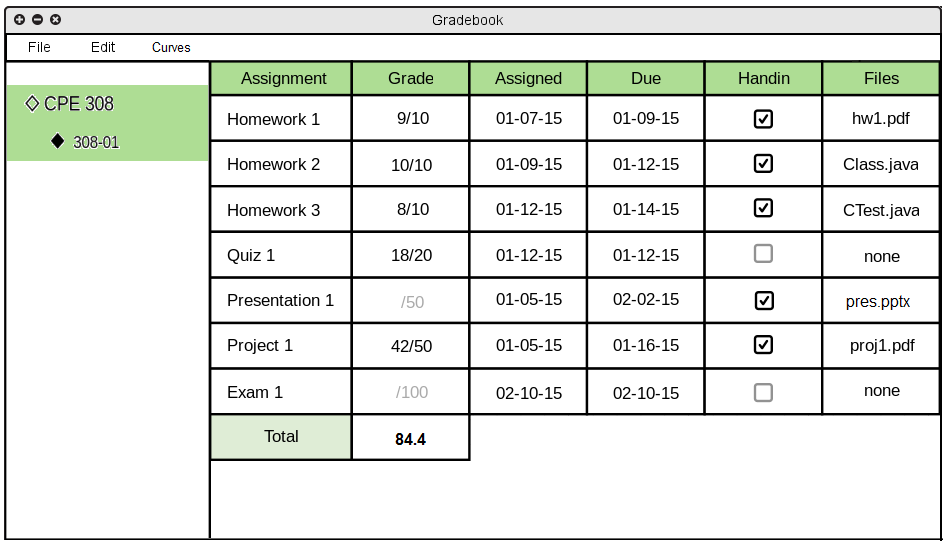
Figure 2.7.3C: Gradebook Post-Handin.