2.7.3 User Account Management
Instructors have to ways to add users to the CSTutor User Database: Importing Students from SIS or Manual Entry. To reach these function, the user goes to the Administration menu and selects, Manage User Accounts. Doing so will bring up the following dialog:
![]()
Figure 2.7.3a - Blank Manager User Accounts Dialog
2.7.3.1 - Import Students from SIS
The fastest way to add students is by having the CSTutor application download a class roster from SIS. First the Instructor click Import from SIS on the User Account Manager screen to bring up the login dialog shown in Figure 2.7.3b.
![]()
Figure 2.7.3b - Blank Login Dialog
The Instructor enters all the information including user name and password. The address of the server will be filled in from the last time the Instructor imported students. The Class field must be the full name of the class (including the section number).
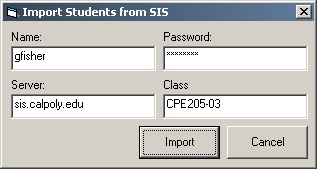
After clicking Import, the system will add the students from SIS into the database.
Note: There are some errors and other messages that will go here
An Instructor can also manually add, delete, and change user account information from the User Account Manager screen.
To add a user, click the Add User button to get the screen shown in Figure 2.7.3.b
![]()
Figure 2.7.3b - Adding a New user
Information about the user is filled in the boxes. User ID is the only required field. First and Last name can be used when a professor wants to track student's progress and quiz scores. A sample screen with the boxes filled is shown in Figure 2.7.3.c.
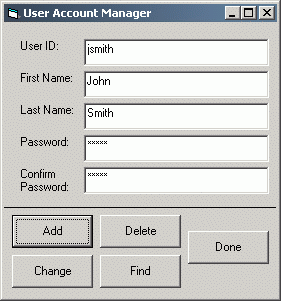
Figure 2.7.3.c - Add User Completed
To finalize the addition, the Administrator clicks the Add button again. This adds the user to the CSTutor User Database and brings the user back to the Mange User Accounts dialog showing the new students record as shown in Figure 2.7.3.d
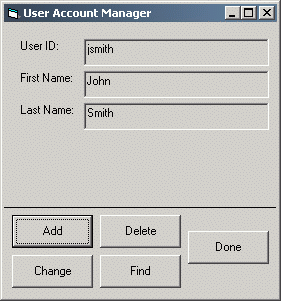
Figure 2.7.3.d - User Added Successfully
Once users are added, they can be searched using the Find feature. After clicking the Find button, enter any information (such as User ID or Name) and click Find again. This will bring up the record that corresponds to the search. If no user record is found, the last displayed user record will be displayed.
After a user is found, the account can be deleted by clicking the Delete button. A confirmation will appear (see figure 2.7.3.e) and if the Administrator selects Yes, the user will be deleted. Another message (see figure 2.7.3.f) will tell the administrator the operation was successful
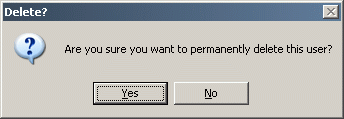
Figure 2.7.3.e - Delete Confirmation Dialog
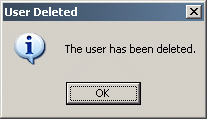
Figure 2.7.3.f - Deletion Successful Dialog