2.4.3 Creating a Quiz
Suppose an instructor wants to add a quiz. They would go to the command menu bar at the top of the screen, then go to "Course Tools ->New Quiz". This will pop up the Quiz Setup dialog (Figure 243-1).
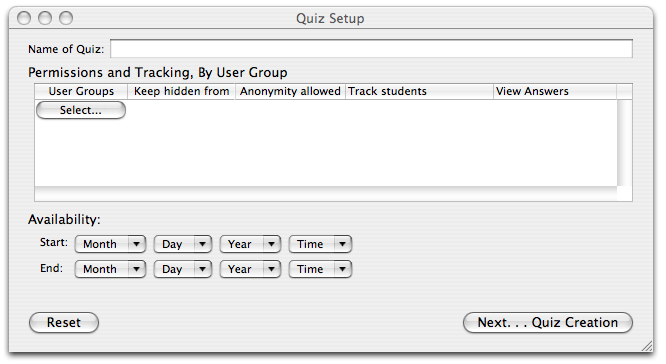
Figure 243-1
The instructor can then fill out the basic information about the quiz.
Naming the quiz: To name the quiz, the instructor just has to type the quiz name into the "Name of Quiz" blank (Figure 243-2).

Figure 243-2
Avalibility: The instructor can choose what date the quiz will start to be available, and what date it will cease to be available, by using the drop down menus for Month, Day, Year, and Time. If no changes are made to this section, the quiz will be available for all time.
Deciding who can access the quiz: First, the instructor clicks on the “Select . . . “ button inside the “Permissions and Tracking, by User Group” subbox. This will pop up the User Groups window. (Figure 243-3)
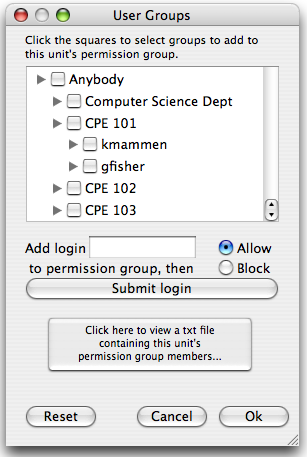
Figure 243-3
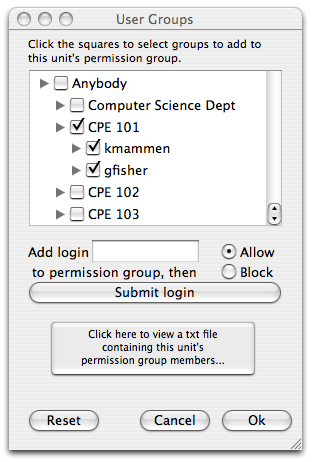
The instructor then clicks the user groups that they want to assign permissions to. Iin this example, the instructor is chooses “CPE 101", and all its sub-classes, as show in Figure 243-4.
 .
.
Figure 243-4
Once the instructor is done selecting user groups, they click "OK" to go back to the Quiz Setup window (Figure 243-5).
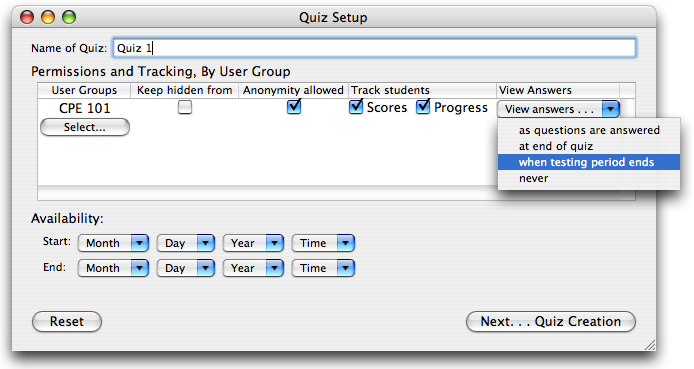
Figure 243-5
The instructor, using the Quiz Setup box in Figure 243-35, can then select what sort of access the User Group will have.
When the instructor is done, they can press “Next . . . Quiz Creation” to go to the next step.
This brings up the window in Figure 243-4, the quiz creation box.
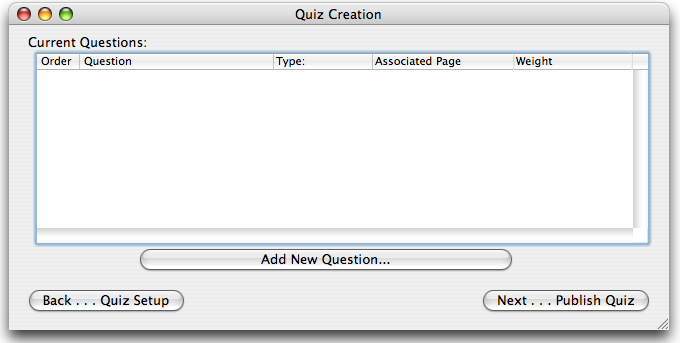
Figure 243-6
Right now, it looks pretty empty. The instructor would like to add a question to the woefully alone quiz, so they click the “Add New Question . . . “ button. This brings up the popup in Figure 243-7.
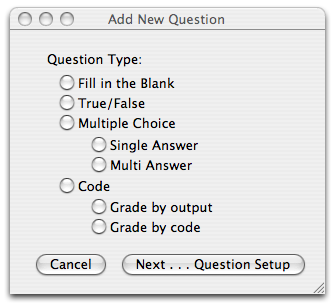
Figure 243-7
Right now, the box is blank. In this scenario, the instructor wanted a mulitple choice question with multiple answers.

Figure 243-8
They select the relevant radio buttons(shown in Figure 243-8), and then proceed to Question Setup, Figure 243-9.
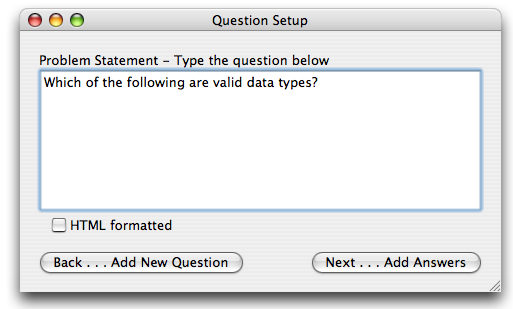
Figure 243-9
The instructor enters the problem statement, then adds answers for the question by clicking “Next . . . Add Answers”. This leads the instructor to the window in figure 243-10.
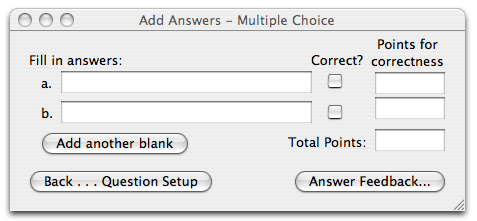
Figure 243-10
This brings up a window that allows the instructor to specify two fill-in answers, by default. For each answer line, the instructor fills out the answer blank, clicks the checkbox if the answer is correct, and assigns a point value to that answer, as shown in Figure 243-11. The point values are automatically totalled in the "Total Points" box.
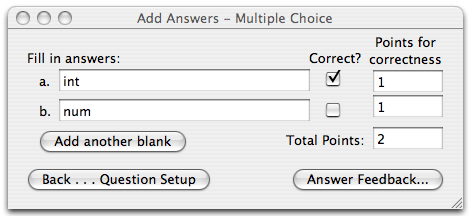
Figure 243-11
If the instructor wants to add more answers, they can click the “Add another blank” button. This instructor wants to have six answer choices, so they click on the button four times. They then fill out the rest of the line: whether the question is correct, and how many points its worth. When they’re done, their window looks like the one in Figure 243-12.
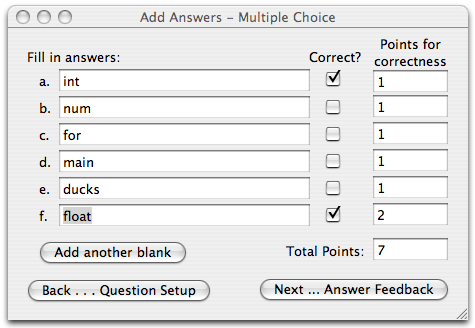
Figure 243-12
If the instructor would like to give the student specific feedback, depending on what they answer, they can click the Answer Feedback button. This will pop up the window in Figure 243-13.
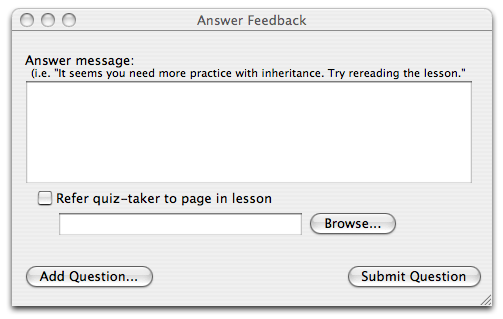
Figure 243-13
The instructor then fills out the answer message, and tells the quiz to redirect them to a review page, by using the Browse button(Figure 243-14).
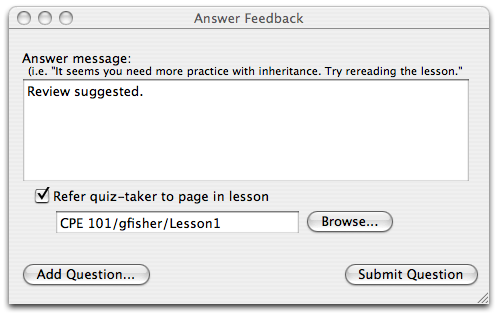
Figure 243-14
The submit button will then add the question to the quiz.
After the instructor has added all the questions they’d like to add to the quiz, they can press the publish quiz button on Figure 243-6, and then the quiz will be done, and added to the lesson!