2.5.1. Setting up a File System as anAdministrator
When the administrator who will be hosting thetutorials runs the CSTutor_Admin program, they are brought to the file system explorer. Here they will be presented with an overview of all tutorial sections visible to users using their servers. The first time the admin logs in, the file system will be empty as in Figure 2.5.1.a.
Figure 2.5.1.a: Initial login screen.
The 'Server' section represents the different available servers for storing the tutorial file system. The 'Course' section contains the different class folders with tutorial systems set up on the selected server. The 'Professor' section contains the different professor folders with tutorial systems set upon the selected server for the selected class.
To begin setup, the administrator clicks the 'New' button located in the 'Server' section to bring up the New Server Dialog as in Figure 2.5.1.b.
Figure 2.5.1.b: Blank New Server Dialog
In the New Server Dialog, the administrator enters either an IP address or a web address of the new server that the tutorials will be stored on in the 'Address' field. They then enter in the name that they want users to see when they access the server as an unformatted string into the 'Server Name' field.
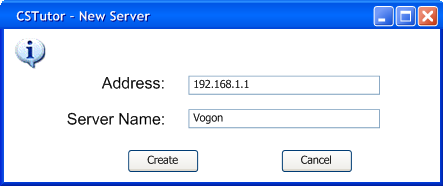
Figure 2.5.1.c: Completed New Server Dialog
Once the administrator has completed entering in data for the server, the new server will appear in the 'Server' section of the file system as in Figure 2.5.1.d.
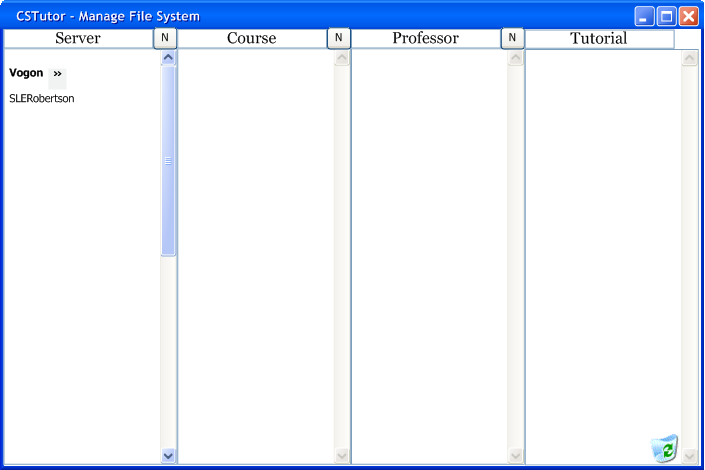
Figure 2.5.1.d: File System Post-ServerCreation
To create a new Course folder, the administrator clicks the 'New' button located in the 'Course' section to bring up the New Course Dialog as in Figure 2.5.1.e.
Figure 2.5.1.e: Blank New Course Dialog
In the New Course Dialog, the administrator enters the course title of the new folder that tutorials will be stored in as an unformatted string into the 'Course Title' field as in Figure2.5.1.f.
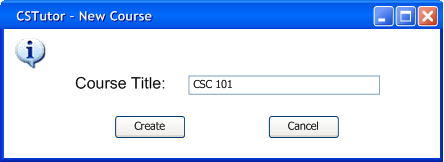
Figure 2.5.1.f: Completed New Course Dialog
Once the administrator has completed entering in the course's title, the new course will appear in the 'Course' section of the file system for the selected server as shown in Figure 2.5.1.g.
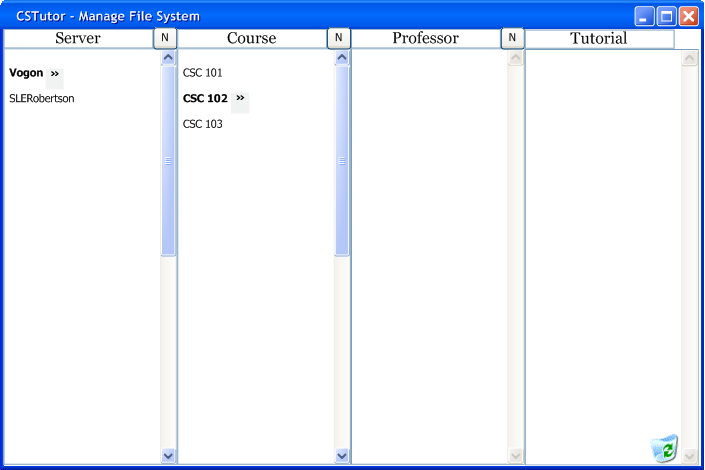
Figure 2.5.1.g: File SystemPost-Course Creation
Once the administrator has completed creating all desired course folders, they select one and proceed to create Professors for that course. The user clicks the 'New' button located in the 'Professor' section, causing the New Professor Dialog to appear as in Figure 2.5.1.h.
Figure 2.5.1.h: Blank New Professor Dialog
In the New Professor Dialog, the administrator enters in the user ID of the instructor as a string of characters into the 'ID' field. The administrator then sets up a password for the instructor by entering a string of alphanumeric characters into the 'Password' field.
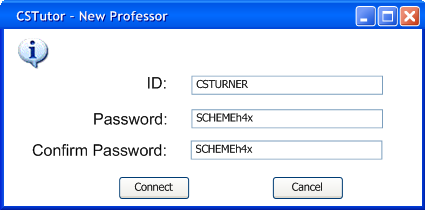
Figure 2.5.1.i: Completed New Professor Dialog
This will allow the professor to publish to the filesystem and let users view their created tutorials. The administrator proceeds to add additional servers, courses, and professors, the results shown in Figure 2.5.1.j.
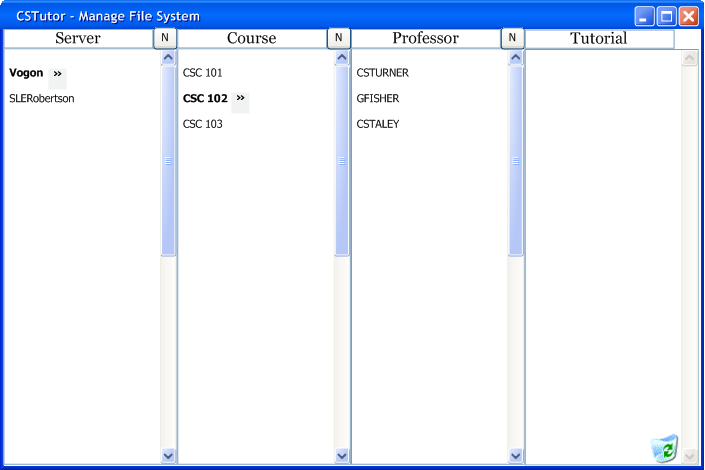
Figure 2.5.1.j: Finished File System
Prev: [none] | Next: deleting-items | Up: administration | Top: index