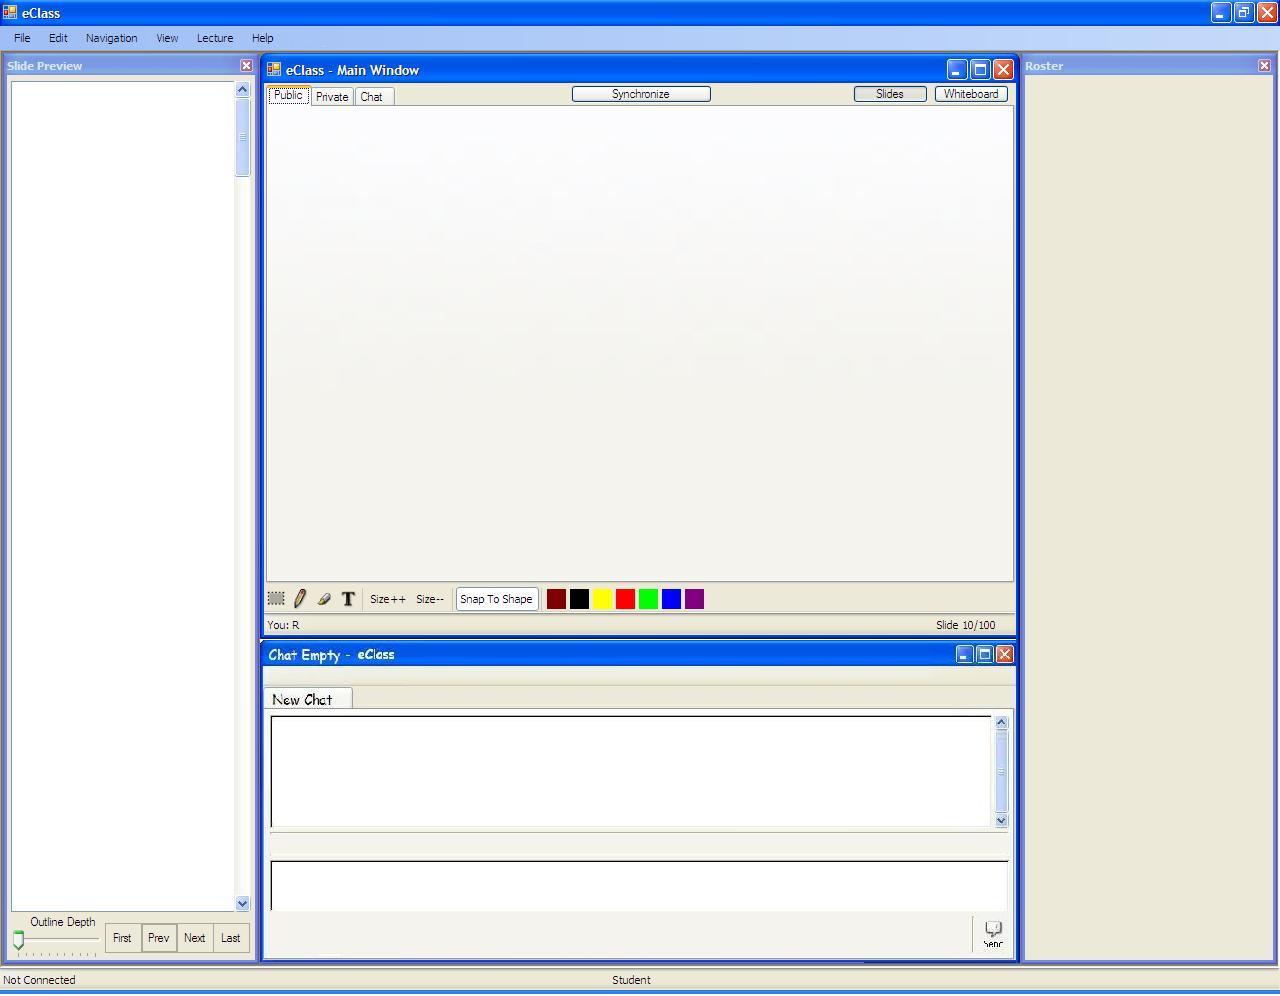
When the user starts eClass, the screen resembles Figure 1.

Figure 1: Initial screen.
Figure 2 shows the command menus.
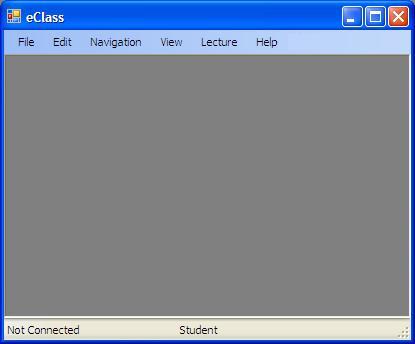
Figure 2: Command menus.
The File menu contains typical commands for manipulating data files and performing other system-level functions. 'File New' opens a blank lecture atmosphere that students can use to create their own lectures or to manipulate instructor's lectures for their own use. 'File Open' allows the user to open an entire lecture that has been saved onto the network or to the users home directory. 'File Save' saves the current slide information including additional student-added information such as private notes. 'File Save As' allows the user to save the lecture as a seperate file that may include either single slides or the entire presentation. ' File Close' closes the presentation but keeps private notes, drawing tools, roster and chat windows open for additional use. 'File Print' gives the user the ability to print slides and private notes that have been taken, with different options for printing including multiple slides or single slide print-outs. 'File Send' allows users to send a slide to another logged-in user to view. 'File Quit' will exit the program and will not save any lecture or notes that were not saved prior by the user.
Figure 3 shows an expansion of the File command menu.
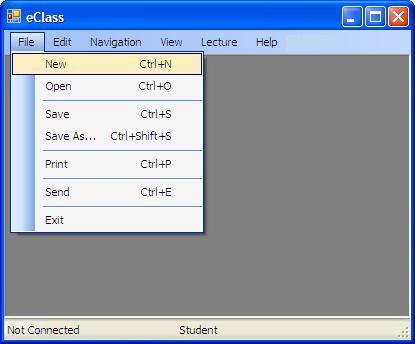
Figure 3: Expanded File command menu.
The Edit menu contains commands for editing and manipulating data. 'Edit Undo' undoes the most recently completed use of the tool. 'Edit Redo' will add the previously undone work back onto your screen as if the undo button was never pushed. 'Edit Cut' removes and copies the currently selected data in the current display. 'Edit Copy' copies the currently selected data without removing it from the area you copied it from. 'Edit Paste' inserts the most recently cut or copied data into the display and can be moved by the user to whatever area they choose. 'Edit Delete' removes the currently selected data from the display; it is not copied anywhere. 'Edit Select All' selects all editable data in the current display. 'Edit Find' opens a dialog that enables the user to find the provided string in the text of the lecture. 'Edit Options' opens a new menu of additional choices for the user.
Figure 4 shows an expansion of the Edit command menu.
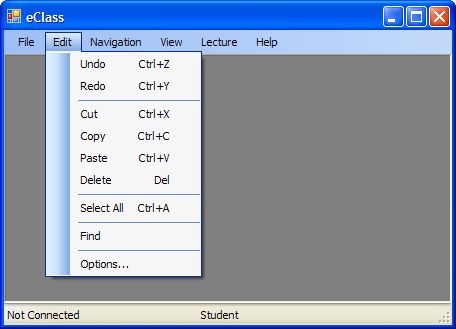
Figure 4: Expanded Edit command menu.
Figure 5 shows an expansion of the Navigation command menu. 'Navigation Start' starts the lecture. 'Navigation Stop' stops the lecture. 'Navigation Next' presents the next slide. 'Navigation Prev' presents the previous slide. 'Navigation First' jumps to the first slide of the lecture. 'Navigation Last' jumps to the last slide of the lecture. 'Navigation Goto' opens a dialog, wheras you enter a slide number, and the lecture jumps to that slide. 'Navigation Expand' expands all the points in the lecture. 'Navigation Collapse' collapses all the points in the lecture. 'Navigation Zoom In' expands the current points on the current slide in the lecture. 'Navigation Zoom Out' collapses the current points on the current slide.
Figure 5 shows an expansion of the Navigation command menu.
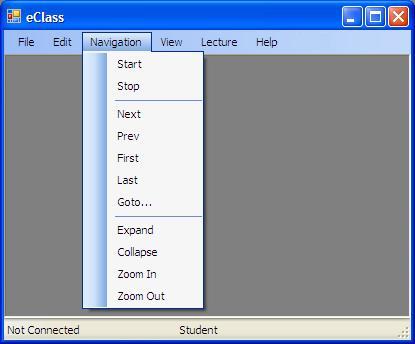
Figure 5: Expanded Navagation command menu.
The View menu contains commands that are used for viewing toolbars so that the user can hide and reveal them as necessary. 'Main Window' is used to show or hide the main window containing slides, and whiteboards that the user interacts with. 'Roster' will show or hide the roster window. 'Slide View' will hide or reveal the slide view window. 'Chat' will show or hide the chat window. 'Drawing' will show or hide the drawing tools window.
Figure 6 shows an expansion of the View command menu.
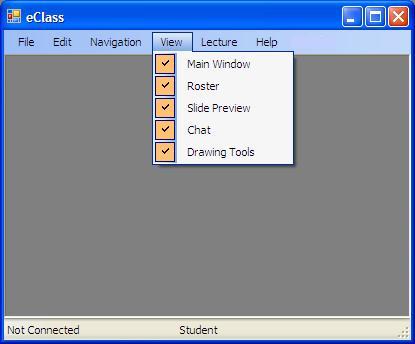
Figure 6: Expanded View command menu.
The Lecture menu contains commands that
are used to operate various features involving the actual lecture. 'Lecture Insert' is a group of
other commands, used to add things to the lecture and slides. 'Lecture Insert Topic' inserts
a new topic into the lecture hierarchy structure. 'Lecture Insert Subtopic' inserts a new
subtopic into the lecutre hierarchy structure. 'Lecture Insert Image' inserts an image to the current slide.
'Lecture Insert Slide Break' is used to insert a user defined slide break in the lecture. 'Lecture Slidify' automatically generates slide breaks based on the current detail setting, but it will not remove user defined
slide breaks.
Figure 7 shows an expansion of the Lecture command menu.
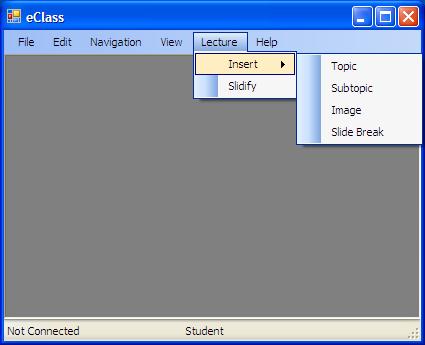
Figure 7: Expanded Lecture command menu.
Figure 8 shows an expansion of the Help command menu.
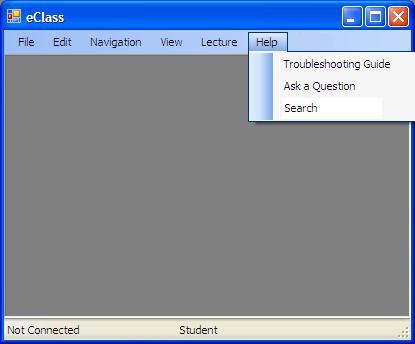
Figure 8: Expanded Help command menu.