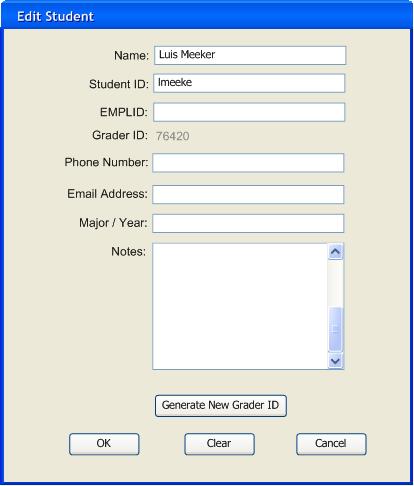
Figure 2.3.8: Edit Student Dialog
This scenario describes the steps a user takes to edit a student's information. The student body of a class generally remains static throughout a grading period, meaning this task is not used as often as others such as adding a graded item. Editing a student requires proper permissions granted by the gradebook's owner.
The user begins the editing process by clicking on a student's name in the first column of the gradebook, the system highlights the selection in blue. From the 'Student' drop down menu on the top menubar the user clicks on 'Edit...'. The system responds by displaying the 'Edit Student' dialog over the gradebook from which the student was selected. The dialog now becomes the active window, the user must click the "OK" or "Cancel" button at the bottom of the dialog to regain use of the gradebook. In Figure 2.3.8 below of the Edit Student dialog, the student was added to the gradebook with minimal information.

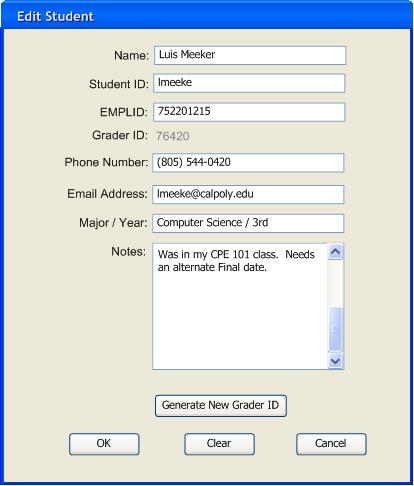
A student's Name and Student ID are taken directly from the gradebook. At this point the user can modify any of the fields with a text entry box, the Grader ID remains immutable. By default a cursor does not show up in any of the text boxes, the user must click inside the box they wish to edit. A filled 'Edit Student' dialog is shown in Figure 2.3.9 below.

Accessing the 'Edit Student' dialog from the drop down menu is the most instinctive way, it can also be done by pointing to a student's name on the gradebook and double clicking the left mouse button.
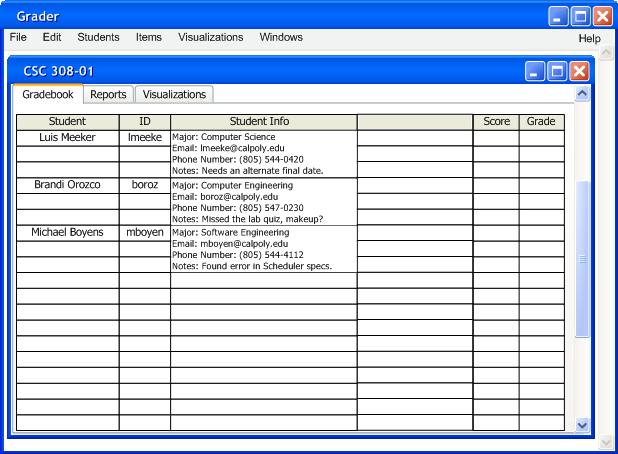
Students' Major/Year, Email Address, Phone Number and Notes can be displayed through the 'Student' drop down menu on the top menubar and clicking on 'Show/Hide Info'. This adds a column containing student information to the right of the Student ID column on the gradebook. EMPLIDs and Grader IDs can only be viewed when logged in under the proper permissions. Figure 2.3.10 illustrates a gradebook after the user has clicked the 'Show/Hide Info' from the 'Student' menu.
