2.1. User Interface Overview
When the admin first executes the Scheduler Tool application, the screen will resemble Figure 2.1.1.
Figure 2.1.1
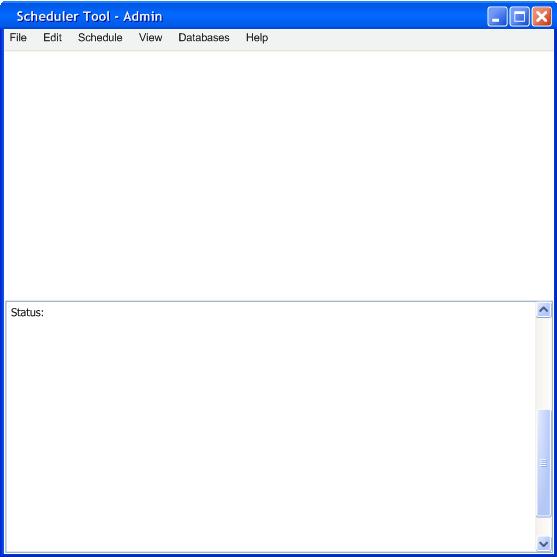
The top of the window has a menu bar, which will be described below.
Underneath the menu bar is the panel that will display the
schedule. Depending
on what form the schedule is
displayed in, this section may or may not be editable
The final panel on the bottom is the status window. It will display a running
list of messages about what is
going on, such as what databases are loaded,
whether the program is generating a schedule, or if a schedule generation is
complete. This section of the
window is not editable.
As seen in the figure 1, the menu bar consists of several options, starting with the File menu. (Figure 2.1.2.)
Figure 2.1.2

From the File menu, selecting “New” will open a fresh new schedule, and start a prompt asking for the starting information for the schedule. More information on starting a new schedule is in section 2.x. If the user selects “Open” from the file menu, a File Chooser will open up, and allow the user to select an existing Schedule to open. When the user selects the “Save” option, the program will save all the open files as their existing names. If a schedule has not been saved yet, then it will function the same as the “Save As…” menu option, which will open a prompt to select the name to save as, and the location to save it. Upon the user selecting the “Print” option, the top schedule will be printed as seen on the screen. When the user wishes to quit the program, the user can select the “Exit” option.
The next pull down menu is Edit, as seen in Figure 2.1.3, which can easily change the users inputted text.
Figure 2.1.3
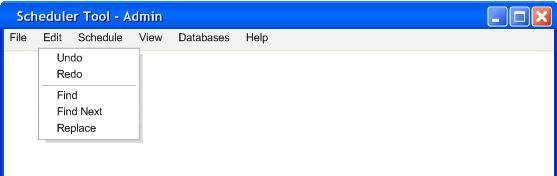
From the Edit menu, selecting “Undo” will revert the schedule back one change. This option can be repeated up to 5 past actions. When the user selects the “Redo” option, it redoes the actions that were previously undone. The user can use the “Find” option to search all open schedules for and appearance of a word, such as a teacher or class. If the user wants to keep finding additional instances of the same word, the user can use the “Find Next” option. Upon the user selecting the “Replace” option, the program acts similar to the find function, but can replace the instance with a new word, ideal for typos in a person’s name, or an error in a class number.
The next pull down menu is Schedule, as seen in Figure 2.1.4, which can be used for making and changing the schedule.
Figure 2.1.4
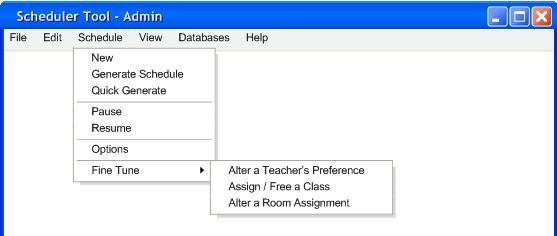
From the Schedule menu, the user can select the “New” as an alternate way to start the new schedule prompt. The user can select the “Generate Schedule” option to have the program generate a bunch of schedules, and display the one with the best “fairness value”. For more information on that, please head to section 2.x. If the user wants the first schedule that pops up, the user can select the “Quick Generate” option. While the program is generating schedules, the user can select the “Pause” option to pause the program, and be able to view the various databases. Once the user is done reviewing or pausing, they can select “Resume” to start back where the program left off. The user can select the “Options” menu to change the way the generate schedule option functions. More information on this in section 2.x.
The “Fine Tune” menu opens a submenu with three options. The user can select “Alter a Teacher’s Preference” to edit a teachers preferred times/classes for that quarter, in an attempt to make a fairer schedule. If the user selects “Assign / Free a Class”, the program will list all the classes, and the admin can change who is assigned what classes manually. When the user selects “Alter a Room Assignment”, the program will show a screen allowing the admin to change what classes are assigned to what rooms.
The next pull down menu is View, as seen in Figure 2.1.5, which can be used for viewing the completed schedule in various manners.
Figure 2.1.5
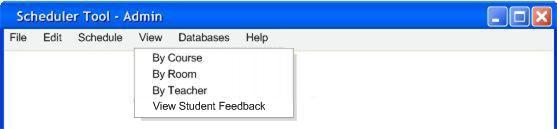
From the View menu, the user can choose “By course” which will list the schedule in a form similar to the printed course catalog. Upon the user selecting “By Room” the view will change to a week view of one room and what classes are in it at each time. When the user selects “By Teacher”, the view will show the week schedule of one teacher, and what classes they are teaching. If the user chooses “View Student Feedback” then it will display the comments that students had about various classes. More information about this in Section 2.2.5.
The next pull down menu is Databases, as seen in Figure 2.1.6, which allows the user to view and edit the 3 main databases used.
Figure 2.1.6
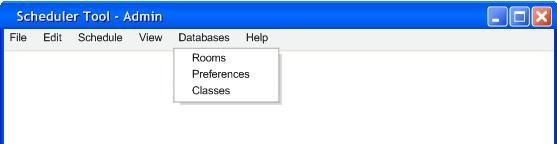
From the databases menu, when the user selects one of the options, it will go to the appropriate database to edit. “Rooms” will go to the room database. “Preferences” will go to the teacher preferences database. “Classes” will go to the Class list database.
The next pull down menu is Help, as seen in Figure 2.1.7, which can be used when things go wrong.
Figure 2.1.7
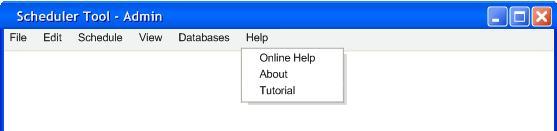
From the help menu, the user can select “Online Help” which opens a help document that acts much like an interactive web page. This should be able to solve most problems the user has. The user can select the “About” option to see the information on the program and the creators. Upon the user selecting “Tutorial”, the program will show various tutorials for doing many of the main activities with this program.
Prev: [none] | Next: [none] | Up: [none] | Top: [none]