2.5. Viewing a Schedule
To view a schedule, select View from the menu bar, then select the type of a schedule between a course schedule, a location schedule, or an instructor schedule. An example of the View menu bar is shown in Figure 2
This section shows users a variety of ways to view a generated schedule:
When the user selects to view a course schedule, the system displays a dialog shown in figure 66.
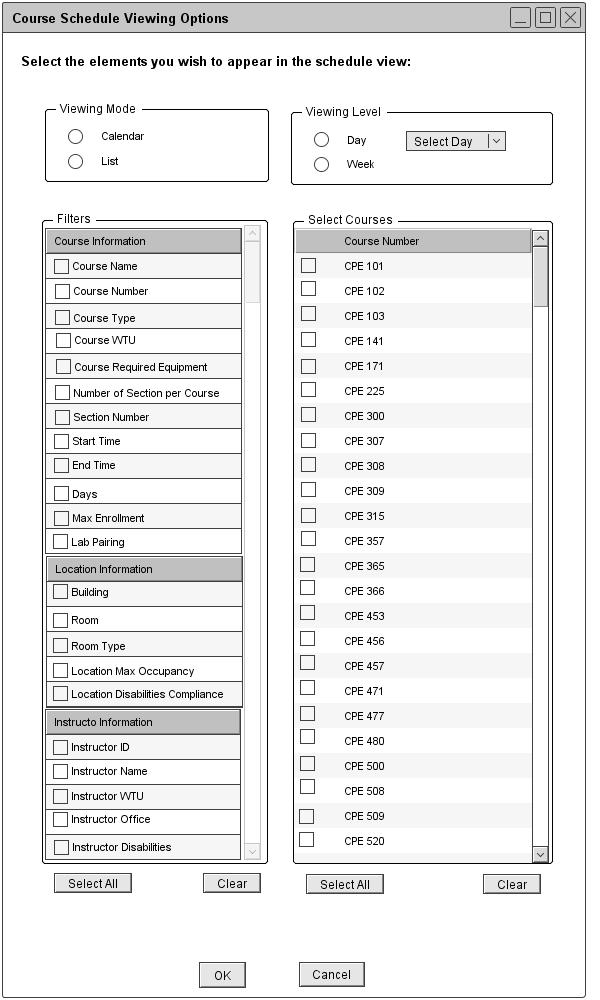
Figure 66: Setting page for viewing a course schedule
The figure 66 shows the viewing options dialog that contains 4 data-entry options. Users can view a generated schedule in two different view modes; calendar mode or list mode. The user selects the view mode option in the Viewing Mode box. Users can view a schedule in a daily view or a weekly view by selecting the option in the Viewing Level box. The Day is a string value representing the day of a week. The value is Monday, Tuesday, Wednesday, Thursday, or Friday. An example of the day dropdown menu is shown in figure 67. When Day is selected, the user is required to pick a day from the dropdown menu. When Week is selected for the viewing level, the Scheduler Tool displays a schedule from Monday through Friday and the dropdown menu is grey out. The system displays a schedule starting at 7:00AM till 10:00PM by default. The user can change this setting through the Advanced Filters
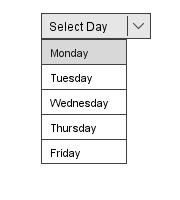
Figure 67: Day Dropdown Menu
The check boxs in the Filter box specify which information fields appear in a schedule view. At least one of the check boxes must be checked. Some of these filter fields are automatically selected after selecting the view mode and the view level. The default selections are shown in table 1. The check boxes in the Select Courses box specifiy which courses appear in a schedule view. At least one of the check boxes must be checked. To select multiple checboxes, hold down Shift key and click.
|
| Daily
| Weekly
|
| Course View
|
- Course Number
- Section Number
- StartTime
- End Time
|
- Course Number
- Section Number
- StartTime
- End Time
- Days
|
| Location View
|
- Course Number
- Section Number
- StartTime
- End Time
- Building
- Room
|
- Course Number
- Section Number
- StartTime
- End Time
- Building
- Room
- Days
|
| Instructor View
|
- Course Number
- Section Number
- StartTime
- End Time
- Instructor Name
|
- Course Number
- Section Number
- StartTime
- End Time
- Instructor Name
- Days
|
Table 1: Automatic Filter Selection
When the user selects to view a location schedule from the View menu, the system displays a dialog shown in figure 68.
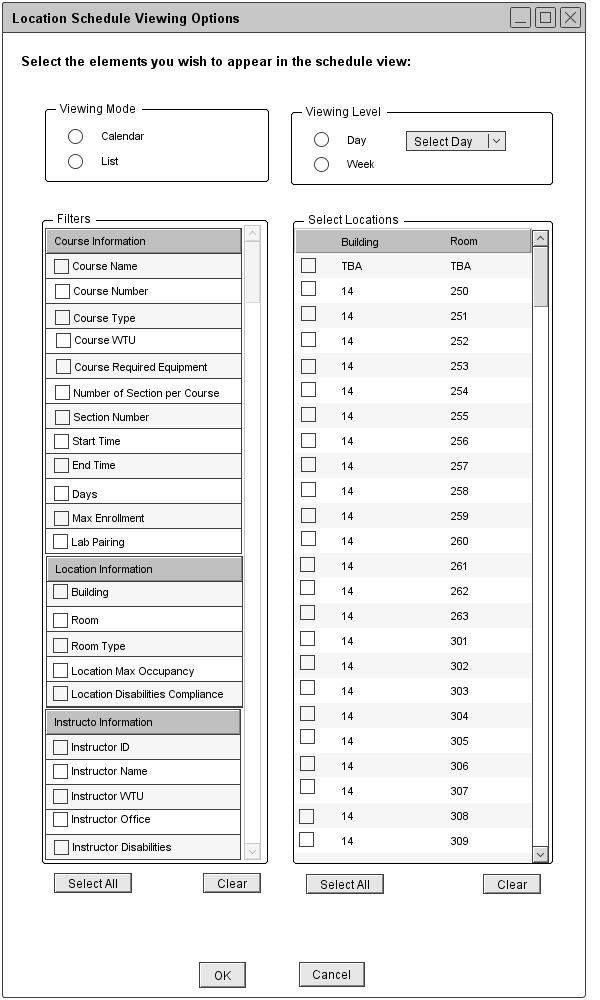
Figure 68: Setting page for viewing a location schedule
In figure 68, the Viewing Mode, Viewing Level, and Filter boxes, have the same functionalities as the boxes in the course viewing option dialog. The check boxes in the Select Locations box specifiy which locations appear in a schedule view. When TBA is selected for Select Locations, the Scheduler Tool displays all of the scheduled courses that do not have an assigned location. At least one of the check boxes must be checked.
When the user selects to view an instructor schedule from the View menu, the system displays a dialog shown in figure 69.
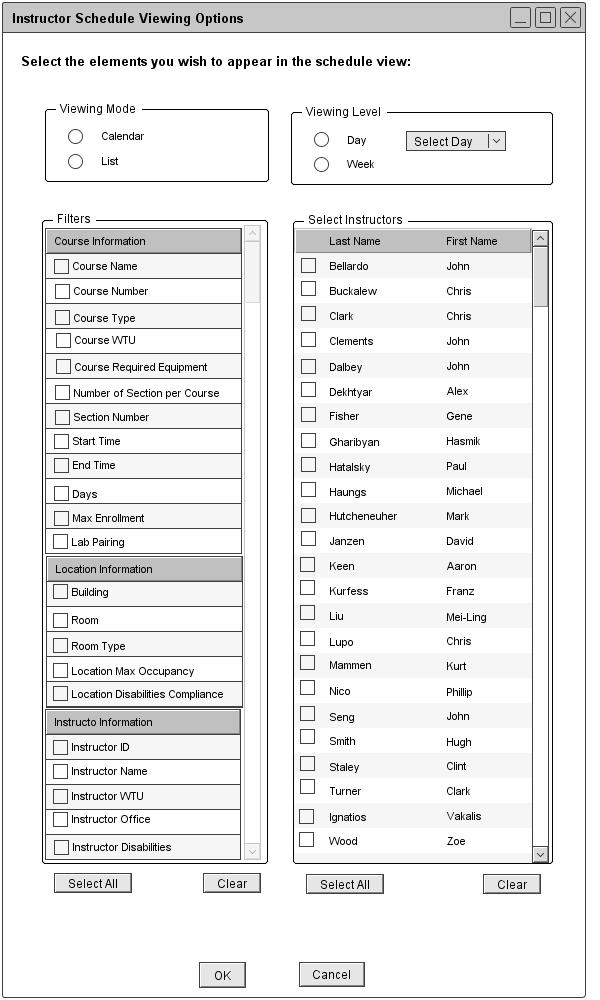
Figure 69: Setting page for viewing an instructor schedule
In figure 69, the Viewing Mode, Viewing Level, and Filter boxes, have the same functionalities as the boxes in the course viewing option dialog. The check boxes in the Select Instructors box specifiy which instructors appear in a schedule view. When Staff is selected for Select Instructors, the Scheduler Tool displays all of the scheduled courses that do not have an assigned instructor. At least one of the check boxes must be checked.
Prev: view-schedule-attributes
| Next: course-view
| Up: functional-requirements
| Top: index