2.5. Test Taker Proctor
There are several ways to present a test to a student. Practice
Tests, which are given to students as exercises and are not graded at all.
Take Home Tests are distributed to students through a secure login server
which can be accessed through any unspecified computer terminal on which a Test
Tool Client is installed. And a Proctored Test, which will likely be
the most common test giving method a teacher would use with the Test Tool
program. A proctored test does not differ much visually from a Take Home Test or
Practice Test, but instead is much more interactive between the Student and
Teacher or Proctor. More specifically the proctor has the ability to start, end
or pause a test, post class wide, group or individual notes to student tests,
and collect and turn in tests at anytime. This enables a proctor to control a
classroom, answer questions and make class enouncements without ever leaving
his/her chair.
2.5.1. Networking
The Proctor Tool is dependent on a reliable,
stable local and remote network to maintain Test integrity, security and student
privacy. As in the rest of the Test Tool Suite, logging into a remote server
provides both the proper distribution of information among user groups with
different levels of permissions as well as a centralized information repository
which can better organize data than manually distributing tests, for example.
The Proctor Tool is unique among the rest of the suite in that it uses a static
local network to run multiple Proctor client processes and a Proctor server
process in unison throughout the duration of the Test taking process. The server
program runs on the Proctors computer and is described in full by the following
sections. The client process is much the same as the Student Test Tool for the
two other methods of test taking. The difference lies in the background
operations of the Client Tool and the proctor server. The server being able to
lock the client programs computer or ending the test at anytime of the Proctors
choosing are examples of these operations that will also be discussed further in
this section.
2.5.2. The Login
Screen
The following is an example of the first screen
that is presented to the user upon opening the Proctor Test Tool. Logging in
allows the Proctor to distribute the correct tests to the proper classroom based
on a pre-defined proctor account on a distributed server as well as uploading
completed tests to the proper location on the server. Logging in also provides
needed security which is an important aspect of the Test Tool project.
Figure 1: Login Screen.
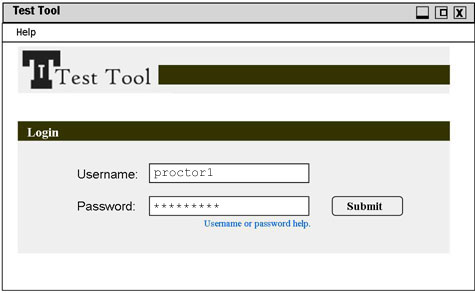
Figure 2: Completed Login
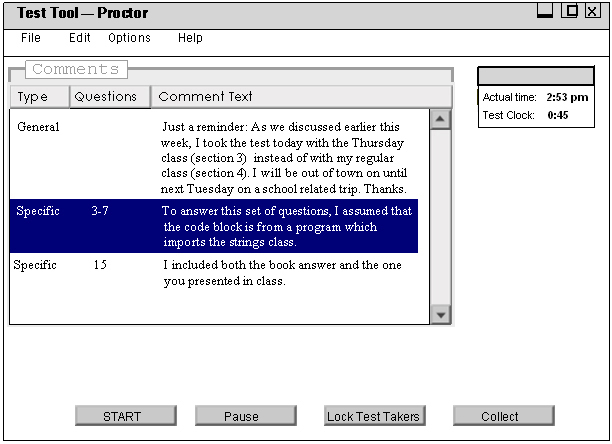
Once logged in, the main Proctor Window appears. From here the proctor is presented with all the main processes involved in proctoring an exam. All teacher notes and future student notes will be displayed in the Notes sub-window. The proctor is also able to open a test from the menu in preparation to distribute it to a pre-defined class network. The network IP's and settings are read from a file in the program folder upon opening which can be edited by a user with administrator privileges. Once a test is chosen, the proctor can: Start the test, distributing it to the client Test Taker programs on the student computers, Pause a test, Lock Test Takers computers from using other local processes or programs (i.e. internet, calculator…), and Collect tests effectively halting the students from answering any more questions and sending the taken tests to a grading program or storage facility. A major portion of the window is dedicated to the Time Remaining clock, clearly displaying the amount of time left before the test is to be collected. The program does not automatically collect the test, although when time runs out a pop-up window will appear to remind the proctor to collect and hand in the tests.
Figure 3: Main Proctor Window.

Figure 4: End of Exam Notice.
To open a test for distribution a proctor must use the View Tests command in the File menu. This command brings up a dialog box with a list of all the available tests on the main server that is assigned to the proctors specific ID. These tests are distributed to the different proctors by a user with server admin clearance. In other words proctors can only see tests which are specifically assigned to him/her after a test is published by the Test Maker program. Once a test has been opened and distributed, e.g. the Start button has been used; a proctor cannot open another test until the current test has been collected.
Figure 5: File Menu Items.
The Exit command simply exits the Proctor program and returns the user to the system display. If a test is currently in progress the Exit command is disabled. This is to ensure proper collection of distributed tests, in the case of an emergency a note can be imbedded with a reason why tests were collected early or that the test should be redistributed at another time.
The Edit menu has only one command, Add Comments. This command is used to alert any one or several students of test related announcements or corrections. A small notification window is immediately displayed in the Test Taking program alerting the student to the note which the student can then view at his/her leisure. An example of the student notification is displayed below.
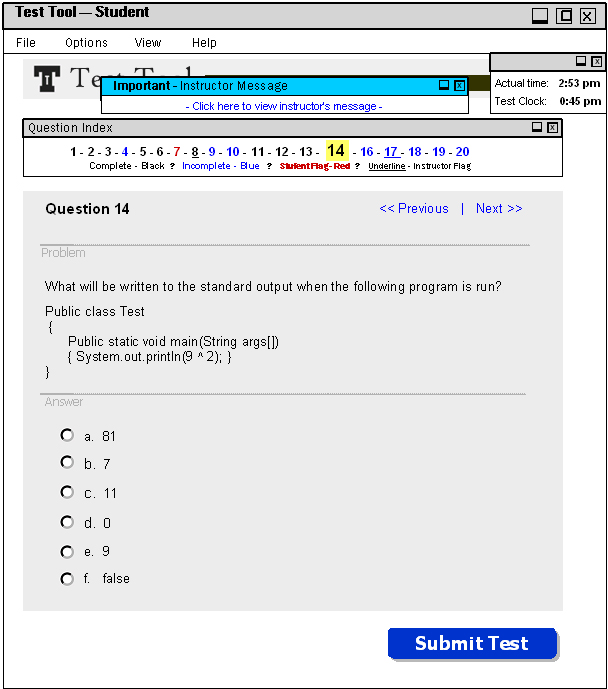
Figure 6: Student Comment View.
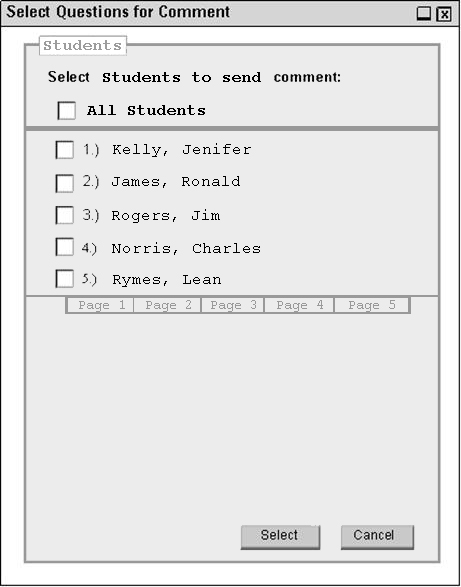
Choosing the Add Comments command from the menu will bring up a separate dialogue box giving the user control over how the note is sent, what category of note it is and who the recipients will be. A General Comment is simply a note to the students or student not relating to any particular problem while a Specific comment can relate to any one question or a group of questions.
Figure 7: Comments Edit Window.
Figure 8: Students to receive Proctor Comment
The last menu on the menu bar is Options. This menu contains the Add Time command. Add Time opens up a dialog box with and editable field requesting the amount of time to add or remove from the test's total time remaining. This gives the user control of the total length of the test and when exactly the students will receive "time remaining" warnings when the test is close to being collected.
Figure 9: Add Time Window.