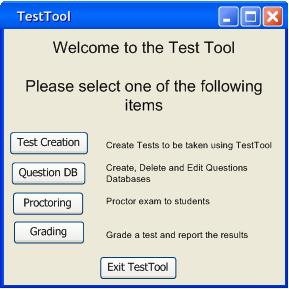
When the user initially invokes the Test Tool, the screen appears as shown as in Figure 1
Figure 1: The launcher for the Test Tool applications
When the user selects Test Creation, the following window is presented.
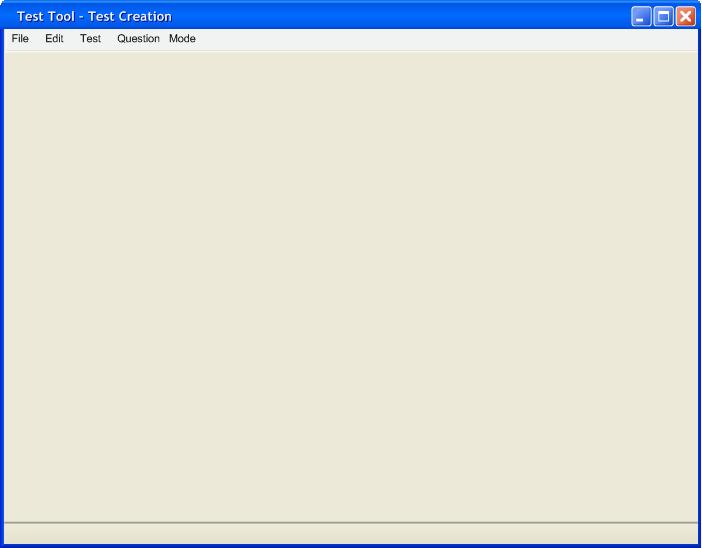
Figure 2: The initial test creation window
This space is used to display open tests. It may also contain question databases if the question database that is opened is being used to generate a test. The tests are contained inside their own windows inside the workspace shown above in Figure 2. The user may not drag the test windows or question database windows outside the test creation workspace.
The top drop down menus of the Test Creation utility window are the following.

Figure 3: The test creation window file menu
File
New Test - creates a new test
Open Test - opens an existing test
Save Test - saves currently opened test
Save Test As - saves currently open test as a specified file
Close and Switch Mode - closes (asks for save) and returns to first screen
Close - closes Test Tool

Figure 4: The test creation window edit menu
Edit (simple text manipulation)
Undo - reverses last user action
Cut - copies everything selected to the keyboard and removes from the test
Copy - copies everything selected to the keyboard
Paste - pastes whatever is currently on the clipboard onto the test
Select All - selects all content of currently highlighted window
Preferences - Allows modifiable preferences for the Test Creation tool.
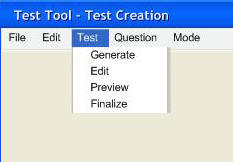
Figure 5: The test creation window test menu
Test
Generate - Initiates the wizard for auto generating a test from a wizard
Edit - Opens test editing window to edit test manually
Preview - Opens a preview of the test that is currently open.
Finalize - Finalizes the test and saves in a format that is password protected and cannot be changed. Also provisions for practice/take home test.
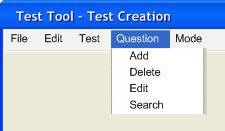
Figure 6: The test creation window question menu
Question
Add - adds a question to the question database.
Delete - Deletes a question from the current test
Edit - Opens a window allowing the user to edit a question from the test
Search - Opens a window to search the available question databases for a question matching the user's queries.
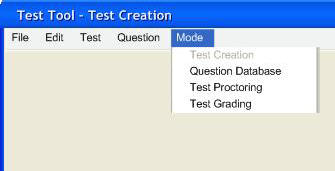
Figure 7: The test creation window mode menu
Mode
Test Creation - Opens the test creation tool.
Note: The tool currently being used is grayed out in the "Mode" menu.
Question Database - Opens question database tool.
Proctoring - Opens proctoring tool.
Grading - Opens test grading interface.
When the user selects question database from the top level window, the following screen is presented.
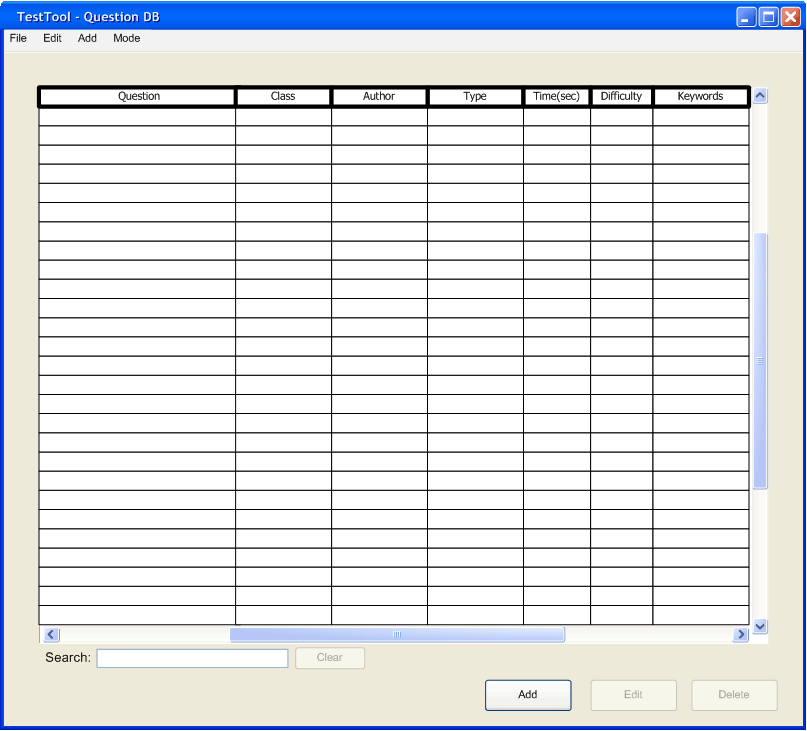
Figure 8: the initial question database window.
The question text appears in the question column. If the question text is too long, it is shortened and a (...) is added to the end to indicate that there is more. The class column indicates what class the question is for. The author field contains the original instructor who wrote the question. The type contains which of the allowed question types the question is. The time field indicates approximately how long the question takes to answer. The difficulty field contains a number from one to ten that specifies how difficult the question is with respect to the others. The keywords is an unlimited field that specifies words that pertain to the question.
The top drop down menus of the Question Database utility window are the following.
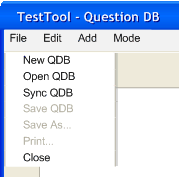
Figure 9: the question database window file menu
File
(These are the same as in the Test Creation utility except Sync.)
Sync - opens the question database synchronizing wizard.
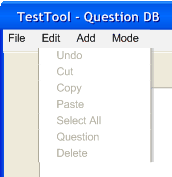
Figure 10: the question database window edit menu
Edit
(These are the same as in the Test Creation utility except Question.)
Question - opens the selected question for editing.
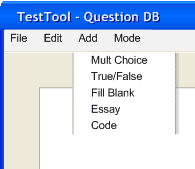
Figure 11: the question database window add menu
Add
Mult Choice - Adds a multiple choice question to the currently open question database.
True/False - Adds a true/false question to the currently open question database.
Fill Blank - Adds a fill-in-the-blank question to the currently open question database.
Essay - Adds an essay question to the currently open question database.
Coding - Adds a coding question to the currently open question database.
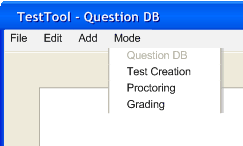
Figure 12: the question database window mode menu
Mode
(These are the same as in the Test Creation utility.)
When the user selects Proctoring from either the initial menu or the mode menu, the following screen is presented.
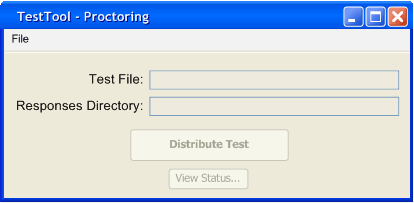
Figure 13: the initial test-proctoring window.
The test file field contains the path of the test that is given to the students. The test file is the test to be taken by the students. The responses directory contains the path of the directory where the finished student tests are placed. The "Distribute Test" button distributes the selected test to all students logged in with their student ID number.
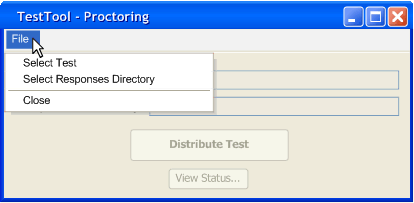
Figure 14: the test-proctoring window file menu.
File
Select Test - opens a browser window to select the test to be taken.
Select Responses Directory - opens a browser window to select the directory in which the student responses are stored.
When the user selects grading, the following screen is presented.
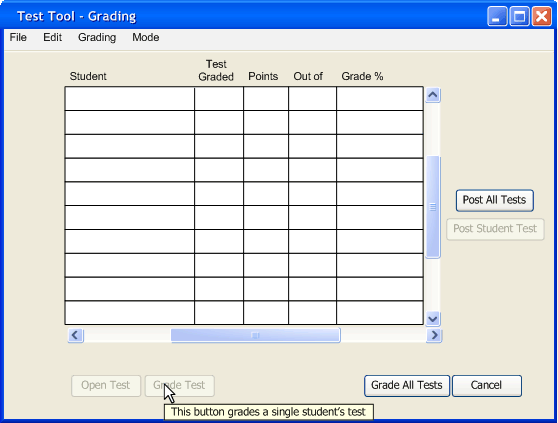
Figure 15: the initial test grading window
The top drop down menus of the Test Grading utility window are the following.
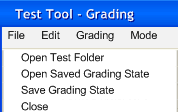
Figure 16: the test grading window file menu
File
Open Test Folder - opens a specified folder which contains all completed test files. Scans files and adds tests to window.
Open Saved Grading State - opens a saved state file for the grading program so that a teacher does not have to grade all of the tests at once and may come back to it later,.
Save Grading State - saves a state file for the grading program so that a teacher may resume grading a test at a later time.
Close - closes the grading tool.
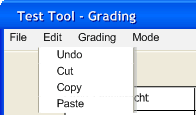
Figure 17: the test grading window edit menu
Edit
(these operations are only for simple text copying/pasting)
Undo - undoes the last action taken by the user
Cut - copies a piece of selected text to the clipboard and removes the text from the screen.
Copy - copies a piece of selected text to the clipboard.
Paste - pastes the text on the clipboard to where the cursor is pointing
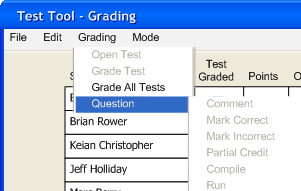
Figure 18: the test grading window grading menu.
Grading
Open Test - Opens the currently selected test for manual grading. (Not available if no test is selected).
Grades Test - Auto-Grades the currently selected test. (Not available if no test is selected).
Grade All Tests - Auto-Grades all currently listed tests. (Not available if no test directory has been specified, or there are no tests to grade).
Question (These are only available if a test is currently being viewed, and a question is highlighted)
Comment - Comments a particular question on a student's test.
Correct - Marks a particular question correct and gives the student full credit for that question.
Incorrect - Marks a particular question incorrect and gives the student zero credit for that question.
Partial Credit - Opens a prompt in which a teacher can give a student partial credit for a question.
Compile - Compiles a highlighted or opened code question. Output is placed in a new pop-up window titled "Program Output". (only available for "coding questions")
Run - Runs a successfully compiled program and places the output in a new pop-up window titled "Program Output". (only available for "coding questions")
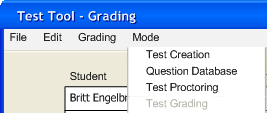
Figure 19: the test grading window mode menu
Mode
(These are the same as in the Test Creation utility.)
2.1.5 Student Test Taking
When the student test taking software is launched, the following screen is shown.
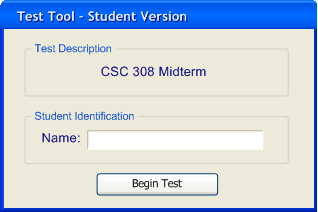
Figure 20: the initial student test taking window.
The test that is taken by the student is shown in the Test Description field. Clicking Begin Test start the student's test.
The test interface is shown in the figure below.
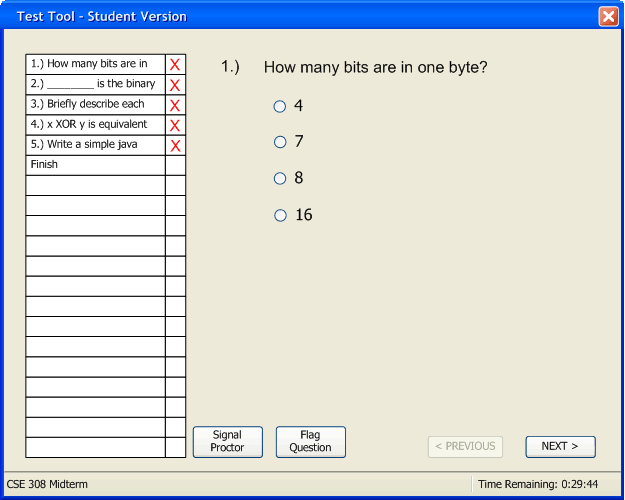
Figure 21: the student test taking interface
When clicked, the "Signal Proctor" button displays a message on the proctor's window informing the proctor that a particular student needs help. The "Flag Question" button marks a question on the list of question to the left that a student may be having difficulty with so that he/she may return to it later. The "Previous"/"Next" buttons allow the student to navigate through the test by going forward or back 1 question. Students may jump to any question they wish by double clicking a particular question number on the left side.
Once the user has answered all of the questions, he/she is presented with the following window.
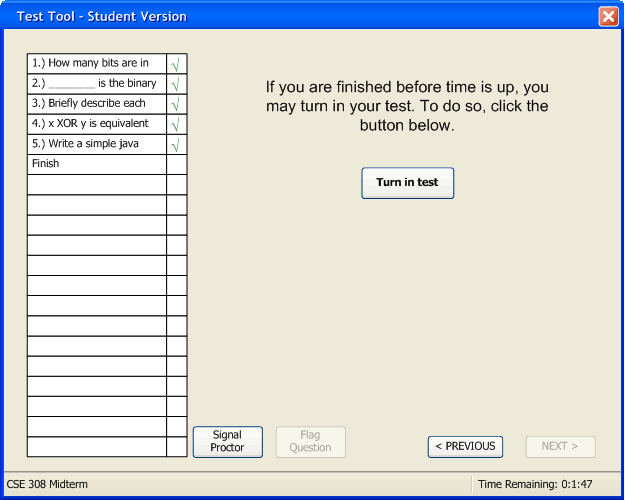
Figure 22: The end-of-test window
Clicking the "Turn in Test" button submits the test to the results directory specified by the proctor. In they case of a take home test, the results are saved in the same directory as the test file.