2.4.1 Auto-generating a Test From Specifications
For the program to automatically generate a test, the user must specify the kind of test
that the program will generate. Because a test usually consists of groups of questions
with similar characteristics, the program allows users to create "Test Templates" that
consist of "Groups" of questions. A "Group" is simply a number of questions that share
some common characteristics. For example, the user could specify a 20 minute quiz with 5 true-false
questions, 3 "fill in the blank" questions, and 2 essay questions by creating a "Test Template"
consisting of three "Groups": a group with 5 true-false questions taking 5 minutes, a group
with 3 "fill in the blank" questions taking 5 minutes, and group with two essay questions taking 10 minutes.
Please note that the example quiz above will be used in this section to model specifying a test.
To create a "Test Template", the user opens the auto-generate interface with “File” -> “New”-> “Test”
-> “Auto-Generate”. The Auto-Generate
specification window opens.
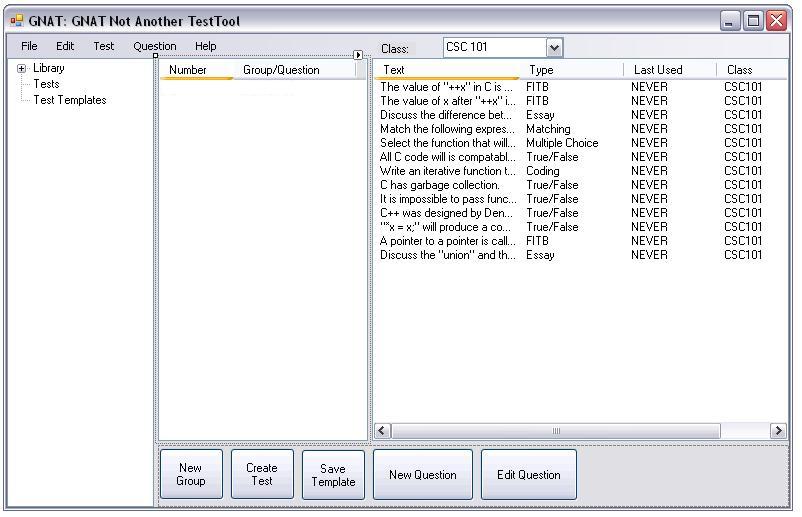
Figure 2.4.1: Screenshot of Base UI with the Auto-Generate Specification Window.
At the bottom of this pane there are three options “
Create Test”, “New Group”, and “Save
Template”.
"Create Test" selects questions from the library that fit the criteria in the
current Test Template.
"New Group" creates a new group of questions in the current Test Template.
"Save Template" saves the Test Template so new tests may be generated later from the
existing specification.
To make a group of questions on the generated test the user selects
“New Group”. The "New Group" dialog
box appears:
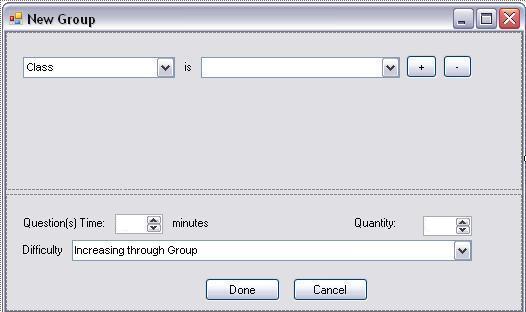
Figure 2.4.2: The New Group Dialogue
Notice that the initial criteria is set to "Class", as the first requirement for a
question group is usually the class for which the test will be generated. If the user does not
require that the group only contain questions for a specific class, such as when generating a qualifying
or summative exam to contain material for several courses, then the user can change this initial criteria
to some other question attribute. The possible attributes that may be used in this context are
"Class", "Type", "Author", and "Keyworks". The field after the attribute can be filled with any text.
The program will parse semicolins as breaks in the field, and make a list of values. For the criteria represented
to be true the attribute need only be one of the items in the list of values.
Also Notice that the initial Difficulty is set to "Increasing through Group". This was set at customer
request. This value can be changed to "All 1", "All 2", "All 3", "All 4", "All 5", or "Random".
To create a Test Template specifying the example above the user selects “New Group”
and fills out the appropriate dialog boxes, beginning by specifying that the desired class is CSC101,
requiring 5 questions which will take 5 minutes.

Figure 2.4.3: The New Group Dialogue with Class set to CSC101
To specify that "True-False" questions are require the user
selects the “+” button next to the first requirement. This adds an additional criteria line to the "New Group"
dialogue.
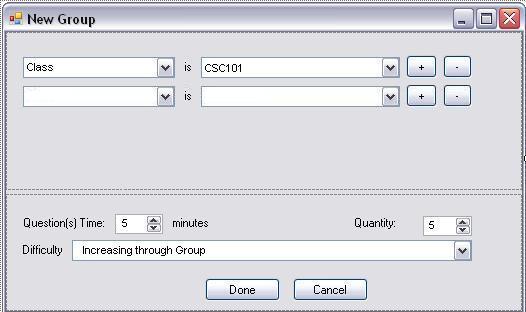
Figure 2.4.4: The New Group Dialogue with an Additional Criteria Line
To add the requirement that the group have only "True-False"
questions the user selects “Type” in the pull down list and
enters “True-False” in the blank.
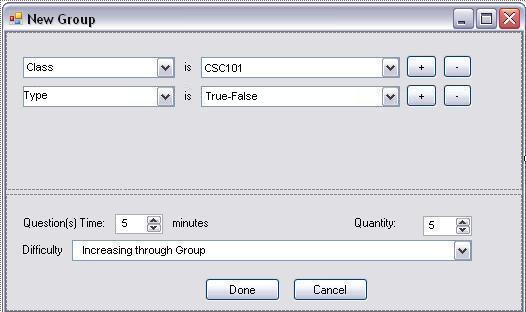
Figure 2.4.5: The New Group Dialogue with the Additional Criteria that the Type is Multiple Choice
The user now creates “New Group” by selecting “Done”.
The dialogue box is now complete and disapears. The user is is not presented with Figure 2.4.6
where "New Group" has been added to the list of groups.

Figure 2.4.6: Screenshot of Base UI with one group Added.
The user can now select “New Group” in the list of groups to change the name to something mnumonic
like “True-False Section”.
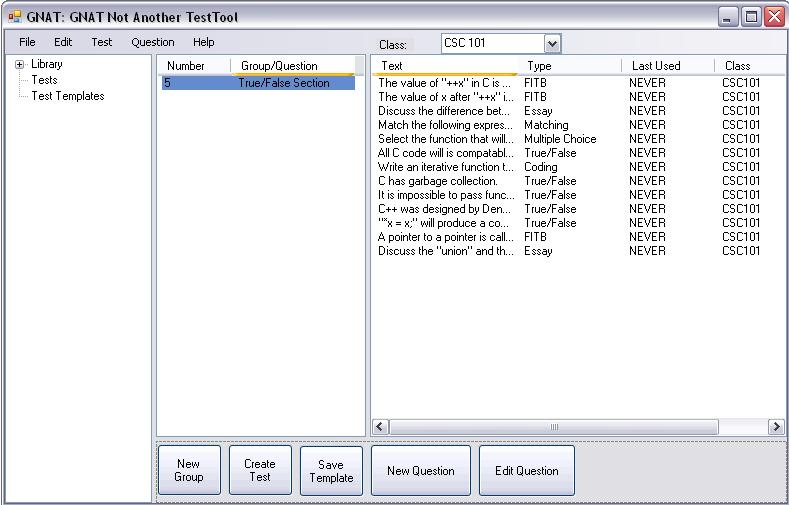
Figure 2.4.7: Screenshot of Base UI with group name changed.
The next portion of the quiz is required to have 3 fill in the blank questions. The user repeats the above steps,
filling in the "New Group" dialogue box with the relevant information.
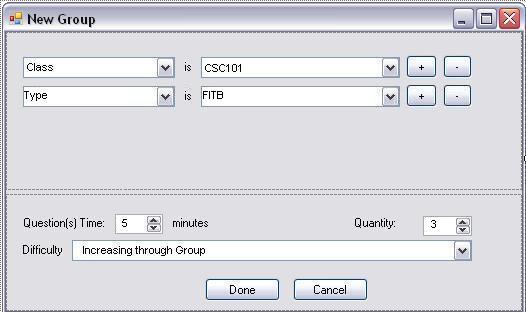
Figure 2.4.8: Screenshot of the New Group dialogue specifying 3 FITB questions
The user selects "Done" and creates a new group, which can be renamed, as above, "FITB Section".
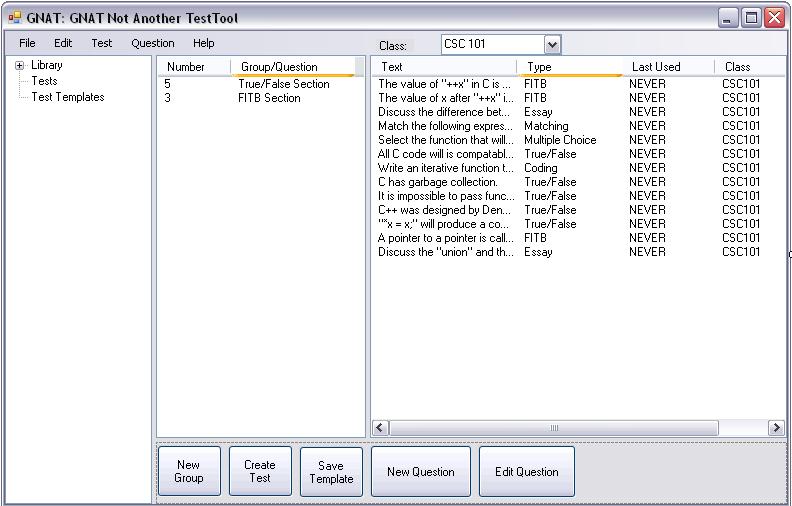
Figure 2.4.9: Screenshot of Base UI with both new groups
The final portion of the quiz is required to have 2 essay questions. The user repeats the above steps,
filling in the "New Group" dialogue box with the relevant information.
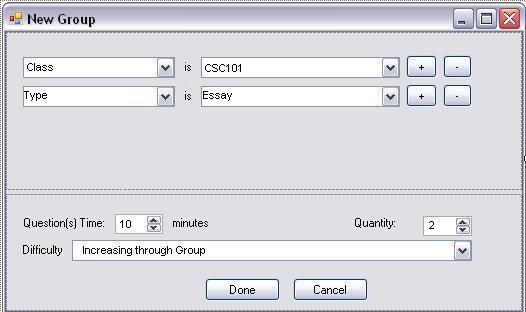
Figure 2.4.10: Screenshot of the New Group dialogue specifying 2 Essay questions
The user selects "Done" and creates a new group, which can be renamed, as above, "Essay Section".

Figure 2.4.11: Screenshot of Base UI with all groups completed
To save the template the user selects "Save Template" and "New Template" is added to the list of templates.
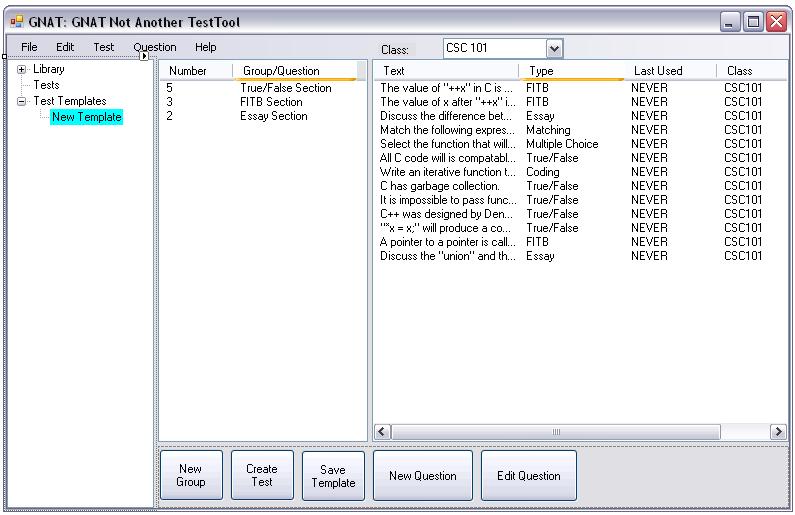
Figure 2.4.12: Screenshot of Base UI with "New Template" added
The user can then rename the template.
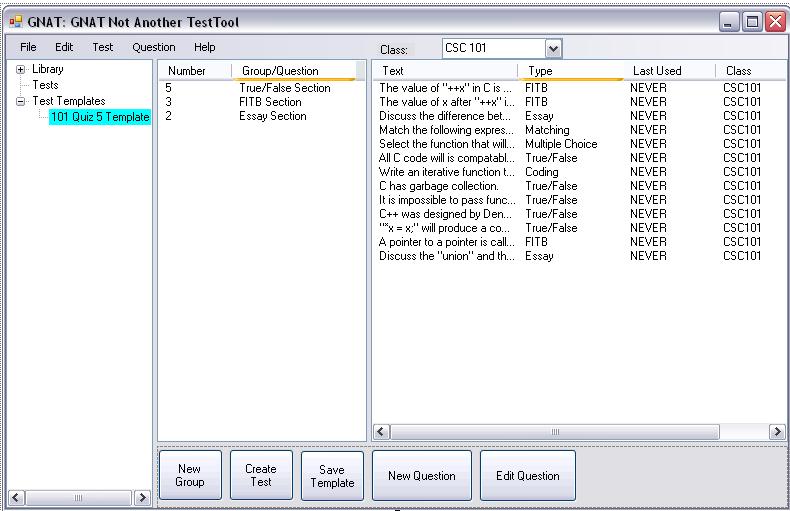
Figure 2.4.13: Screenshot of Base UI with "101 Quiz 5 Template"
At this point a test can be auto-generated based on this template by selecting “Create Test”.
This test will be called “New Test” in the test category. When created "New Test" will not
have any point values associated with each question. The point values and questions can be modified and
the test can be renamed and using the interface described in section 2.4.2 beginning with figure 2.4.16.


