Lightsaber Scene
Brian Balberchak
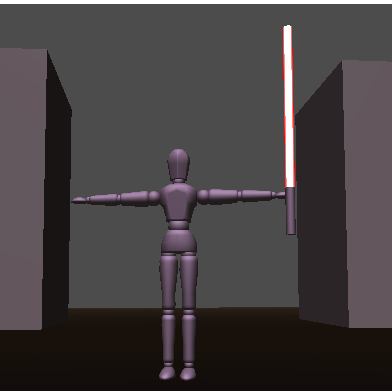
In my project, I wanted to showcase a scene with a lightsaber as the only light source. Initially,
I had envisioned a scene similar to the Darth Vader scene at the end of Rogue One, where I would've
had a fully articulated and animated dummy figure be able to swing its lightsaber, and the light
from the lightsaber would be properly reflected on the walls. Unfortunately I did not have the time
or energy to debug and implement these features in the relatively short period of time given, but I
was at least able to make the lightsaber blades look pretty decent using custom shaders, as well as
place some pillars to make the scene seem like a hallway of sorts.
Project Features
The key features included in my final project are:
- Lightsaber Shading
-
A custom shader was used to color the lightsaber blade. No matter what direction the camera is facing
the saber, it will always appear bright white in the center and taper off into the blade color on the
edges.
-
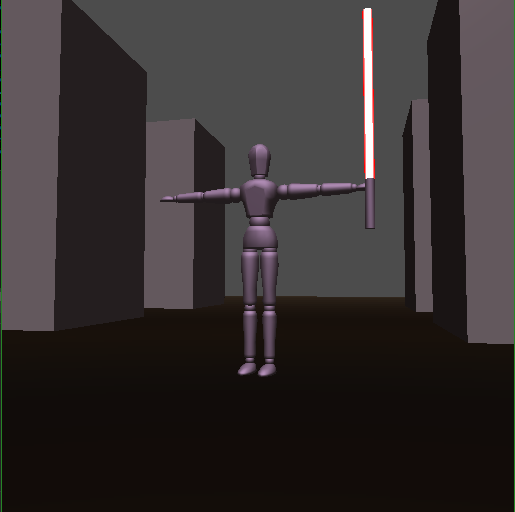
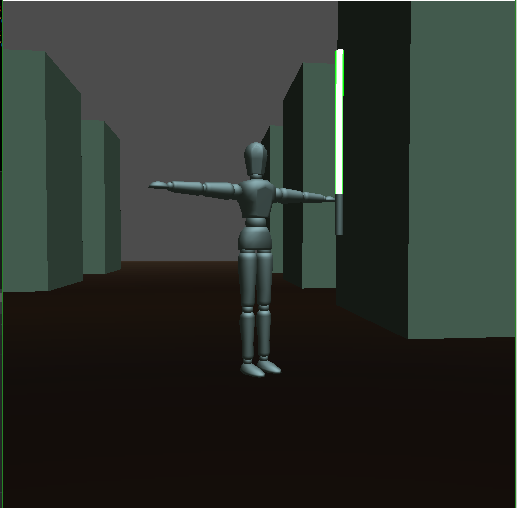
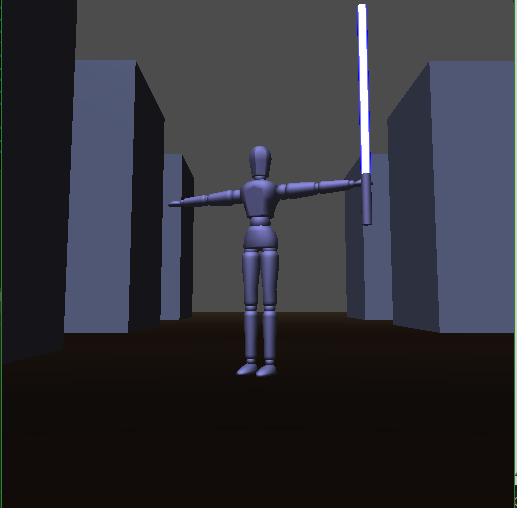
There are 4 different blade colors supported in this scene, which can be toggled with the 'L' key. The
blade colors include: Red, Blue, Green, and Purple.
- Blinn-Phong lighting
-
The lightsaber is supposed to act as the only light source in the scene.
- Movable Third-Person Camera
-
Previous labs and projects had us manipulate the camera position in a first-person view. I modified this code
so that the camera became fixed in a 3rd-person view behind the blade wielder. Whenever the player moves the
camera by clicking and dragging, the dummy snaps into place so that its back is to the camera.
Problems Encountered
The main problems I encountered while developing were:
-
Getting a lightsaber model rendered. Initially I had found a lightsaber .obj file, but the only issue with it
was that it was far too detailed for the scope of this project; it took about 90 seconds to load every time I
launched the program. I then tried generating my own .obj files for a simple cylinder to use as the base of
the blade, but I found several bugs with regards to the normals and lighting of the generated cylinders. I
then scoped the Internet for a simple cylinder .obj, and after about 15 minutes finally found one that could
work.
-
The shader for the lightsaber color had some bugs based on the y component of the view vector, i.e. the blade's
color would bleed into the whole cylinder so that the center vertical line would also appear as the blade color.
I fixed this issue by simply negating the y-component of both the view vector and the fragment coordinates; this
was done by simply setting the y-components to 0 when calculatinng the blade's color.
-
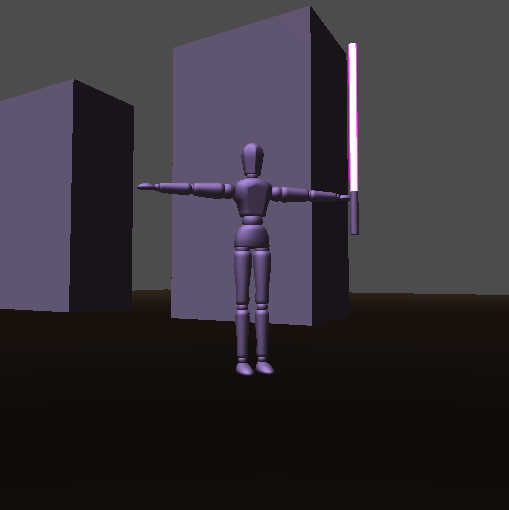
The light source was supposed to be at the location of the blade. This was not quite the case, as can be seen in
some of the screenshots above, where the blade is right next to a wall that is not lighted very well. Unfortunately,
I did not have the time or energy to properly debug this issue.
-
Animating the provided dummy model proved to be a bit of a nightmare. Every time I attempted to rotate a limb across,
say, the Z-axis, it would rotate in the X-axis instead. This was due to the need to rotate the entire model by 90
degrees in one axis before it appeared upright, but it made doing translations and rotations a nightmare. As is also
the case with the problem highlighted above, I did not have the time to properly debug the animation of the dummy
during this finals' week, so I had to leave the figure static.
Key Interactions
(W): Move dummy forward in scene
(S): Move dummy backward in scene
(A): Strafe dummy left in scene
(D): Strafe dummy right in scene
(L): Swap blade colors (Red -> Blue -> Green -> Purple)
Use mouse to move camera 360* around scene.
References
Bloom Effect Tutorial - Explains how to implement a bloom effect,
which would have been excellent for the lightsaber but I was not able to implement.
Material Values - A handy webpage for
implementing different materials. I used it to find the obsidian-like material for the pillars.
* I also referenced the provided Lab 9 code for using the dummy, Project 4 code for the movable camera, and Project
3 code for the swapping of shaders for the different lightsaber colors. *