CPE 473 Final Project
GLSL Shader Demonstration
By Brendan Asche
Description
This project demonstrates shaders written in GLSL. It presents a number of scenes inside a terrain environment (from my 476 project), with each scene depicting a different vertex and fragment shader pair. The shaders demonstrated are: texture mapping, shadow mapping, environment mapping, refraction (based on environment mapping), bump mapping (with a specular component), alpha mapping (transparency), and displacement. Below is a list of scenes and the shaders they demonstrate.
Controls: Use the w, a, s, d, c, and space bar keys to move the camera and use your mouse to look around. Use the number keys to select the desired scene number. Also, press “~” to bring up the console. Doing so gives you a mouse pointer back so you can close the window (or just type “exit” in the console and hit enter). Another useful console command is “pos” which prints the position and look-at of the camera. A frames-per-second counter will appear in the top left corner.
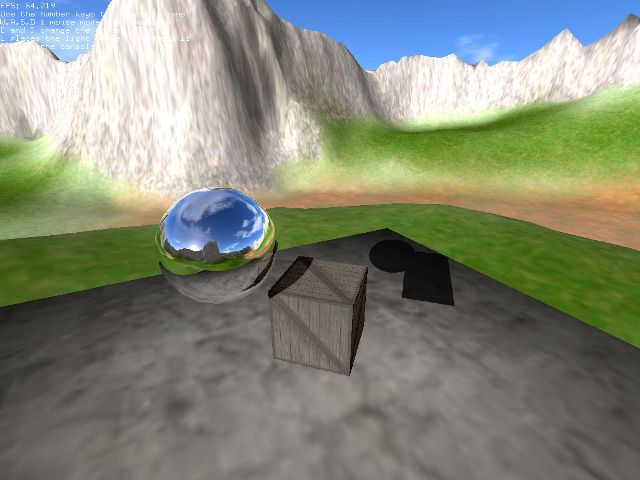
Scene 1
Scene 1, copied from my shader program, shows an environment mapped sphere casting a light mapped shadow on a box and a plane.
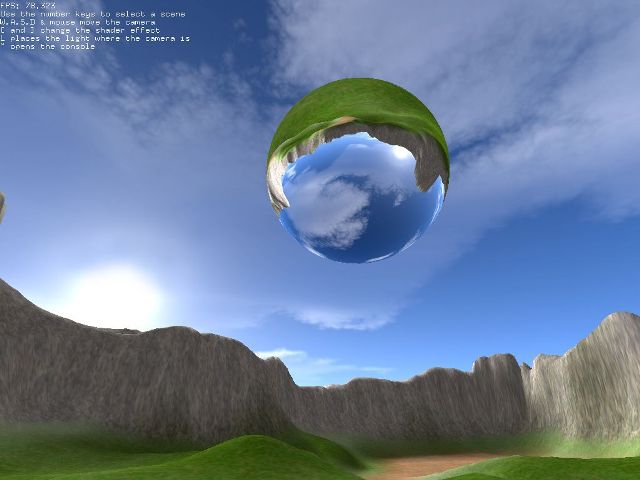
Scene 2
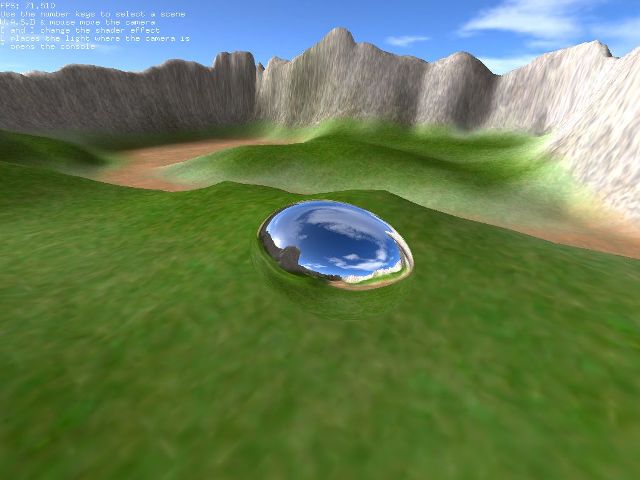
This scene contains just a sphere. Using the “[“ and “]” keys, users can change which shader OpenGL renders the sphere with. The shaders, in order, are: environment mapping, refraction, a bump mapped texture of the earth, a bump mapped texture of the earth with alpha mapping to make the oceans transparent, and an environment mapped sphere with displacement to make an animated blob. The “L” key places the position of the light source where the camera is (this only affects the two shaders that use the bump mapped earth texture).
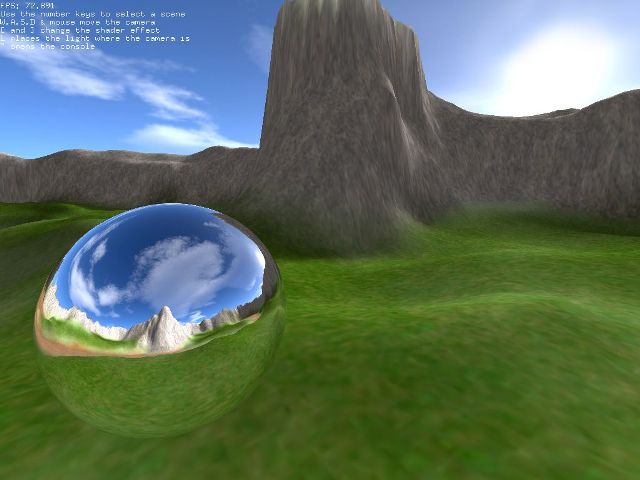
Environment Mapping
Refraction (using the same environment map)
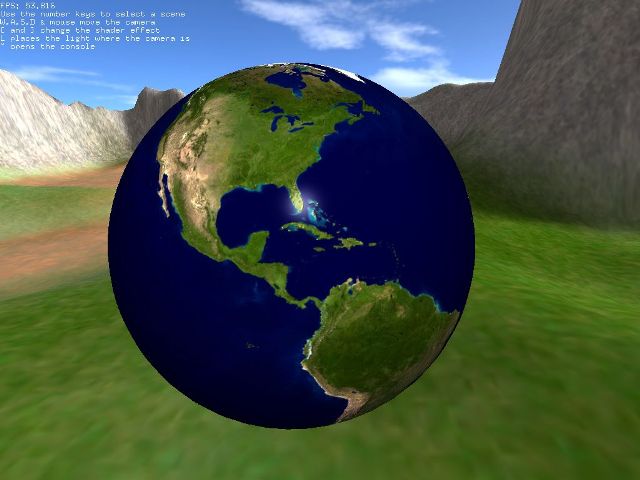
Bump mapping with a normal map and specular highlight
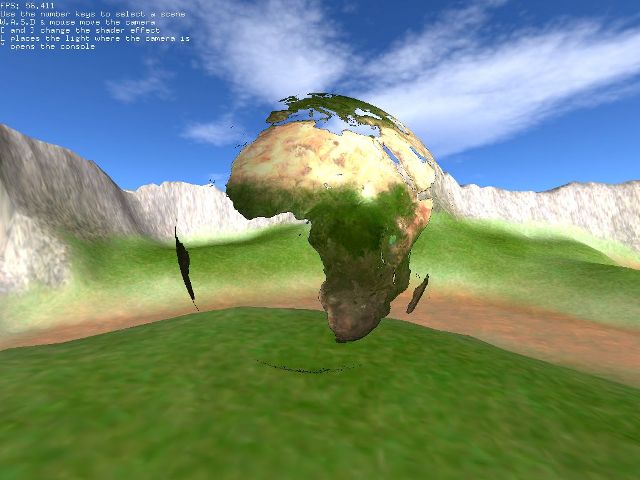
Alpha mapping applied to a bump map
Vertex displacement using sin and atan as functions of time
Scene 3
Here, a relatively low polygon mesh of the bunny again demonstrates environment mapping, refraction, and texture mapping. Unfortunately, I did not have texture coordinates for the bunny so the texture mapping looks bad. The “[“ and “]” keys change the shader.

Environment mapping
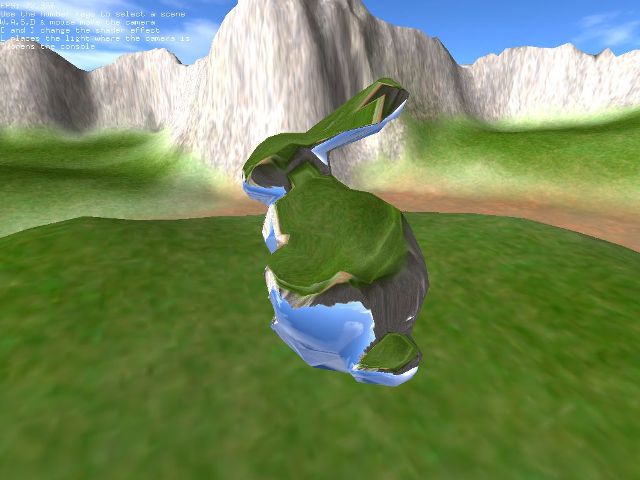
Refraction (using the same environment map)
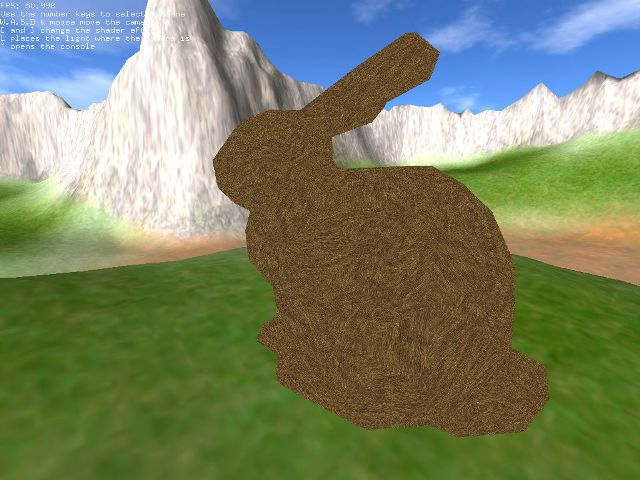
Texture mapping (without proper texture coordinates)
Scene 4
Scene 4 contains a box with a bump mapped brick texture and specular highlight. The “L” key places the position of the light source where the camera is. I found a good tutorial that described how to compute the TBN matrix completely inside the vertex shader, and it fixed numerous bugs for me. See my reference below.
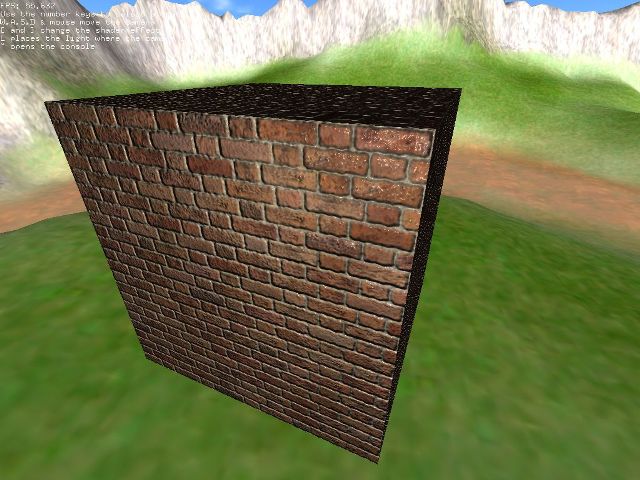
Bump mapped cube with a specular highlight
References
Environment Mapping:
RareWtFailWhale. “Environment/Reflection mapping in GLSL.” Internet: http://www.pouet.net/topic.php?which=6825, [Mar. 18, 2010].
J. Guinot. (2006, Apr. 15). “The Art of Texturing Using The OpenGL Shading Language.” Internet: http://www.ozone3d.net/tutorials/glsl_texturing_p04.php#part_4, [Mar. 18, 2010].
Calculating the Tangent-Binormal-Normal
Matrix (totally inside your vertex shader):
J. Guinot. (2006, June 1). “Mesh Deformers with the GLSL.” Internet: http://www.ozone3d.net/tutorials/mesh_deformer_p2.php#tangent_space, [Mar. 18, 2010].
Bump mapping:
F. Sanglard. “BumpMapping with GLSL.” Internet: http://www.fabiensanglard.net/bumpMapping/index.php, [Mar. 18, 2010].