Normal Mapping
Nikhil Kowshik
Overview
Since its inception, nomrmal mapping (also known as Dot3 Bump Mapping) has become a standard way ofenhancing
rendered geometry's detail while minimizing render time. In order to use normal mapping we need a few things.
First, we need a high polygon-count model (this can be created in commercial modelling software). Second,
we need a low polygon-count version of this model. Once we have these two things we can generate a normal map
and begin.
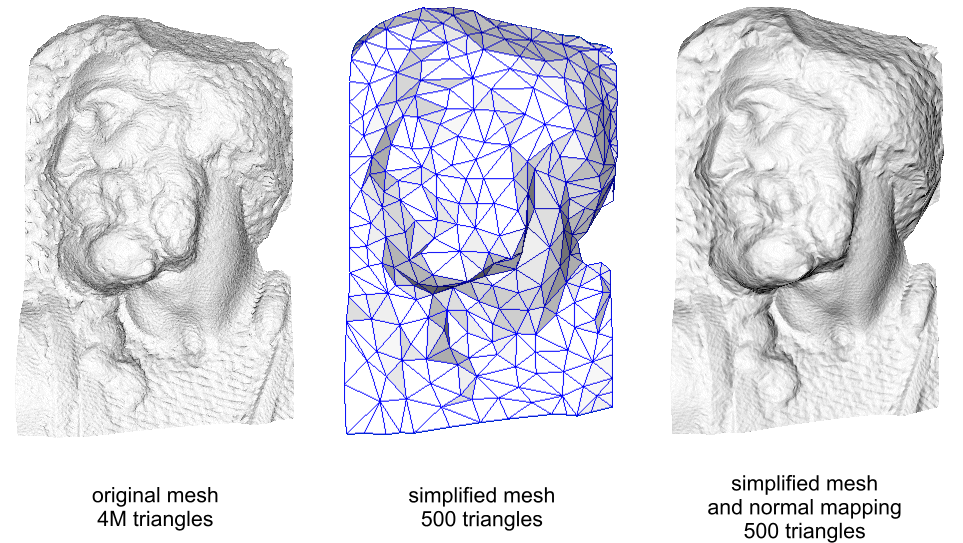
A simple way of explaining what normal mapping is is this: using the high polygon-count model we compute the
normal for each vertex and store this data in an image file, called the normal map . During run time, we
load the low polygon-count version of the model and, rather than using this model's vertex normal information we
use the normal information stored in the normal map. This way, we can light the low polygon-count's model so it
will look more like the high polygon-count version. Below is an example of this process:
For this project I used a model of a Tyranasaurus Rex, provided by the instructor, and a generated normal map, also
provided by the instructor. From there, I had to implement the vertex and fragment shaders that handled the shading
of the model.
Implementation
Implementing normal mapping proved to be far more work that I initially thought it would be. The normal map is
defined in terms of a different coordinate space, called tangent space. In order to correctly use the normal
information in this normal map we need to transform the ligh and eye positions/vectors into tangent space. To do
this we need two other pieces of vertex information: the vertex tangent and vertex binormal. Only then can we
compute lighting using a TBN matrix. The math behind findint the vertex tangent vector and creating the
transformation matrix is beyond the scope of this page but in the end we get a matrix that looks like this:
| Tx |
Ty |
Tz |
| Bx |
By |
Bz |
| Nx |
Ny |
Nz |
Where T is the tangent, B is the binormal, and N is the normal. Once we have this we can transfrm the light and
eye vectors to tangent space.
Each of the shaders is responsible for a different part of normal mapping. The veretx shader uses ths tangent and
normal and binormal to create the TBN matrix and transpose the eye and light vectors. The fragment shader uses
these vectors as well as the corresponding normal from the normal map to calculate the lighting for the model.
Results
My results for this assigmentns were relatively positive. Normal mapping works on the Tyranasaurus Rex model. In
addition to normal mapping I created a small stick figure for size comparison (the figure is almost to
scale). I also made a ground plane and textured it with grass; I made a 'sky'; I also added trees to the scenery.
The trees' positions are randomly generated when the program starts.
The next section contains screenshots of the program.
Screenshots
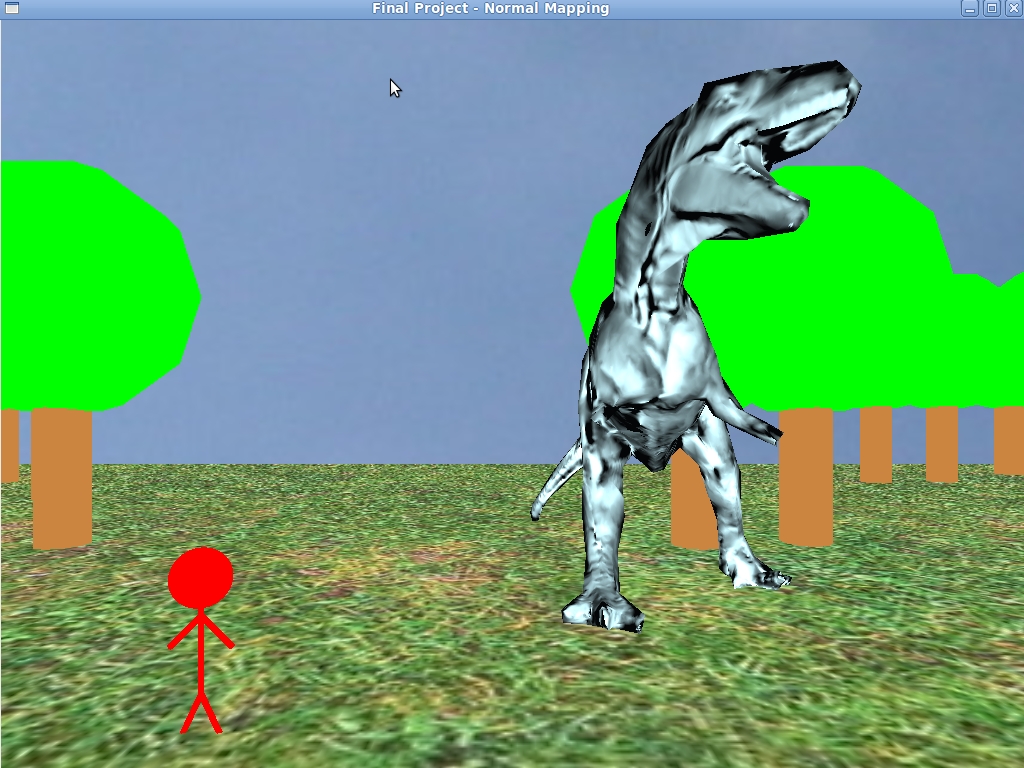
A simple screenshot with both the dinasaur and the person:
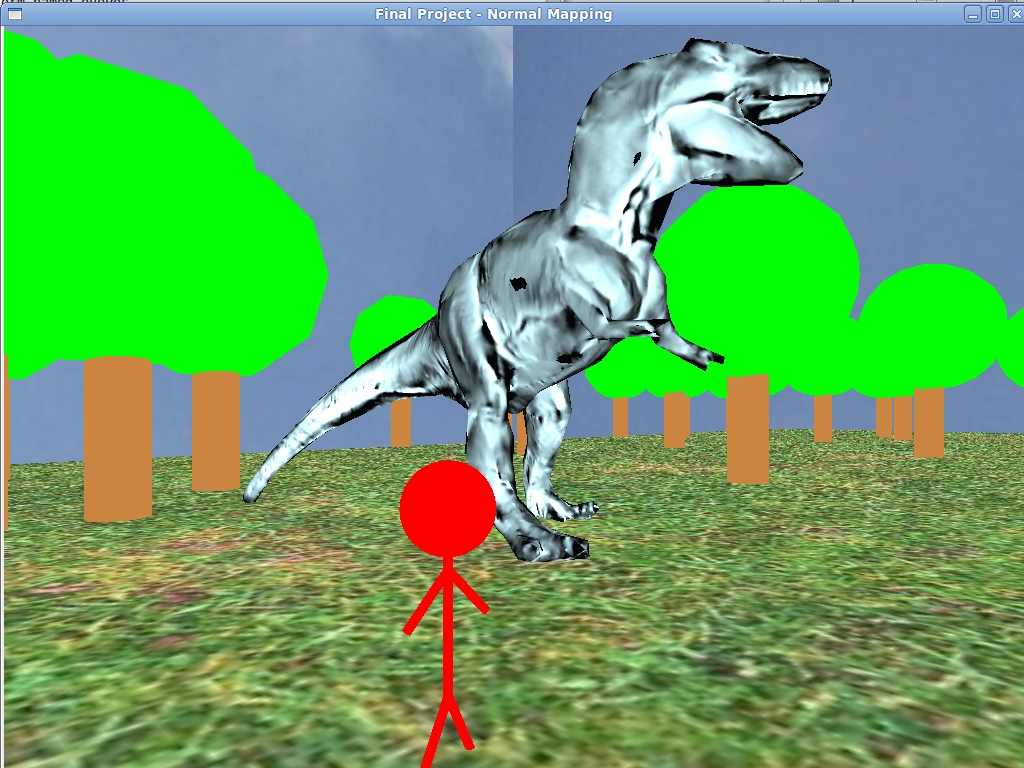
Another simple screenshot with both the dinasaur and the person with a different view point:
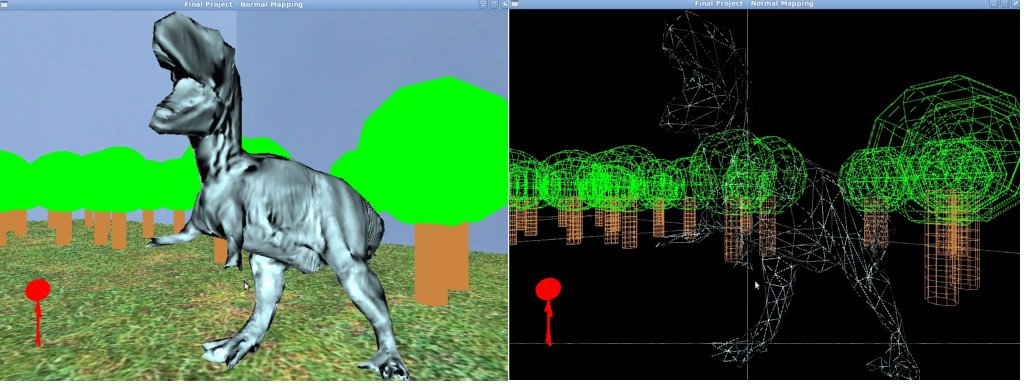
The next two screenshots swho the same view with solid mode and wireframe mode, respectively. This was done to
show the detail added to a simple model. Nothis that the ridges on the stomach are not modeled physically with
polygons.:
References
These are the references I used during the project.
Wikipedia - Normal Mapping
Paul's Projects - Bump Mapping
oZone3D.net - Bump/Normal Mapping
OpenGL Normal and Specular Mapping Shader
GPWiki - GLSL Bump Mapping