A task is a "to-do" item in a calendar. To schedule a task, the user selects
the `Task' command in the `Schedule' menu, in response to
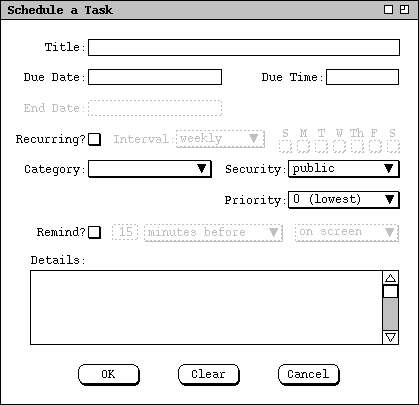
which the system displays the dialog shown in Figure 95.

Figure 95: Task scheduling dialog.
The following fields in the task scheduling dialog hold the same form of information as the appointment scheduling dialog in Figure 6:
The date and time fields of a task specify when the task is due. A task has no specific start time or duration. The `End Date' field applies to recurring tasks; it is initially disabled since the default for tasks is non- recurring. The `Security' for a task is one of two levels: `Public' or `Private'. The `TitleOnly' and `Confidential' security levels do not apply to tasks, since these levels are only meaningful for scheduled items that have a start time and duration, i.e., appointments and meetings.
The `Priority' for a task is fundamentally different than for the
other types of scheduled item. For a task, priority is a numeric value that
defines the relative importance among tasks. The value is between 0 and 10,
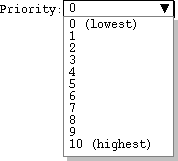
with a higher value indicating a higher priority. Figure 96 shows the task
priority pulldown menu. For documentation purposes, the menu lists
parenthetically that 0 is the lowest and 10 the highest priority. These
documentary words do not appear in the data field itself for the 0 and 10
values.

Figure 96: Task priority menu.
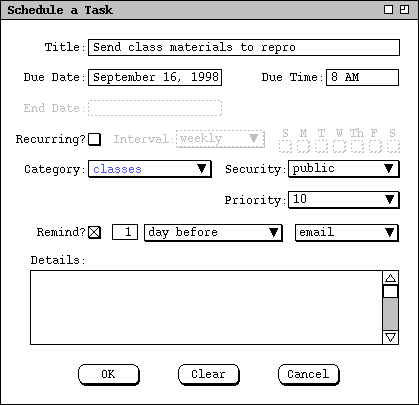
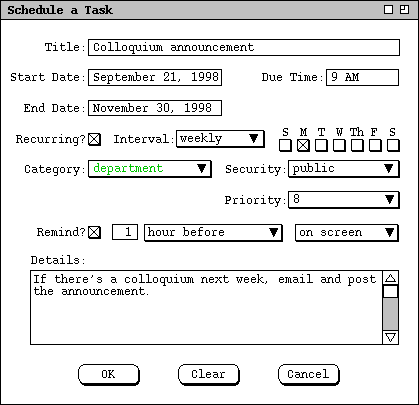
Figures 97 and 98 show two filled-in task scheduling dialogs for tasks that
have appeared in the figures of earlier scenarios.

Figure 97: Scheduling a non-recurring task.

Figure 98: Scheduling a recurring task.