This scenario demonstrates a user editing and deleting a group. Editing groups are useful for changing group names or adding and removing members from a group.
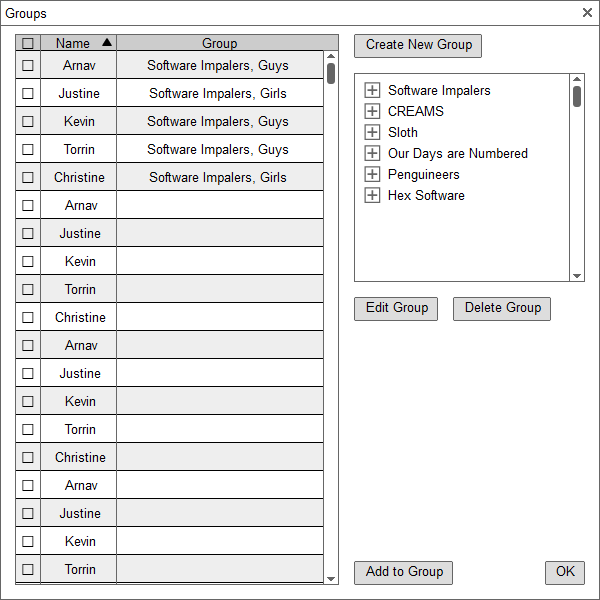
To edit or delete a group, the user selects Add Group from the
Tools drop down menu to open the Group dialog. The system displays
the dialog shown in Figure 1.
Figure 1: Editing a Group.
In this example, some groups are already created. To edit a group, select Edit Group to bring up a similar dialog as Add Group shown in Figure 2.
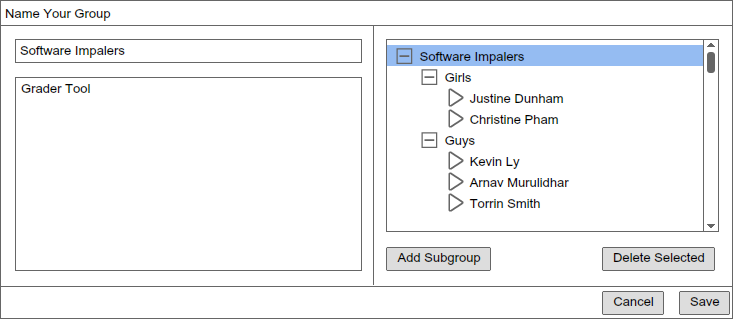
Figure 2: Pre-filled Group Settings.
In this example, the Software Impalers are being edited, and their group information is already pre-filled such as their name, description, members, and subgroups. From here, the user can alter attributes, then click on Save to save changes or Cancel to discard changes and restore the original state of the group.
Deleting groups will remove group from the gradebook. All students associated with that group or its subgroup will automatically be removed from that group. To delete a group, on the Managing Groups dialog, select a group in the list of groups, then click on Delete Group. A final confirmation box will appear as shown in Figure 3.

Figure 3: Confirm Delete.
If the user clicks on Confirm then the group will be removed from the
gradebook. If the user clicks on Cancel then the user will be brought
back to the original dialog without changes.