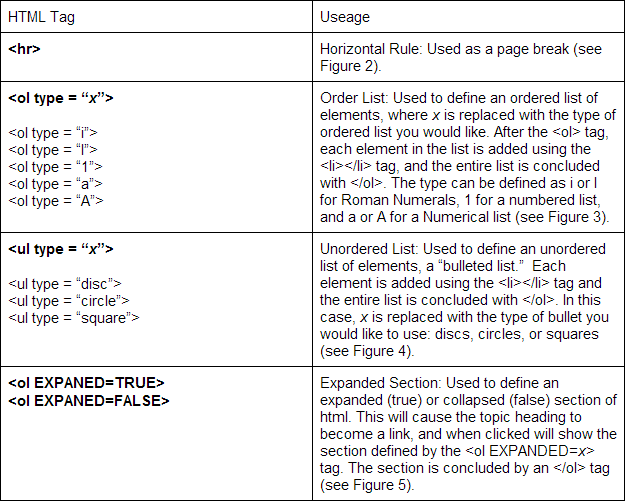
Figure 1: The HTML tags.
As a feature of the EClassroom, a user can import an HTML file, as seen in the previous section. A user can create a presentation with standard HTML tags, including paragraph markers, lists, and font characteristics. In addition to these standard tags, the user can add a page break using the horizontal rule tag, <hr>. This will indicate to the program where to break for the next page. In Figure 2, the user adds the <hr> tag after their notes to indicate the page break.

Figure 2: The <hr> tag.
As well as having the ability to add page breaks, the user can also add different style bulleted lists by adding type definitions to the <ol> (ordered list) tag. These include definitions for numbered, alphabetical, and roman numeral styled lists. Each of the following can be seen in Figure 3, along with their HTML code. For comparison purposes, the same text was used for each list.

Figure 3: The <ol> tag type definitions.
Another form of lists that can be added to HTML slides are bulleted lists. This option can also be implemented using type definitions within the <ul> (un-ordered list) tag using circle, discs, or squares. An example of each of these bulleted lists can be seen in Figure 4, along with their HTML code.
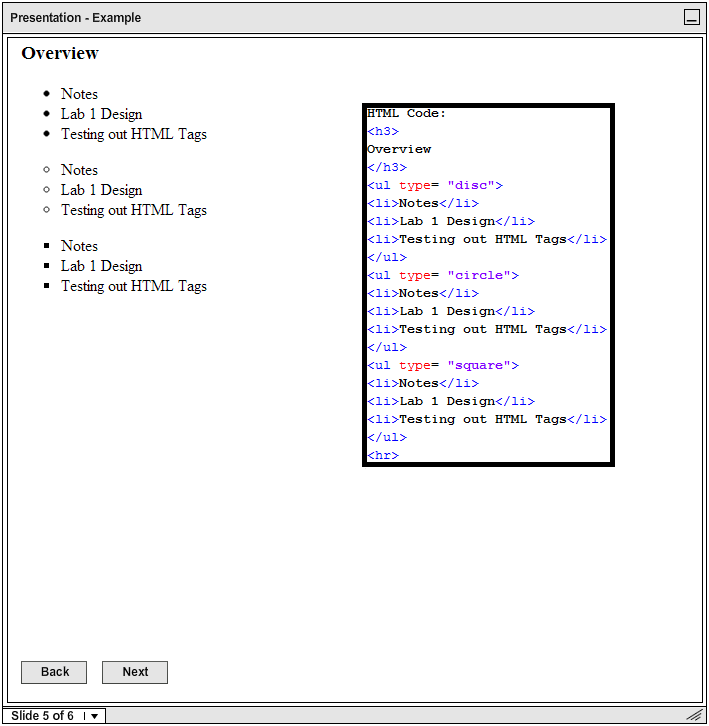
Figure 4: The <ul> tag type definitions.
The program will also allow a user to click on a heading to expand extra notes that can be hidden from view. This feature will be done using a definition, EXPANDED, to both the ol and ul tags. In order to set a collapsable section, use the <EXPANDED=FALSE> tag. This will allow the user to click on a topic heading, and expand the text within the EXPANDED section, setting the value to TRUE. The user can click on the heading again, causing the value to be set back to FALSE and collapse the section. An example can be seen in Figure 4.

Figure 5: The <EXPANDED> tag definition.