Figure 2.3.1: Menus to start creating a new course. The Course submenu item is highlighted when the user hovers their mouse over it. Clicking on it brings up the Create Course window.
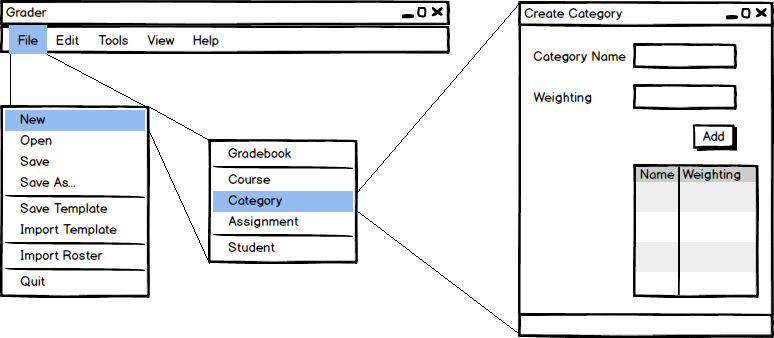
From the File menu, a user can create new courses, categories of assignments, and assignments. Figure 2.3.1 demonstrates the menu interactions necessary to enter the Create Course window.
Figure 2.3.1: Menus to start creating a new course. The Course submenu item is highlighted when the user hovers their mouse over it. Clicking on it brings up the Create Course window.
The Create Course window has four text boxes, two drop menus, and finally a Cancel and Finish buttons. A user can navigate between the text boxes and drop menus by using the Tab key or clicking on the individual elements.
The Course Name text box has initial focus when the Create Course window opens, and the user can immediately type to begin filling out the field.
When the user clicks on the Department drop menu, the list of departments (retrieved from Cal Poly’s servers) is pulled down as in Figure 2.3.2. The user then scrolls to find the department they wish the course to be in and clicks on that department to select it. The user may also scroll using arrow keys and select using Enter.

Figure 2.3.2: The Department drop menu (left) and Term drop menu (right). The currently selected item is highlighted in each.
The Term drop menu lists the current term upon opening the screen and displays all four terms when clicked. The Year text box lists the current year, but a teacher may edit this.
Clicking the Cancel button closes the window and discards any settings. No new course is added. The Grader tool is left as it was before the user entered the menu.
The Finish button is greyed out and unclickable (as seen in Figure 2.3.1) until the user fills all the forms. No field may be left empty. Upon filling all the fields, the Finish button with no longer be greyed out and will be clickable as seen in Figure 2.3.3. Clicking on the Finish button before filling all the fields will produce no result. Once a user has filled all the fields and clicks on the Finish button, the Create Course window closes and the Grader tool shows the new course on an empty spreadsheet as seen in Figure 2.3.4.
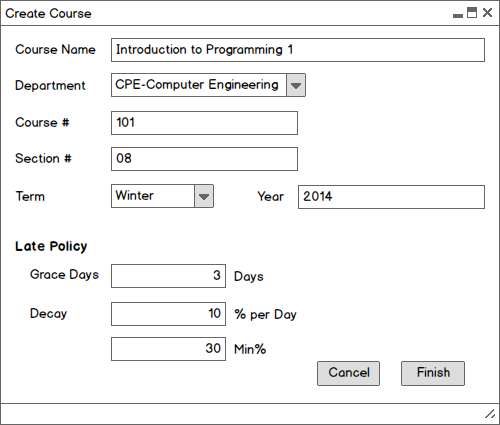
Figure 2.3.3: A completed Create Course window; the Finish button is clickable.
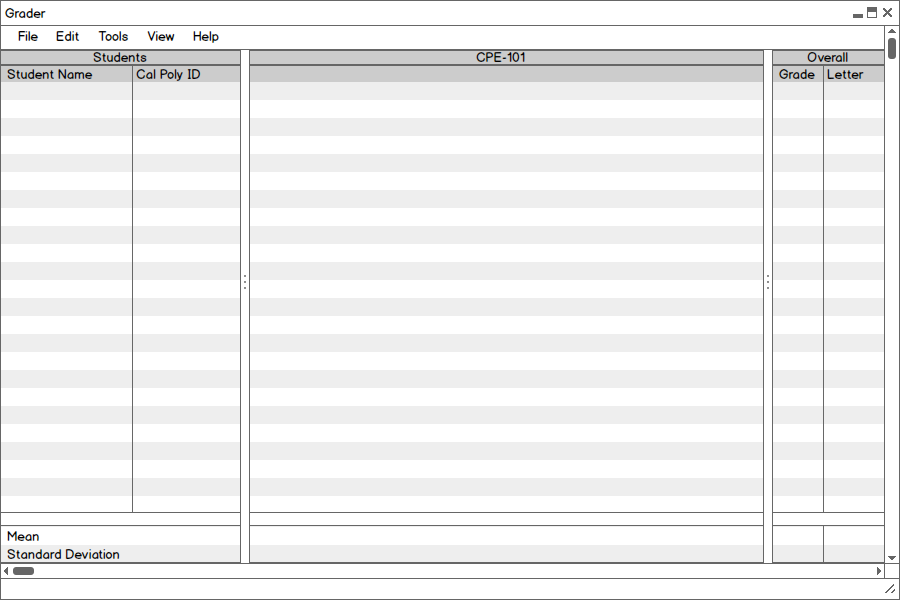
Figure 2.3.4: An empty spreadsheet for the newly created course.
Figure 2.3.5: The create assignment category dialogue.
Once categories have been created, the user can now begin to add assignments. The dialogue
for that is shown in Figure 2.3.6.
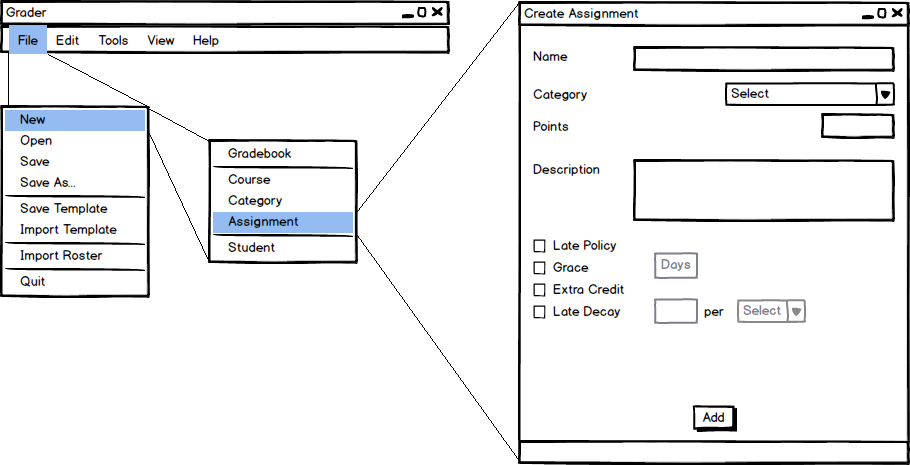
Figure 2.3.6: The Create Assignment dialogue.
The Create Assignment category contains 3 text fields, a combo box, and a series of
checkboxes. The user will enter the name of the assignment in the Name field. Additionally,
the Points field contains a space where the user can enter a numeric value representing how
much the assignment is worth. The combo box contains the categories that were previously
created from Figure 2.3.5. A description for the assignment goes in the Description text box.
The check boxes include options for a Late Policy defined by the teacher and whether or not
this assignment is Extra Credit. Also, the Grace check box is used to determine whether
there is a grace period or not to turn the assignment in. The Decay box is used to mark off
assignments that are turned in after they are due.
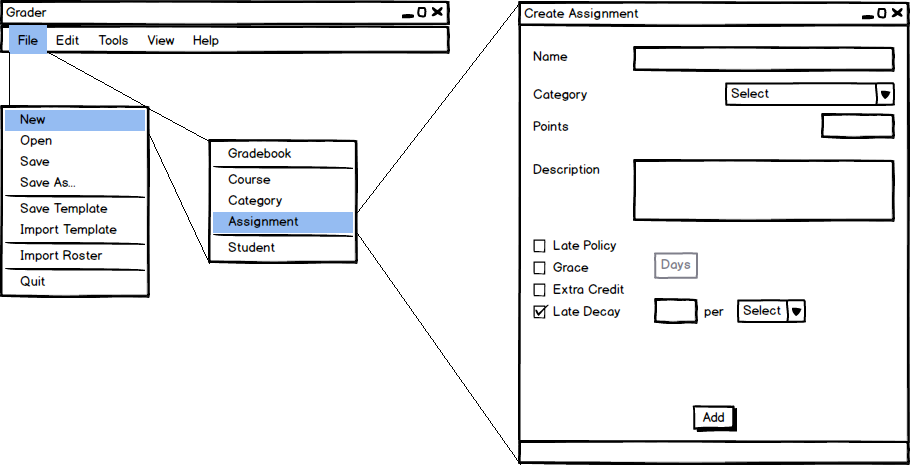
Figure 2.3.7: The Create Assignment dialogue box after the Decay
checkbox has been checked.
Once the Decay checkbox is checked, the greyed out text field for the amount taken off
per day becomes editable. At the same time, the combo box to determine whether points are
taken off per day, minute, or hour becomes clickable as well. The Add button will add
this assignment to the spreadsheet.