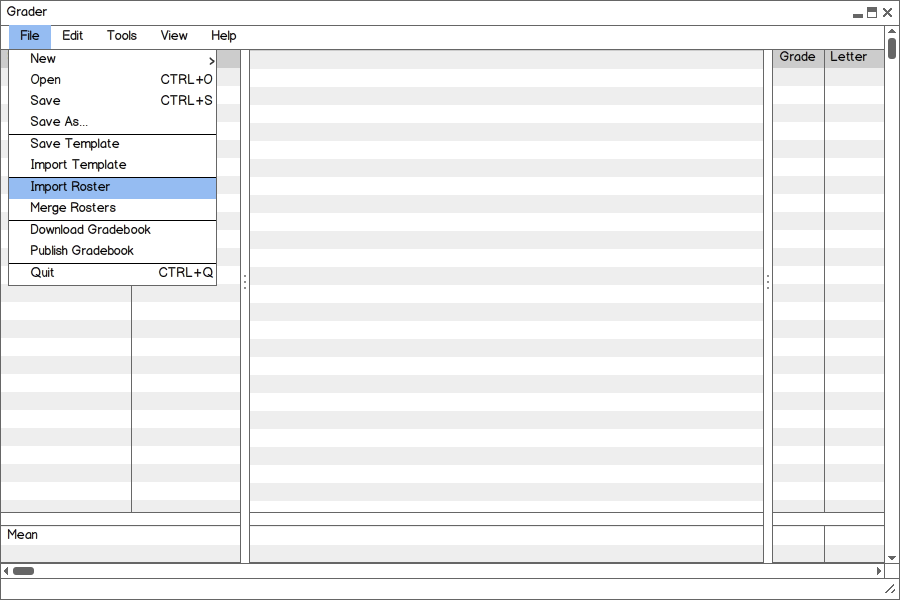
Figure 2.4.1: Menus to start importing a roster. The user hovers the mouse over File→Import Roster. Clicking on Import Roster brings up the Import Roster window.
When adding students to the Grader, the user has two options: importing a roster(s) provided that the user have access to a school’s registrar, or manually entering students. Once students have been entered into the Grader, the user can manage the class roster by either modifying students, deleting students, or creating groups for students. The follow describes the user interaction for each scenario:
Below, Figure 2.4.1 one shows how to begin importing a roster into the Grader. From the menu bar, select File→Import Roster.
Figure 2.4.1: Menus to start importing a roster. The user hovers the mouse over File→Import Roster. Clicking on Import Roster brings up the Import Roster window.
The system will then display a dialogue box such as the one in Figure 2.2.1. As stated above, in order to import a student roster, the user must have access to a school’s registrar. Here is where the user will input the information necessary to connect to a school server. The Host Name field is the name of the server where the user will be able to send final grades. The User Name field is the specific user name which should have been given out by the registrar upon employment. The Password field is the users password for the given user name. There is also a Merge Rosters check box which the user can select in order to have the rosters of multiple sections of the same course merged together to create one master roster.
The user will not be able to import unless all fields are completed. Once all fields are filled out, click the Import button.
Figure 2.2.2 shows what the Grader will look like after importing the roster.
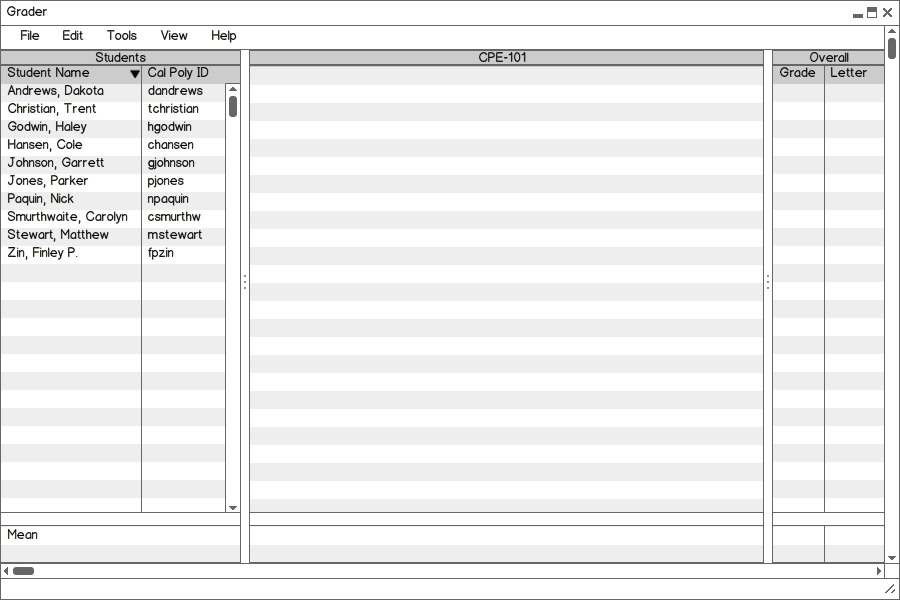
Figure 2.4.2: The Grader after importing a roster.
In the event that the user would like to add a student to a course who isn’t on one of the imported rosters, there is a way to manually enter a student. Figure 2.4.3 shows how to start this process. On the menu bar, select File→New→Student. The New Student dialogue as shown in Figure 2.4.3 will then pop up.

Figure 2.4.3: Dialogue to start manually entering a student. The user hovers the mouse over File→New→Student. Clicking on Student brings up the New Student window.
The first thing the user must select is the Course and Section number to add the student to. As seen in Figure 2.4.4, if the desired class is not shown, the user may select New Course (the last option in the course drop down menu) in which the user will be directed to the dialogue as discussed in Section 2.2.2. (Note: if the user would like to create a new section, this would fall under the category of New Course as each section number is linked up to a corresponding course.)
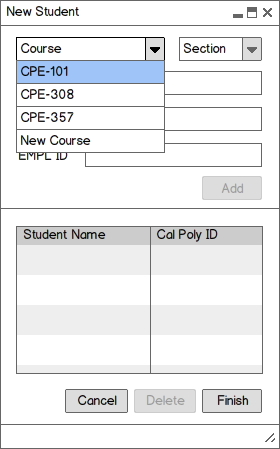
Figure 2.4.4: The New Student dialogue with the Course drop down menu expanded.
In the Name field input the student’s first name and last name comma separated with the last name first. If there is a middle name to include, enter it as part of the first name. The Cal Poly ID field is the user name that the student uses to login to the same server as when used to import rosters (see Section 2.4.1). If the student is not enrolled, the user must input a User ID of choice. (Note: convention is typically the first initial of the student’s first name, followed by the student’s last name.) Similarly, the EMPL ID field is the student ID number for that student at Cal Poly. Again, if the student is not enrolled, the user must enter a number of choice. Students cannot be added unless there is a value for every field. If there is at least one field that has no value, the Add button will be disabled. An example of a completed dialogue box for adding a student is shown in Figure 2.4.5.
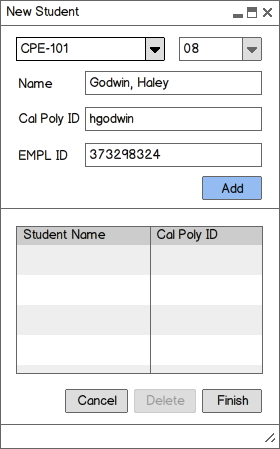
Figure 2.4.5: Example of a filled in New Student dialogue box.
Once all the information for a student has been entered, click the Add button highlighted in Figure 2.4.5. The student will then be added to a table directly underneath the Add button, as shown in Figure 2.4.6.
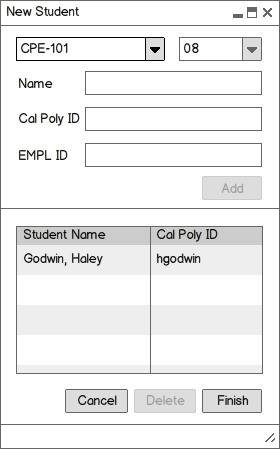
Figure 2.4.6: Example of a New Student dialogue box after the user clicks the Add button.
The user can keep entering in new students by entering in new information for each field and clicking Add until all the desired students have been added. The students will be added to the table in alphabetical order by last name. Figure 2.4.7 shows the table filled will multiple new students. If the user is unsure if a certain student has been added or not, the user can click the Student Name or Cal Poly ID columns to sort by first name or last name respectively. If the user would like to delete a student from the table, highlight the student to be deleted in order to enable the Delete button, as shown below, and then click the Delete button. Once finished, click the Finish button, highlighted below, and all the students will now be added to the roster of that course and section. If only one student is being added, the user must click Add before clicking Finish or the student will not be added.
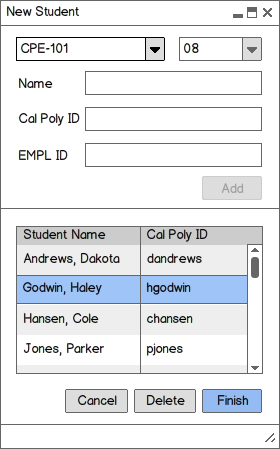
Figure 2.4.7: Example of a New Student dialogue box after the user has added multiple students.
Below, Figure 2.4.8 shows what the Grader looks like after the manually added students have been added to the same imported roster in Figure 2.4.4.
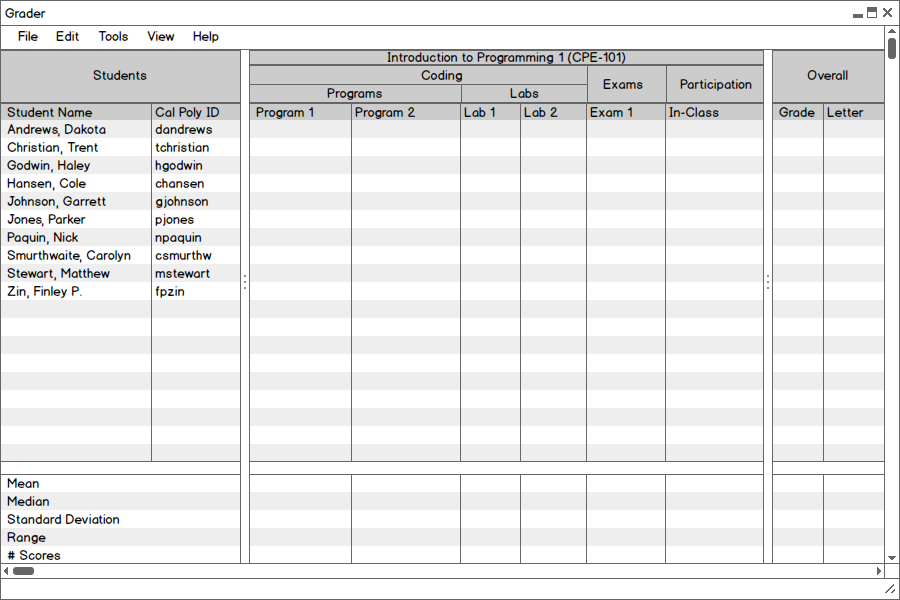
Figure 2.4.8: The Grader after manually adding students.
After entering in students to the Grader, whether via import or manually added, the user has the ability to edit any aspect of a student or delete a student.
To edit a student, hover the mouse over the student to modify and right click the mouse. The students name will then become highlighted. Figure 2.4.9 shows the small menu that will appear with three options: edit, delete, and manage. Click the first option, Edit.
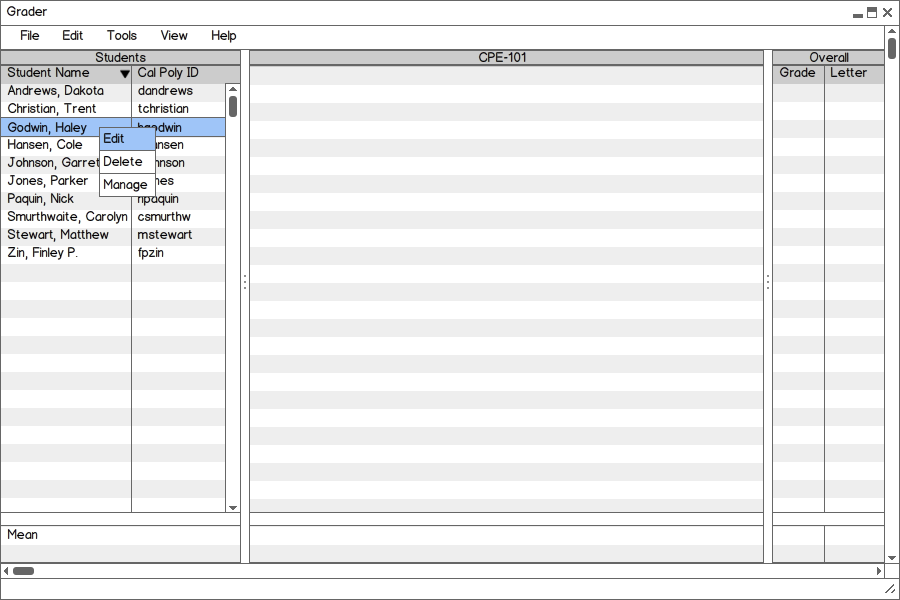
Figure 2.4.9: Right clicking a student and clicking Edit
A dialogue box like the one below in Figure 2.4.10 will then pop up in the center of the page which will show the student’s Name, Cal Poly ID, and EMPL ID. The user can alter any of the fields, but will not be able to leave any fields blank. Once finished modifying the student, click the OK button highlighted in Figure 2.4.11.
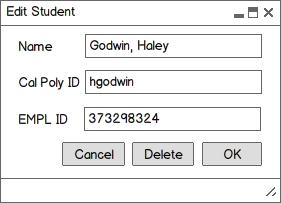
Figure 2.4.10: The Edit Student dialogue box.
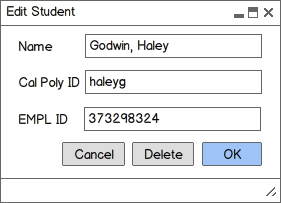
Figure 2.4.11: The Edit Student dialogue box with edits and OK button highlighted.
The dialogue box shown in Figure 2.4.12 will pop up asking if the user would like to confirm these changes. Click No to return to the spreadsheet without any student modifications, or Yes to return to the spreadsheet with all the modifications made in the Edit Student dialogue which can bee seen in Figure 2.4.13
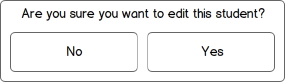
Figure 2.4.12: The Edit Student confirmation box.
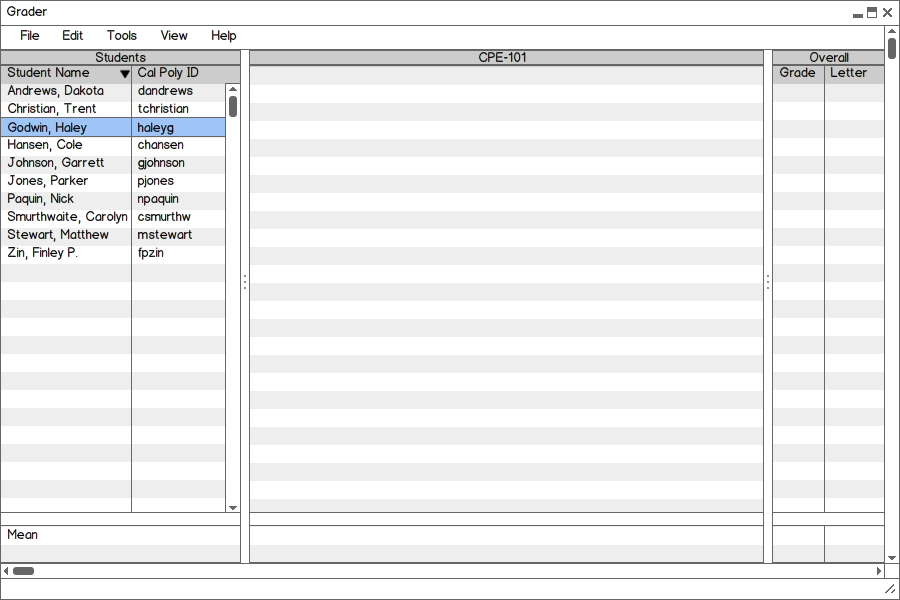
Figure 2.4.13: The spreadsheet after the Edit Student modifications. The student that was just edited is highlighted.
There are two ways to delete a student. The first is to hover the mouse over the student to delete and right click the mouse. The students name will then become highlighted and the same menu as show in Figure 2.4.9 will appear. Click the second option, Delete.
The second way to delete a student is when right clicking the mouse over a student, click Edit. At the bottom of the Edit Student dialogue that will pop up, click the highlighted Delete button as shown in Figure 2.4.14.
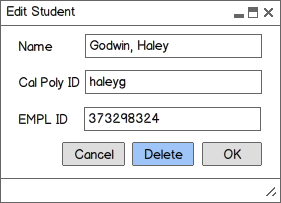
Figure 2.4.14: The Edit Student dialoge box with the Delete button highlighted.
In both cases, the dialogue box shown in Figure 2.4.15 will pop up asking if the user would like to confirm these changes. Click No to return to the spreadsheet without deleting the student, or Yes to return to the spreadsheet with the student removed from the spreadsheet. Figure 2.4.16 shows the spreadsheet with the same student highlighted in Figure 2.4.9 deleted from the roster.
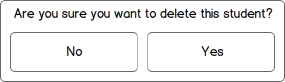
Figure 2.4.15: The Delete Student confirmation box.
Figure 2.4.16: The spreadsheet after the Delete Student confirmation box. Notice student "Godwin, Haley" has been removed.
To create groups for the students, hover the mouse over any student and right click the mouse. That students name will then become highlighted, but in this situation it doesn’t matter which student is selected. The same menu as show in Figure 2.4.9 will appear. Click the third option, Manage.
The dialogue shown in Figure 2.4.17 will then pop up. There are two drop down menus in the top left of the screen to show the course and section of the students the user is managing. These will be auto-filled with the course the user was just interacting with, but if a different course or section is desired this can be manually changed via the drop downs. Directly below the drop downs in the entire roster for that course. To create a new group, click on the New Group + tab highlighted below and enter the name for the group.
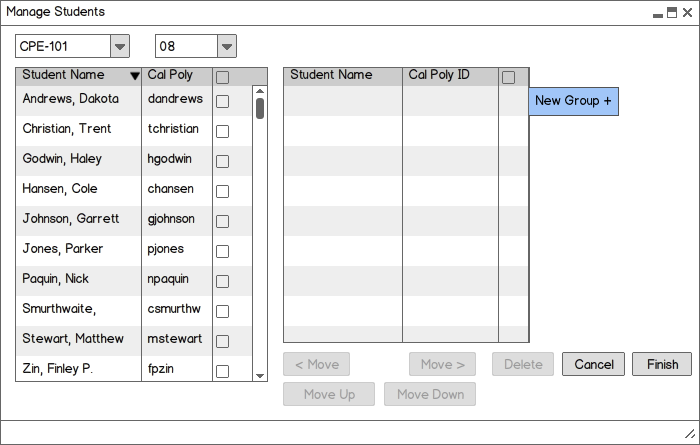
Figure 2.4.17: The Manage Students window.
Notice how the Delete and Move buttons are disabled. The Move Up and Move Down buttons will become available when at least one student is selected in any table, the Move > button will become available when at least one student in the left table is selected, the < Move will become available when at least one student in the right table is selected, and the Delete button will become available when a group is selected.
As many groups as desired can be created by repeatedly clicking New Group + and entering in new group names. Figure 2.4.18 shows the dialogue with multiple groups created.
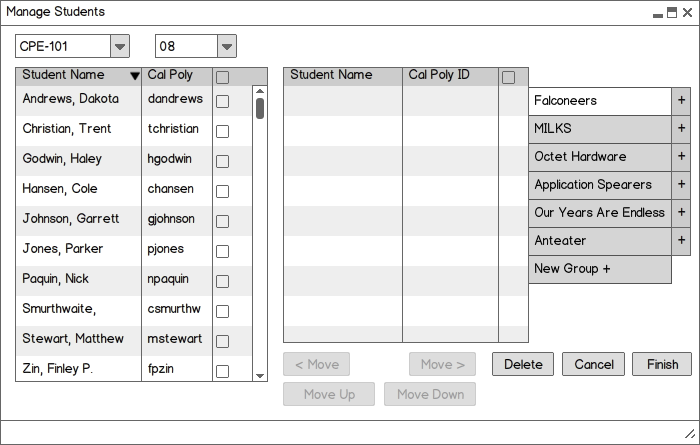
Figure 2.4.18: The Manage Students window with multiple groups added.
To move students to a group, select the check boxes for each student in the third column in the table on the left as seen in Figure 2.4.19. At the bottom, the right Move > button will be enabled. Click this button to move students from the roster table on the left to the desired team table on the right. Figure 2.4.20 shows the after effect of this action.
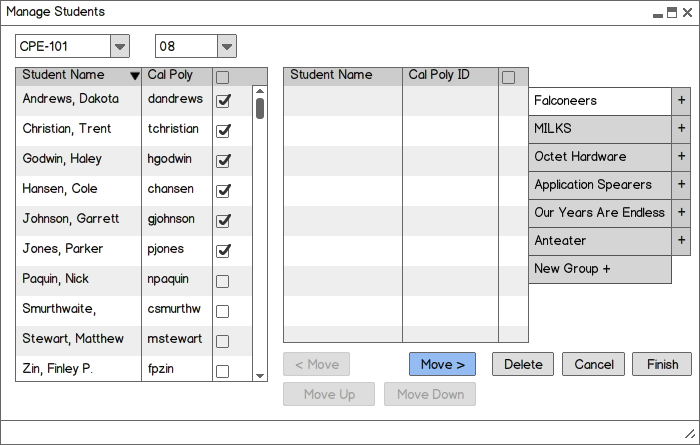
Figure 2.4.19: The Manage Students window with multiple students and the Move > button selected.
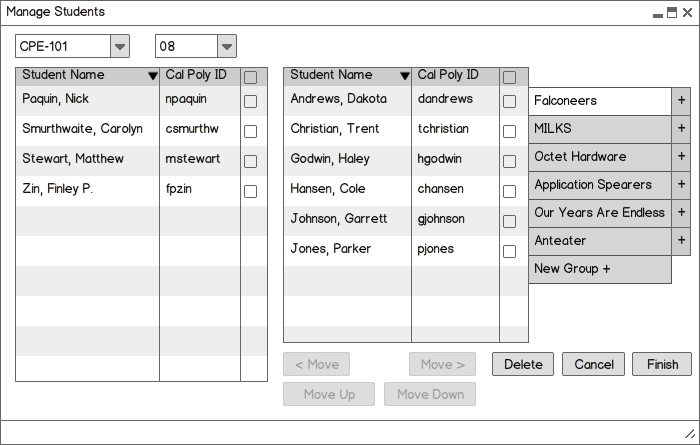
Figure 2.4.20: The Manage Students window after moving the students selected in Figure 2.4.19. Move > button selected.
If a student needs to be removed from a team, similar action is done except when a check box is selected on the right table, the left Move is enabled. Click this button to move students from the desired team table on the right the roster table on the left. An example of this action is shown in Figure 2.4.21 and Figure 2.4.22.
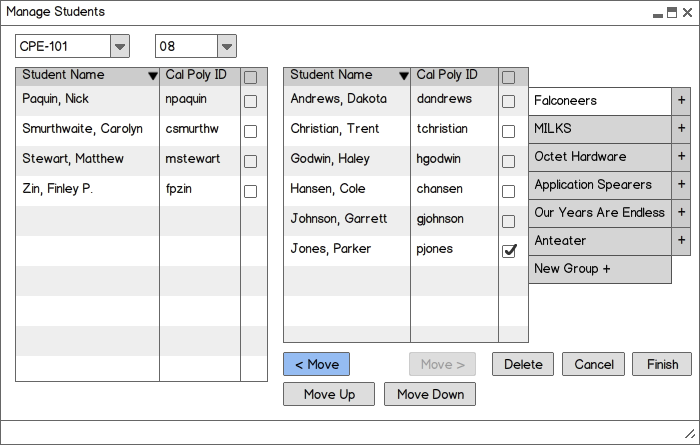
Figure 2.4.21: The Manage Students window with one student and the < Move button selected.
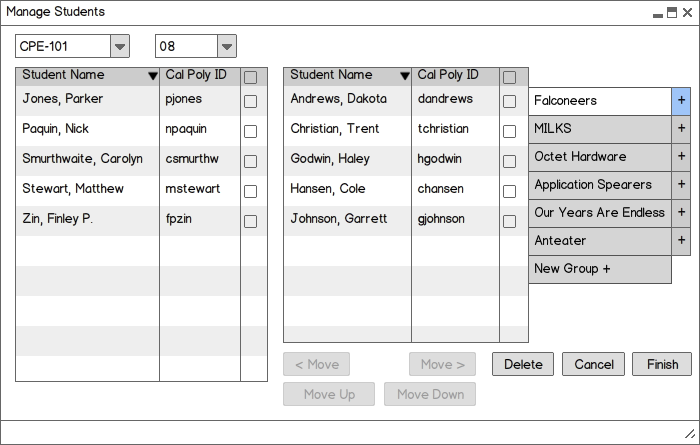
Figure 2.4.22: The Manage Students window after moving the student selected in Figure 2.4.21.
The user can also create subgroups by pressing the + button located at the end of each group. Figure 2.4.22 shows the + button of the first group highlighted in order to create a subgroup. Figure 2.4.23 shows what the group table will look like after adding a subgroup. The convention is that each subgroup will appear directly below the last subgroup for that group. Each subgroup will also be tabbed in so the user can visually see the current group hierarchy.

Figure 2.4.23: The Manage Students window after adding a subgroup.
It is very simple to move students from a group to a subgroup. In the right table, the user will select the desired students to move, then press the Move Down button, as showing in Figure 2.4.24. After pressing this button, the dialogue in Figure 2.4.25 will appear which will allow the user to select which subgroup to add the students to.
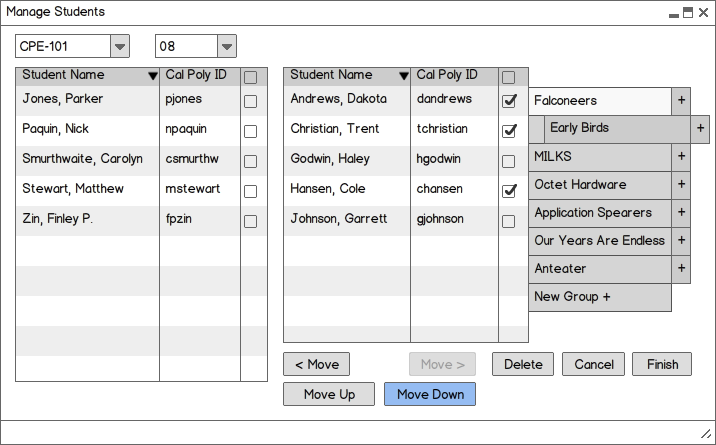
Figure 2.4.24: The Manage Students window with students selected and the Move Down button highlighted.
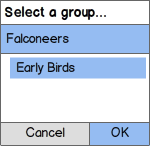
Figure 2.4.25: The dialogue to select a subgroup.
The selected students are then removed from the original group and moved to the chosen subgroup. The effects of these actions can be seen in Figure 2.4.26.
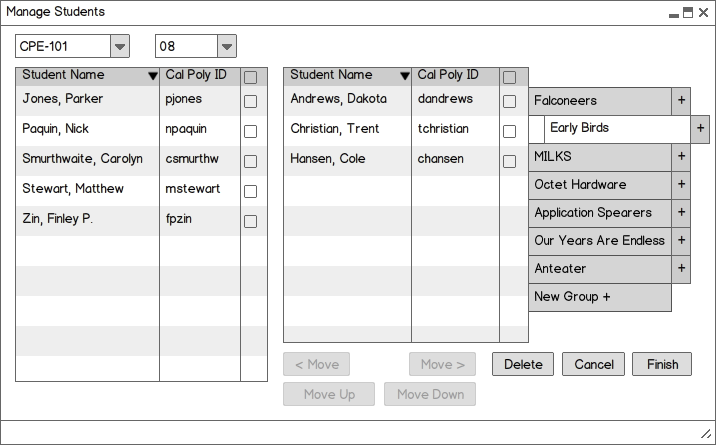
Figure 2.4.26: The Manage Students window after moving the student selected in Figure 2.4.24 to the group chosen in Figure 2.4.25.
To move students in a subgroup up to a higher level group, similar actions are done. The user selects the desired students and then pressed the Move Up button, as shown in Figure 2.4.27. After this, the dialogue shown in Figure 2.4.28 will appear for the user to select which group to move the selected students to.
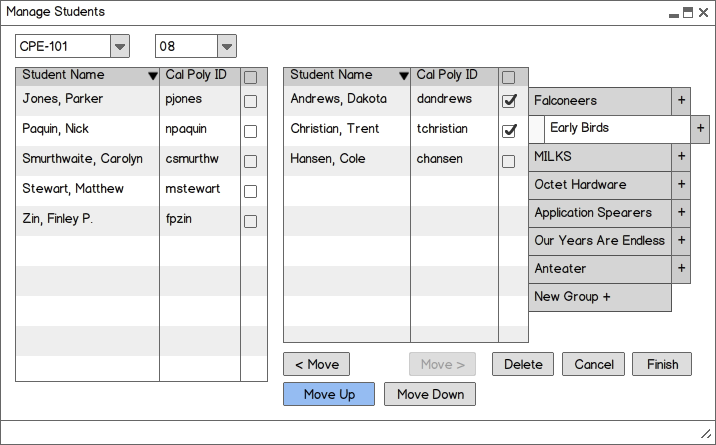
Figure 2.4.27: The Manage Students window with students selected.

Figure 2.4.28: The dialogue to select a higher level group.
The students will then be removed from the subgroup and moved to the chosen higher level group, as shown below in Figure 2.4.29.
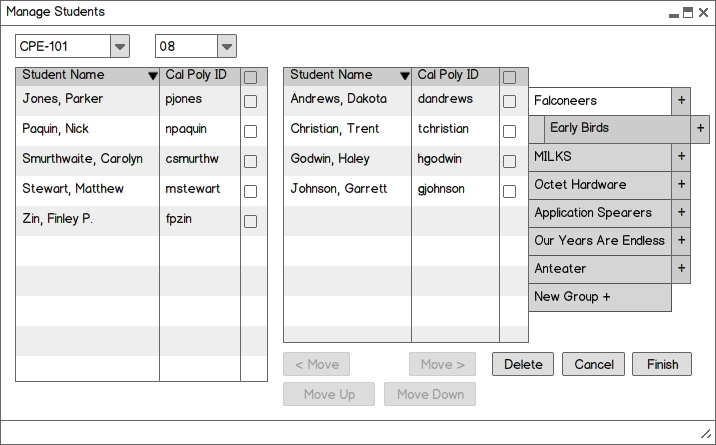
Figure 2.4.29: The Manage Students window after moving the student selected in Figure 2.4.27 to the higher level group in Figure 2.4.28.
The is one thing to note about the dialogue boxes for moving students to a subgroup and a higher level group, such as Figure 2.4.25 and Figure 2.4.28. The user will be shown all the group that lie hierarchically below or above the given group, not just those immediately below or above. That way if, for example, the user wants to move a student to a group four subgroups below the given group, the student can be moved directly to that subgroup and not have to move to every single subgroup between the given and the desired group.
The user can also delete a group as easy as creating it. When the user is on the group to be deleted, press the highlighted Delete button such as that in Figure 2.4.30. Then the dialogue box in Figure 2.4.31 will appear.
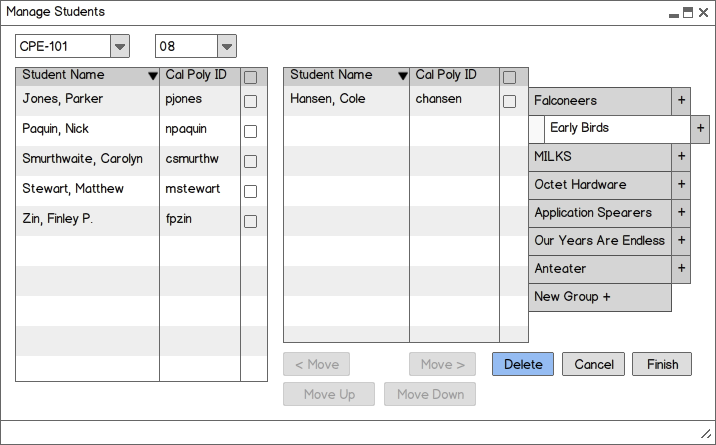
Figure 2.4.30: The Manage Students window with the Delete button highlighted.
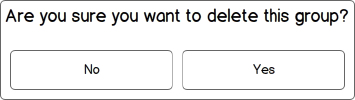
Figure 2.4.31: The dialogue that is shown to confirm deleting a group.
Any students that were still in the group that was deleted are automatically placed in the group that is hierarchically one group above the deleted group. This can be seen in Figure 2.4.32.
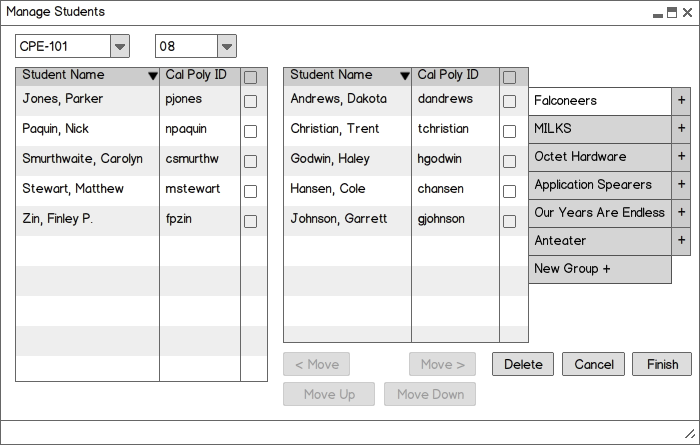
Figure 2.4.32: The Manage Students window after deleting the group in Figure 2.4.30.
When all teams have been created and students have been added to them, click the Finish button in the bottom right corner to return to the main screen, as shown in Figure 2.4.33. Figure 2.4.34 shows what the spreadsheet will look like with teams added to it. If there are any student that were not added to any team, they will be placed at the top of the spreadsheet above all the teams.
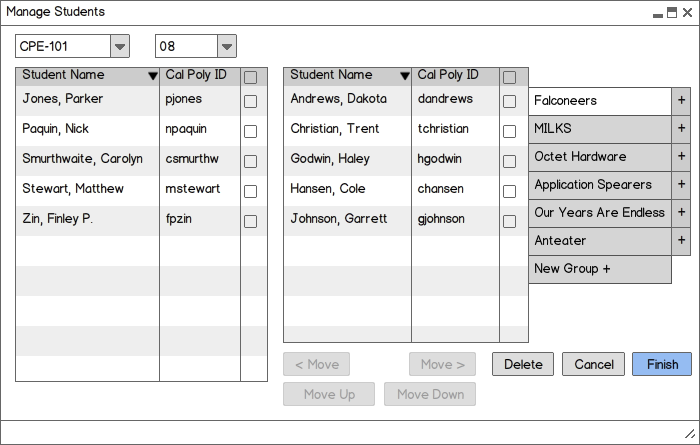
Figure 2.4.33: The Manage Students window with the Finish button selected to save all changes and return to the Grader spreadsheet.
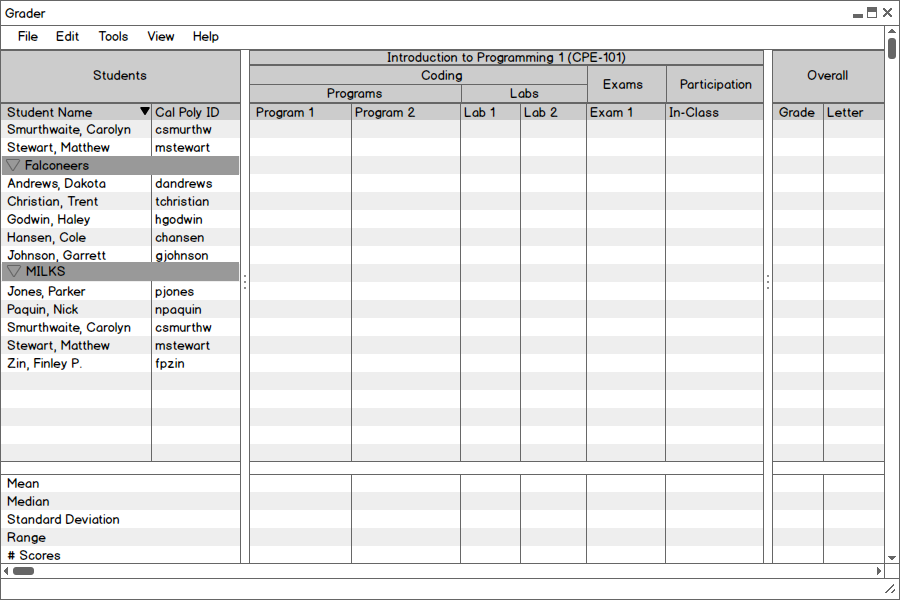
Figure 2.4.34: Example spreadsheet with groups created.