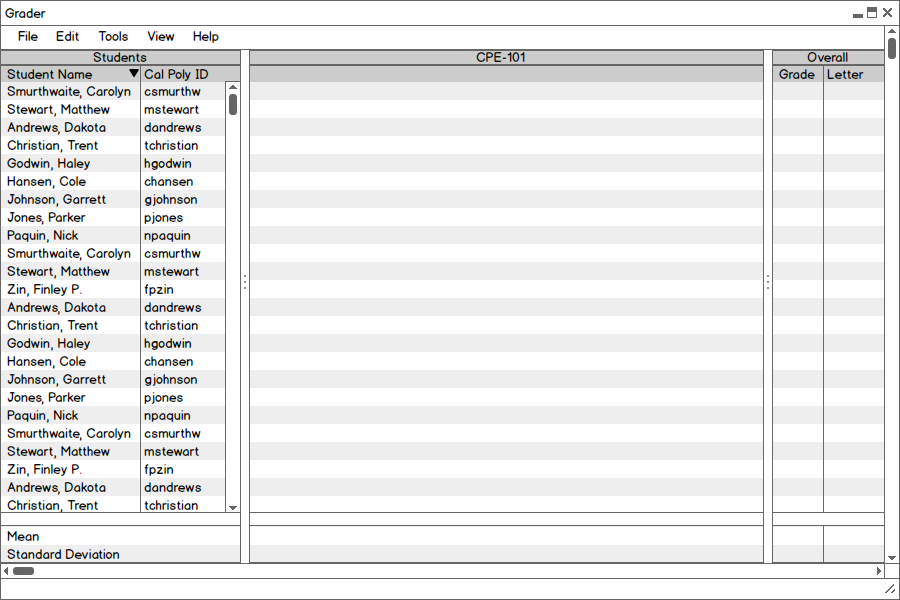
Figure 2.3.0: The gradebook after a class has been imported.
Managing graded items allows instructors to add, delete, and modify existing categories and assignments. Additionally, the professor can create a grading scheme to be used for the class. Figure 2.3.0 shows the gradebook after a class has been imported. By the end of this section, assignments and categories will be added to said gradebook. Note that to reduce clutter, the students are removed from the gradebook pictures.
Figure 2.3.0: The gradebook after a class has been imported.
From the File menu shown in figure
Figure 2.3.1: The dialogue box to create a category.
Categories can be used to organize assignments in the gradebook so the professor can have an easier time grading. The Create Category dialogue box has two text fields for the name of the category and the weighting this category has on the course. Once these fields have been filled in, the user can do two operations: they can add this category to the list of categories (Figure 2.3.2) or make this category a subcategory of one already in the list of categories (Figures 2.3.3-4)
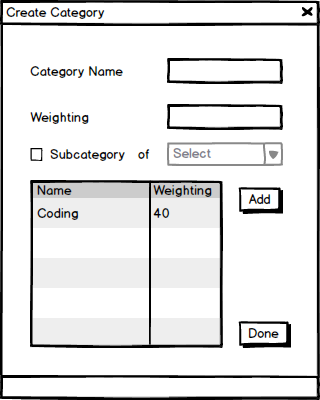
Figure 2.3.2: The dialogue box with an entry in the categories table.
After creating an entry in the categories table, the user can create subcategories by selecting a category from the table and adding a new category to it. Figures 2.3.3-4 shows how to add a subcategory.
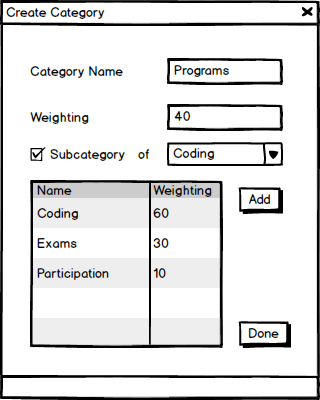
Figure 2.3.3: The dialogue box with the subcategory check box selected. In this figure, the user has selected Coding as the parent category to Programs.
Once all of the fields are filled out, the user can add the subcategory to the table (Figure 2.3.4)
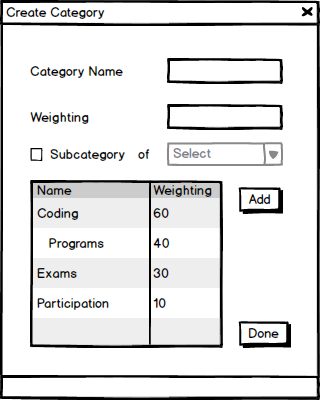
Figure 2.3.4: The end result of the subcategory being added to the table.
Figure 2.3.5 shows the gradebook after the categories have been defined by the user.
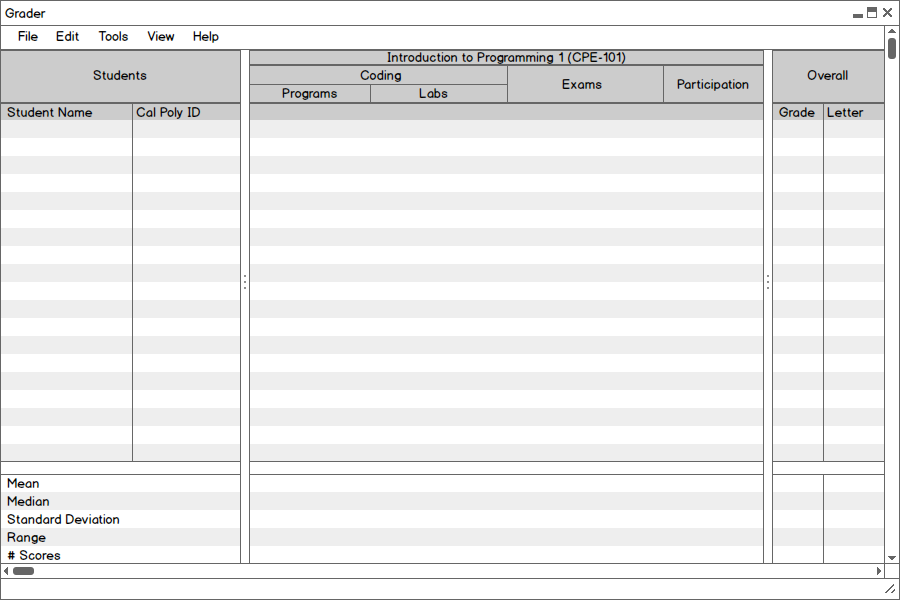
Figure 2.3.5: The view of the gradebook after categories have been defined by the user.
In addition to adding categories from the aforementioned file menu, the user can add assignments to the gradebook using the categories they just made. Figure 2.3.6 shows the Create Assignment dialogue box.
Figure 2.3.6: The dialogue box to create an assignment.
This dialogue box contains three text fields to describe the name, the point value, and description of this assignment. Also, there is a combo box that contains all of the previously created categories. By selecting categories, the professor can organize where they want their assignments to go. Figure 2.3.7 shows these fields filled in.
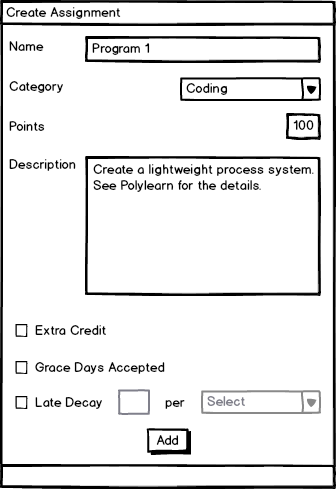
Figure 2.3.7: The dialogue box with its fields filled in.
The Create Assignment also contains three checkboxes to indicate if grace days are accepted, if this assignment is extra credit, and if there is late decay on this assignment. Similar to the subcategory checkbox shown in Figures 2.3.3-4, the late decay check box will enable the text box and combo box next to it. The user can then enter how much decay there should be in the text box and select how often it should apply that decay from the combo box. These operations are shown in Figure 2.3.8.
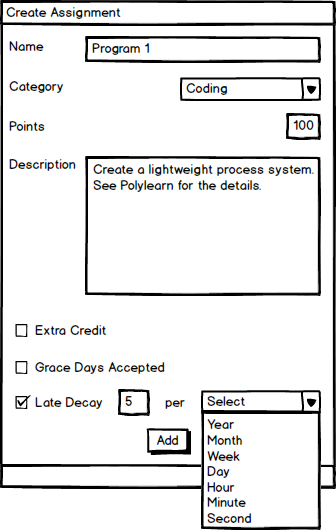
Figure 2.3.8: The late check box selected and fields highlighted.
Once all of this has been done, the assignment is added to the gradebook, as seen in Figure 2.3.9
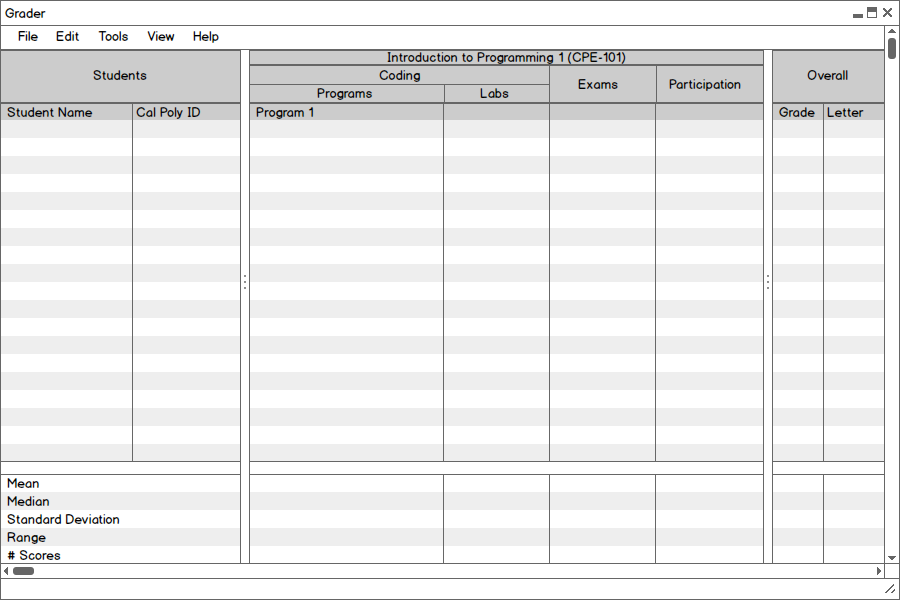
Figure 2.3.9: The gradebook after an assignemnt has been created.
From the grade book, the user can modify already created categories if they desire to do so. This dialogue box displays the same information as the Add Category dialogue shown in Figure 2.3.1, except that now there are buttons for modify and delete (which will be discussed in section 2.3.3). Figure 2.3.10 shows the Modify Category screen with Participation selected.
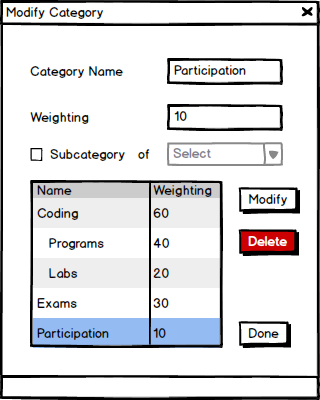
Figure 2.3.10: The Modify Category dialogue box with a category selected.
Once selected, the user can edit the specfied category. Note that once one of the textfields has been edited, the user no longer has the option to delete the entry. After modifying an entry, the user can then click Modify to commit their change as shown in Figure 2.3.11.
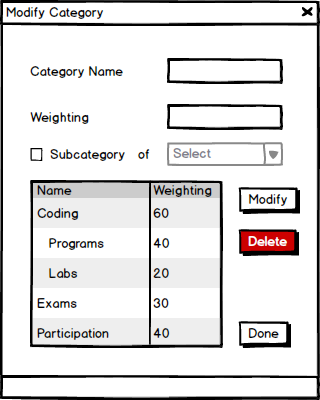
Figure 2.3.11: After clicking Modify, the table is now updated with the new weighting for Participation.
Similar to modifying categories, the user can also modify assignments. Figure 2.3.12 shows the Modify Assignment dialogue box.
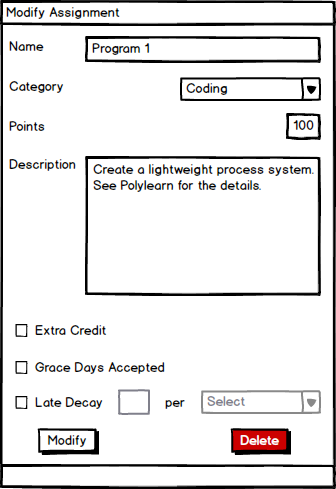
Figure 2.3.12: The Modify Assignment dialogue box.
Like the modify category dialogue, once text has been edited in the assignment window, the delete button can no longer be clicked.
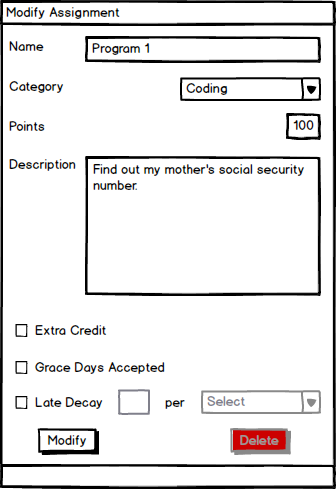
Figure 2.3.13: Modifications to the description of Program 1. Once satisfied, the user can click the Modify button to update that assignment.
Within the Modify Category dialogue box, there is the option to delete categories. From Figure 2.3.10, the user can hit the delete button to bring up Figure 2.3.14.
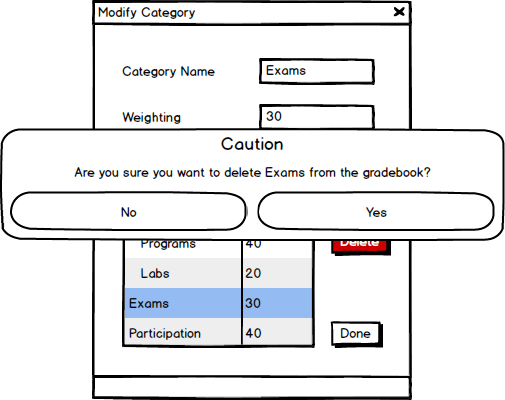
Figure 2.3.14: The alert dialogue that pops up when the delete button is pressed.
If the user selects no, then they are taken back to the previous screen. However, if they select yes, they are shown a picture similar to Figure 2.3.19, when an assignment is deleted.
Within the Modify Assignment dialogue box, there is the option to delete an assignment. From Figure 2.3.12, the user can hit the delete button to bring up Figure 2.3.15.
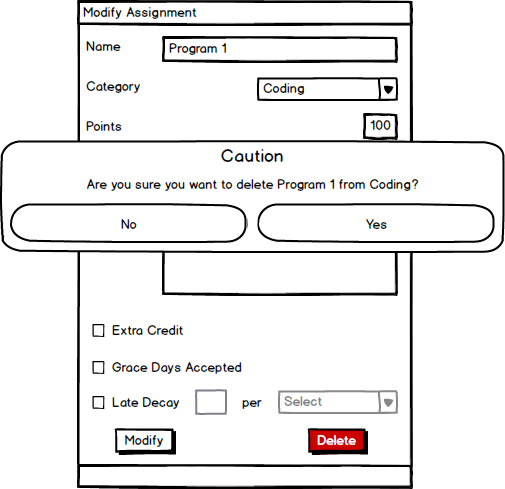
Figure 2.3.15: The alert dialogue that pops up when the delete button is pressed.
Similar to the delete category alert box, if the user hits no they are brought back to the previous screen. Otherwise, they are brought to the gradebook where their assignment will be shown as being deleted.
Figure 2.3.16: The gradebook after an assignment has been deleted.
The user can enter scores from the gradebook iteself. The steps for these are shown in Figure 2.3.17-18.
Figure 2.3.17: The gradebook.
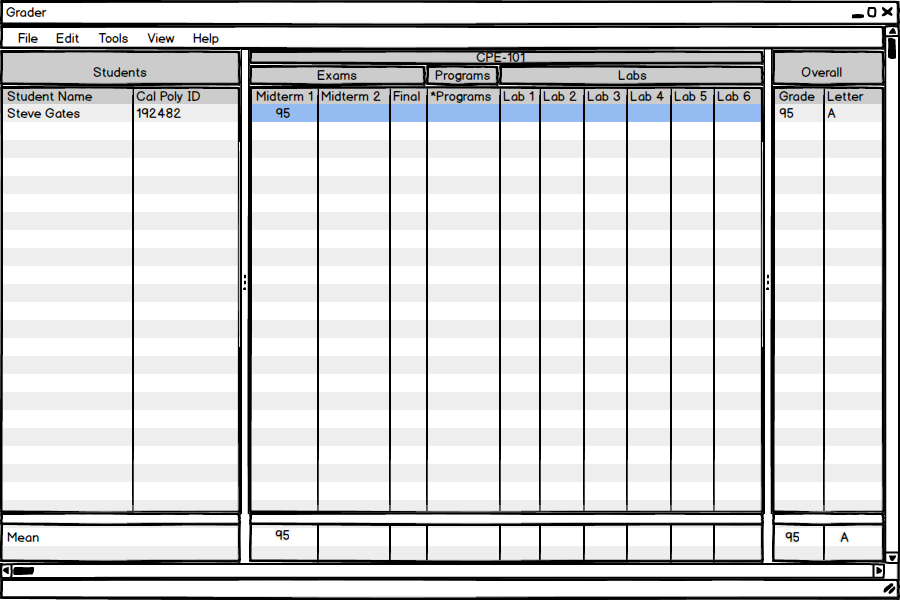
Figure 2.3.18: The gradebook after a grade has been entered for the student.
Notice that after entering the grade, the statistics at the bottom of the screen are automatically updated.
For each course the professor can also create a range of grades to be used on the course. Figure 2.3.19 shows the Define Grading Scheme dialogue.
Figure 2.3.19: The define grade scheme dialogue.
The dialogue has three text fields: one for the letter value to be assigned to the number ranges for that letter (the other two boxes). Also there is a color picker to indicate what color this grade is represented by. Figure 2.3.20 shows the fields modified.
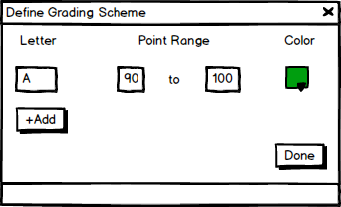
Figure 2.3.20: The define grade scheme dialogue with values entered.
In addition to the text fields, there is a button to add more ranges in the grading scheme. Figure 2.3.21 shows many different ranges entered.

Figure 2.3.21: The define grade scheme dialogue with many ranges entered.