This scenario shows an individual grader grading a completed test taken by other users. Grading a test is something that a grader does after every test. In this scenario, it is assumed that other users have filled in a test, and the grader has the answers from all the users on all the questions. Details on how a user takes a test are covered in Section 2.5 Test Taking .
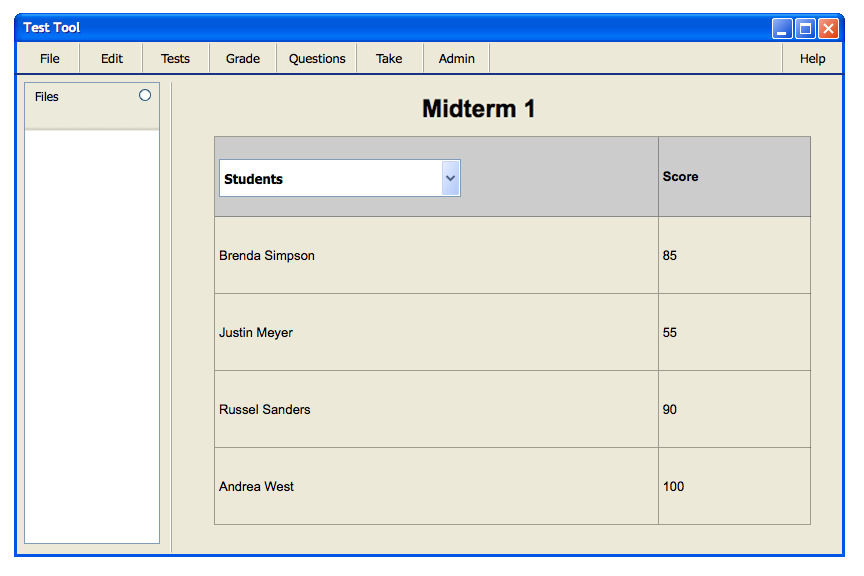
The grader selects the Grade Test item in the Grade menu and the system displays the window shown in Figure 2.6.1, for grading the currently selected test.
Figure 2.6.1: Grading window for completed test.
A finished test is displayed in a table format, showing the students and their current score. This score is subject to change, depending on if the grader removes questions from the test, or if a question has not yet been graded. When the grader presses the drop-down list currently holding Student, the system displays the different options shown in Figure 2.6.2.
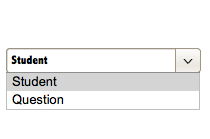
Figure 2.6.2: Drop-down menu for switching between students and question with their corresponding score.
To switch the content of the table from containing students to containing
questions, the grader selects Question in the drop-down list
in the table. This changes the content of the table to contain the actual
questions from the test and the corresponding average percentage of points
that the respondents have received from the grading. This is shown in
Figure 2.6.3.
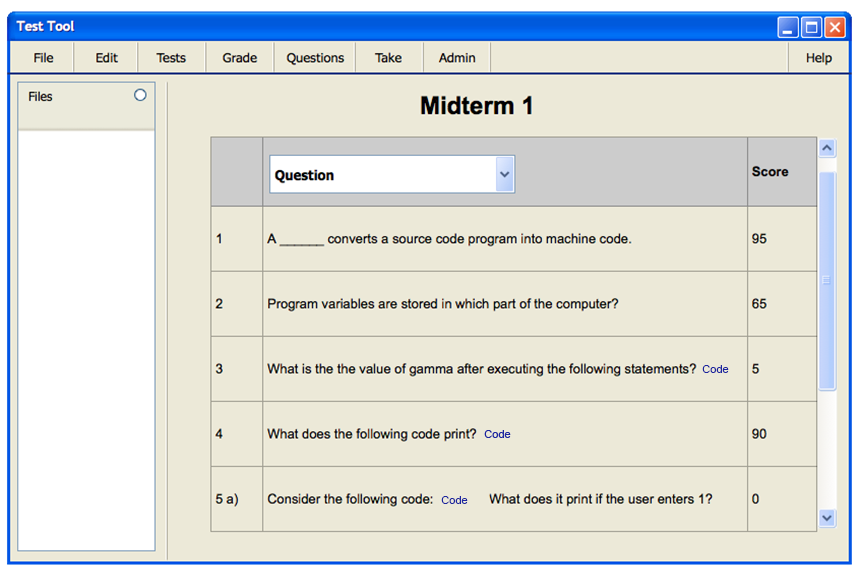
Figure 2.6.3: Questions and scores.
The grader presses the blue Code link to view the code
belonging to a question in a new window, as shown in Figure 2.6.4.

Figure 2.6.4: Code belonging to question 3 in Figure 2.6.3.

Figure 2.6.5: Small window for removing a question.

Figure 2.6.6: Dialog for removing question, making sure that user wants to remove the question.
When the user presses the Cancel button in the dialog shown in Figure 2.6.6, the dialog window closes without removing the selected question from the test. The same thing happens if the user presses the X button.
If the user presses the Remove button in the dialog shown in Figure 2.6.6, the system removes the question from the current test being graded, updating the scores of all users who have submitted answers to the test. The system updates the view and the resulting list of questions is displayed in Figure 2.6.7.
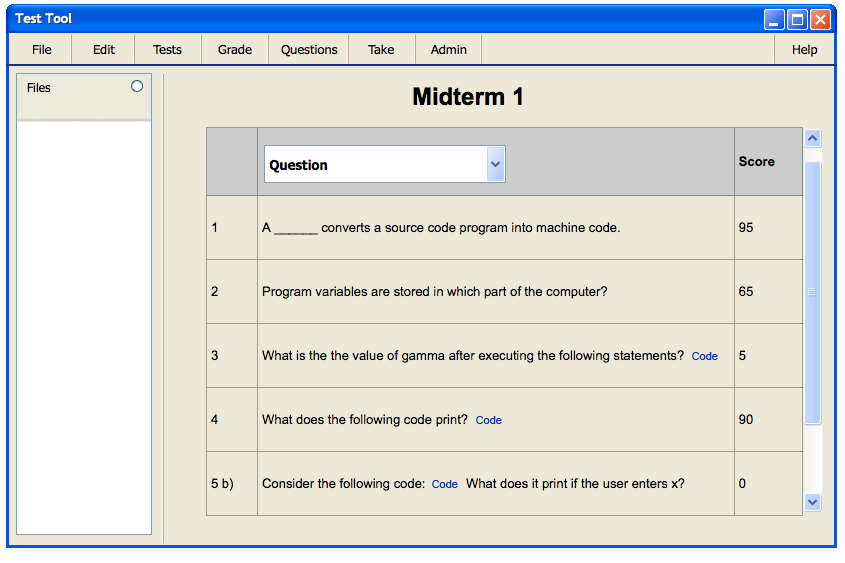
Figure 2.6.7: The result of removing a question.
Pressing a question or a student takes the grader to a screen of answers, scores, and comments, as displayed in Figure 2.6.8. If the question has not yet been graded, all the comments are marked as "-". The score on a question is 0-100. Pressing the Back button takes the grader back to the last screen viewed before the current one.

Figure 2.6.8: Grading of a multiple-choice question.
The grader views the answers on the different questions from students here, grades their answers, modifies their scores, and comments on the questions by clicking on the field that is to be edited, changing the content of it, followed by pressing enter. A change of the score on a question automatically updates the total score on the test for that user. In Figure 2.6.8 a multiple-choice question is graded. The program automatically matches correct answers from users and gives them a score of 100.
The grading of a free-response question is done in similar manner as shown above. The grader presses free-response question number 3 in the table seen in Figure 2.6.7. In response, the system displays the window shown in Figure 2.6.9.
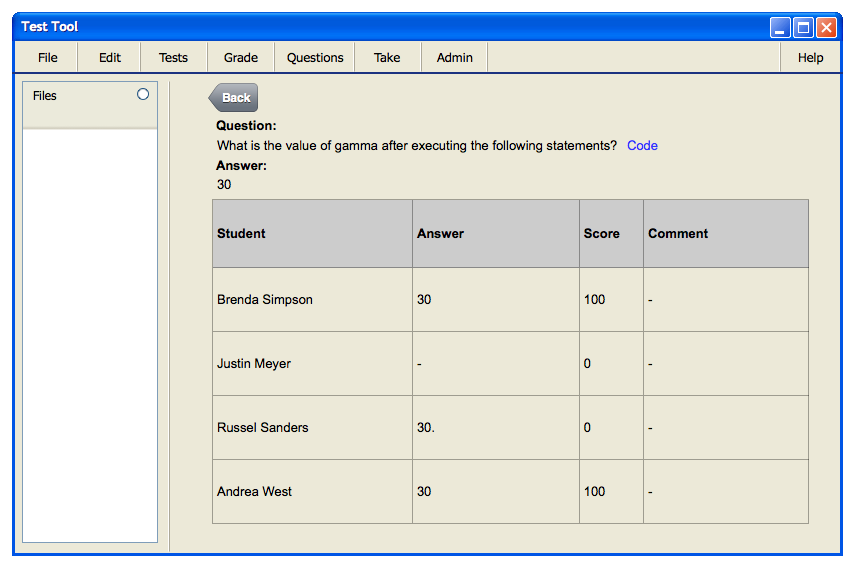
Figure 2.6.9: Grading a short answer question.
The system attempts to grade the question automatically. In Figure 2.6.9 one of the students has entered a trailing '.' after their answer, and since this does not match the correct answer the automatic grader does not give any points to the student answer. In this scenario, the grader decides to reward the student full credit for the answer. The grader edits the score of the answer, and adds a comment. The result from completing both of these actions is shown in Figure 2.6.11.
The grader adds comments to specific parts of the answer by marking the part of the answer the comment is for, followed by right clicking on the marked text. The system responds with displaying the small window shown in Figure 2.6.10.

Figure 2.6.10: Adding a comment to an answer.
The user presses Add Comment and the system responds by generating a numbered footnote after the marked text, together with the same number for the grader to fill in in the comment section of the table. The grader adds two comments to the student response, generating the view seen in Figure 2.6.11.

Figure 2.6.11: Added score and comment to short answer question.
The last type of gradable question from a finished test is a coding question. Depending on the choice of the creator of the test, the system attempts to grade the question automatically, or the grader grades the programs manually. In this scenario, the grader views the coding question as seen in Figure 2.6.12.
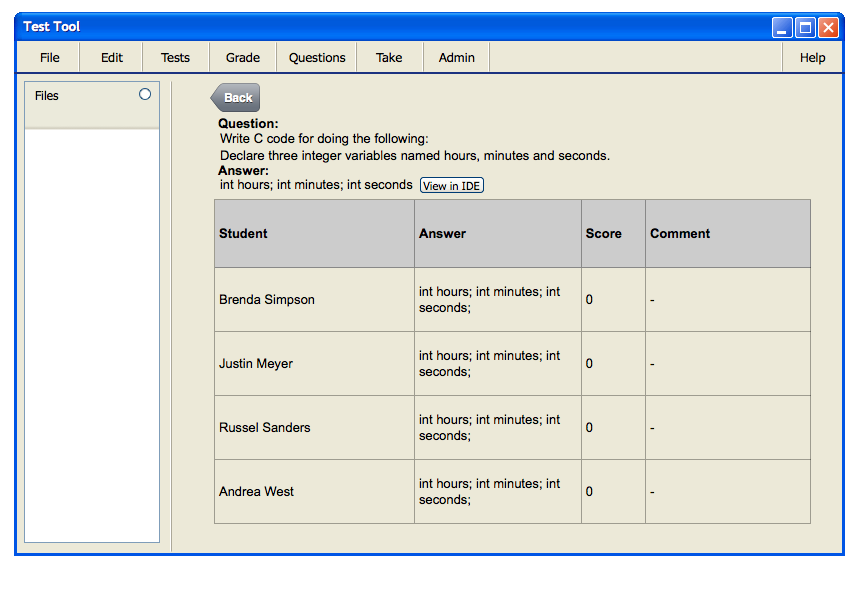
Figure 2.6.12: Grading a coding question.
The grader selects an answer and then presses the View in IDE button to view the submitted code in an IDE as shown in Figure 2.6.13. This opens a new window containing the code from the user's answer to the question.

Figure 2.6.13: Viewing submitted code in the IDE.
The grader goes back to the answers, and fills in the appropriate scores and comments by editing the corresponding sections of the response table. The result is seen in Figure 2.6.14.

Figure 2.6.14: Result of grading a coding question.
This is a graphical user interface that is currently in working progress, and as so it is subject to change. In the prototyping elements from the Windows XP interface has been used, but the end product will be platform independent.