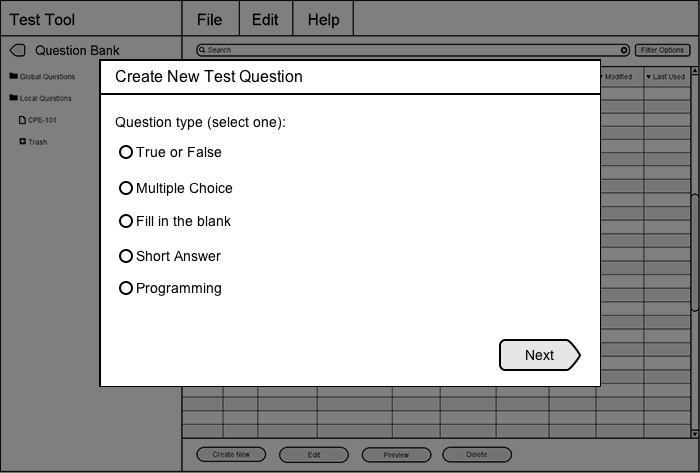
The user can create a new question directly by clicking the "Create New" button in the far left of the Question Bank bottom toolbar (see Question Bank). When the user clicks the "Create New" button, the pop-up window shown in Figure 14 appears.
Figure 14: Create new question pop up window accessed through question bank interface
Figure 14 shows the Create New Test Question window where the user can select a type of question to add to the Question Bank. The window appears as a pop-up over the initially empty Question Bank shown in (see Figure 5). From the initial "Create New Test Question" window, the user can select from 6 radio buttons.*
Radio Buttons for Question Types
1. True or False
2. Multiple Choice
3. Fill in the blank
4. Short Answer
5. Programming
5. Test Instructions
Once the user selects a question type of which to create, the user would click the "Next" button to proceed to design the selected type of question. The two subsequent windows both provide a "Back" button that allows the user to either select a different question type or edit necessary fields. The user must perform a series of steps to complete question formation: 1. Each of the six types of content have unique and common user input fields important to formulating the respective question. The unique input fields for each type of question as well as preview examples are shown for each of the Question Types. 2. Each of the six types of content have common user input fields called Question Properties. 3. The last step consisting of a confirmation of question details and student view of a question would be to Preview and Finish. For each question, the user has the ability to insert an image into the question. See Inserting Images.
Question Properties are common to all types of questions. In the Question Properties section at the bottom of the question construction window shown in Figure 15, the user must specify keywords, a time estimate, the point value, difficulty, and visibility of the question being created.

Figure 15: Default Queston Properties section at the bottom of each type of question construction
Keywords: The user can type in any string of keywords to the input field. The user can search for questions with certain keywords in the Question Bank through its search bar to tag the question with the subject maerial or by the type of test the question is used for (a midterm, for example).
Time: The time in minutes the user estimates for students to spend on the question.
Point Value: The user can assign the question a number of points using the controls in the stepper input or by simply typing in the desired value. The user is not constrained to integers; decimal points are allowed. Next to the point value is a checkbox for the user to indicate whether the question's point value may be shown next to the question.
Difficulty: There slider allows the user to specify the difficulty of the question on a scale of 0 (None) to 10 (Hard). The user is not required to specify a question difficulty, in which case the slider would remain at 0 (None).
Visibility: If the user leaves the "Add to Global Question Bank" checkbox as checked, the question and its properties would be visible to other professors and stored in the Global Question Bank. If the user unchecks the checkbox, the question is only added to the user's Local Question Bank, and only the user can view it at the time of question creation.
Once the user completes the appropriate fields for the question type to their preferences, the user can proceed to the preview window.
The preview window shows the student view of the question and confirms question properties. The user can edit fields from the question design step by clicking the "Back" button. Once reviewed, the user can finish the process of creating a question by clicking the "Finish" button. The question would then be saved to the specified visibility setting.
The user can insert images into test questions in two ways:
1. Insert Image from URL
2. Insert Image from File

Figure 16: Steps to insert image URL in a test question with an example
The user can insert an image into a test question by clicking on the "Insert Image..." drop down menu and selecting "From URL..." The user would then be prompted to enter the URL to the image. Once the user clicks "Insert Image", the question construction window will display the text "(Image Inserted)" in place of where the user's cursor was at the position it was in when the user clicked the "Insert Image..." button.
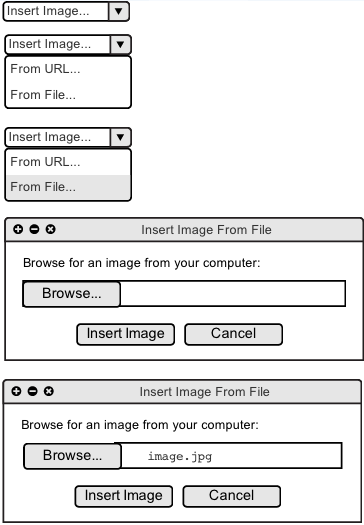
Figure 17: Steps to insert image file in a test question with an example
The user can insert an image into a test question by clicking on the "Insert Image..." drop down menu and selecting "From File..." The user would then be prompted to browse for an image file from their computer. Once the user opens a file for inserting, the file name would appear in the text area adjacent to the "Browse..." button. Once the user clicks "Insert Image", the question construction window will display the text "(Image Inserted)" in place of where the user's cursor was at the position it was in when the user clicked the "Insert Image..." button.
II. Question Type Specific Properties and Previews
In the case that the user selects "True or False" on the Create New Question window and clicks the "Next" button, the user would be able to enter the details of the True or False question itself.
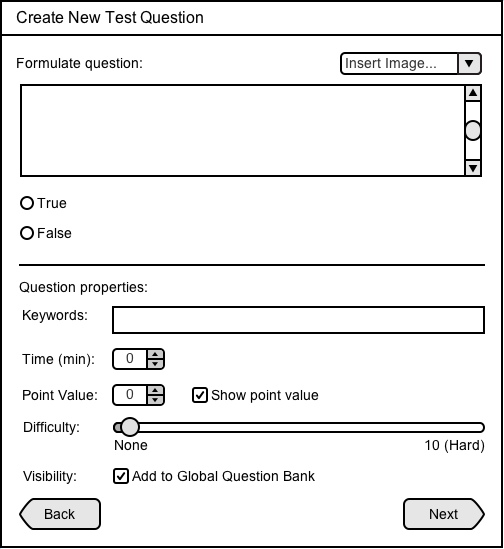
Figure 18: True or False Question Construction
The user can enter a true or false statement in the text area provided and indicate its truth value using radio buttons.
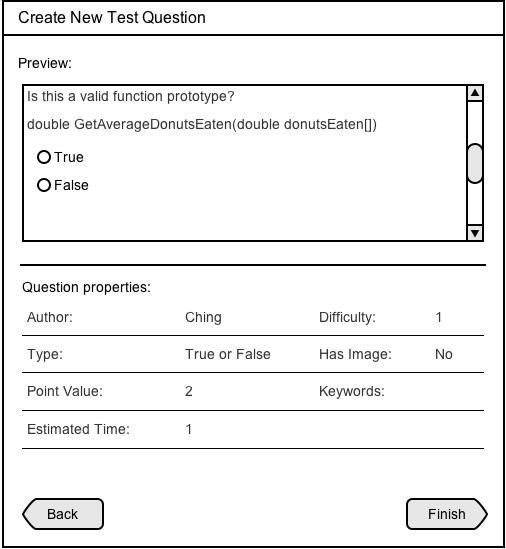
Figure 19: True or False Question Construction window completed by the user
Once the user fills in the necessary information including the common user input fields to all question types (see Question Properties), the user can proceed by clicking the "Next" button. The user would then be presented with a preview of the question as well as a confirmation of question properties.
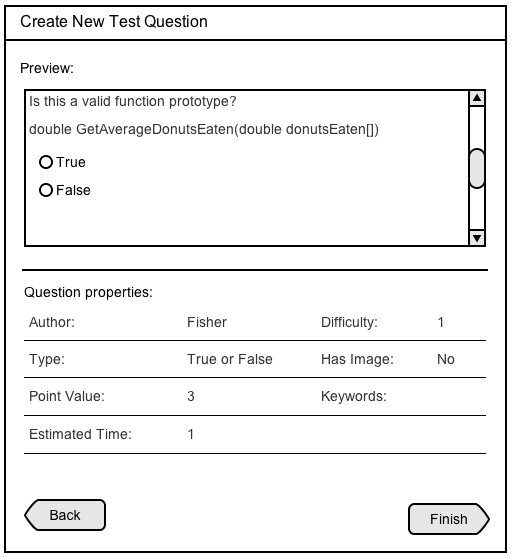
Figure 20: True or False Question Preview Example
Once the user clicks the "Finish" button in the preview window, the question would then be added to the Question Bank database.
In the case that the user selects "Multiple Choice" on the Create New Question window and clicks the "Next" button, the user would be able to enter the details of the Multiple Choice question itself.
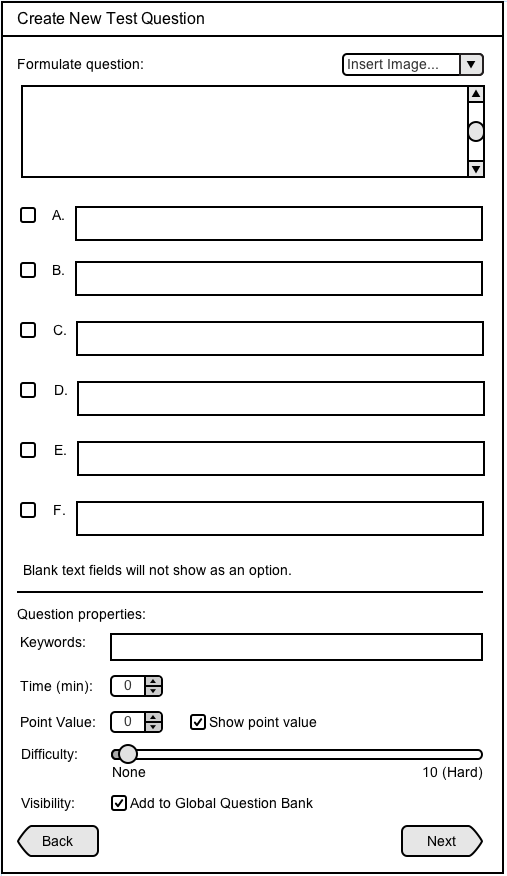
Figure 21: Multiple Choice Question Construction
The user can type in a question in the text area provided. The user can enter the statement corresponding to each choice in the text area provided. Should the user leave a text area blank, the respective choice will not appear as an option when a student takes the test.
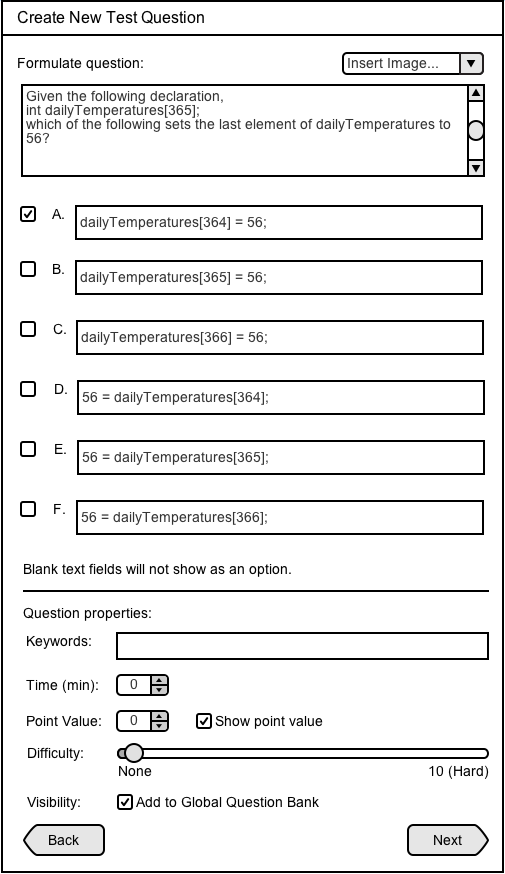
Figure 22: Multiple Choice Question Construction window completed by the user
Once the user fills in the necessary information including the common user input fields to all question types (see Question Properties), the user can proceed by clicking the "Next" button. The user would then be presented with a preview of the question as well as a confirmation of question properties.
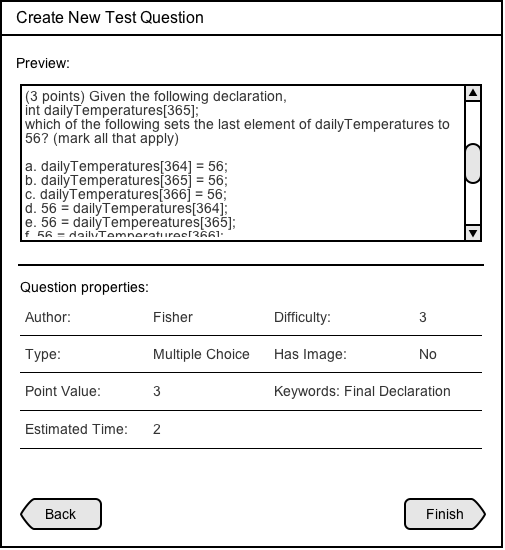
Figure 23: Multiple Choice Question Preview Example
Once the user clicks the "Finish" button in the preview window, the question would then be added to the Question Bank database.
In the case that the user selects "Fill in the blank" on the Create New Question window and clicks the "Next" button, the user would be able to enter the details of the Fill in the blank question itself.
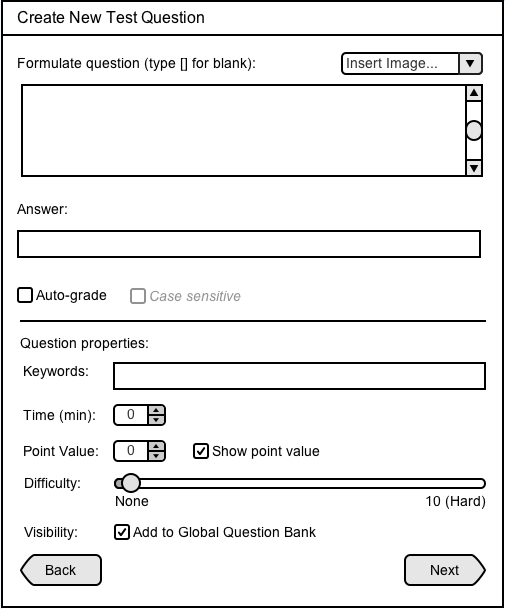
Figure 24: Fill In The Blank Question Construction
The user can enter a statement with a blank text area in the position where the user (the teacher) types a left and right bracket without any character(s) in between, exactly as shown: "[]". Instead of the pair of brackets, a blank text area will appear to the student in its place. The user can type in the answer (the string of text belonging in the blank) and specify whether he or she would like the test tool to automatically compare the student input to the specified answer. If the "Auto-grade" option is checked, the teacher can choose to have the test tool grade the student's answer with case sensitivity, by checking or unchecking the box next to "Case sensitive".
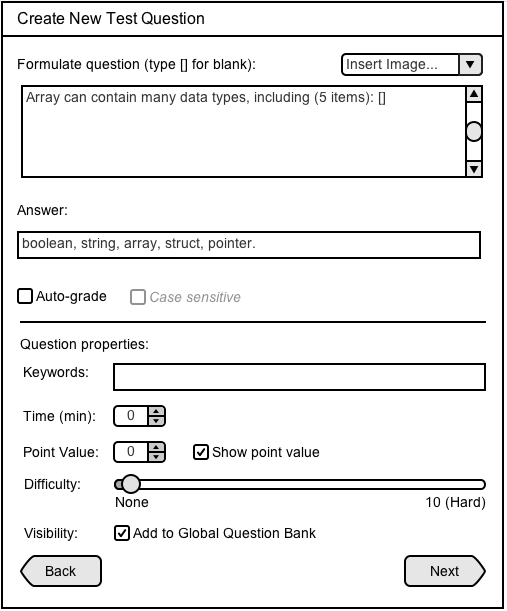
Figure 25: Fill In The Blank Question Construction window completed by the user
Once the user fills in the necessary information including the common user input fields to all question types (see Question Properties), the user can proceed by clicking the "Next" button. The user would then be presented with a preview of the question as well as a confirmation of question properties.
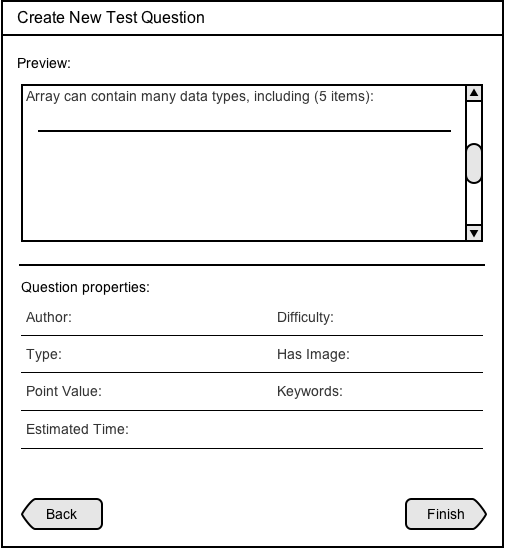
Figure 26: Fill In The Blank Question Preview Example
Once the user clicks the "Finish" button in the preview window, the question would then be added to the Question Bank database.
In the case that the user selects "Short Answer" on the Create New Question window and clicks the "Next" button, the user would be able to enter the details of the Short Answer question itself.
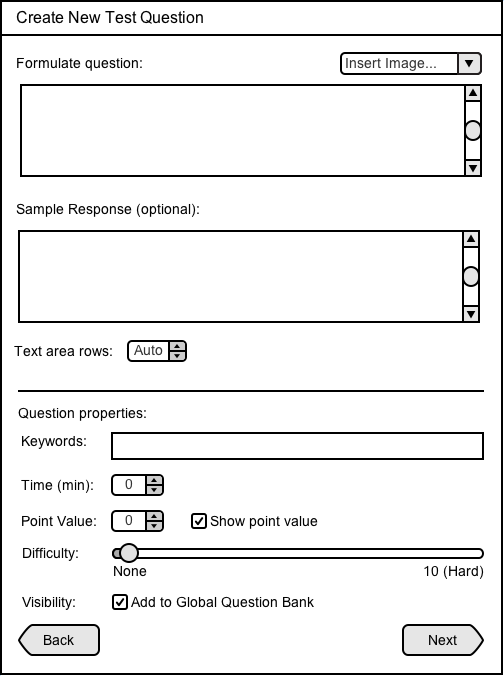
Figure 27: Short Answer Question Construction
The user can type in a short answer prompt in the text field provided and an optional response. The user can then specify the maximum number of rows in the text area that the student test taker has available to type in his or her answer. The default value is "Auto". Leaving the field as "Auto" will produce a text area that has either 1 row (if no sample response was provided) or the number of rows filled by the sample response provided.
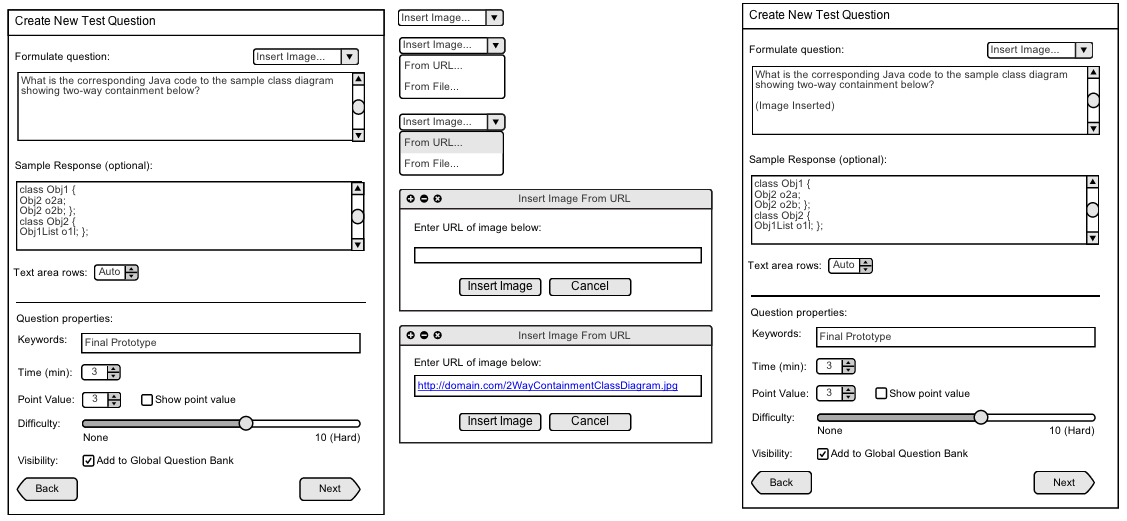
Figure 28: Short Answer Question Construction window completed by the user
Figure 28 shows an example of a user who inserts an image into a test question. The user would click the button "Insert Image..." where he or she would like the image to be placed and follow the steps. The text "(Image Inserted)" would appear in place of where the image would be. Once the user fills in the necessary information including the common user input fields to all question types (see Question Properties), the user can proceed by clicking the "Next" button. The user would then be presented with a preview of the question as well as a confirmation of question properties.
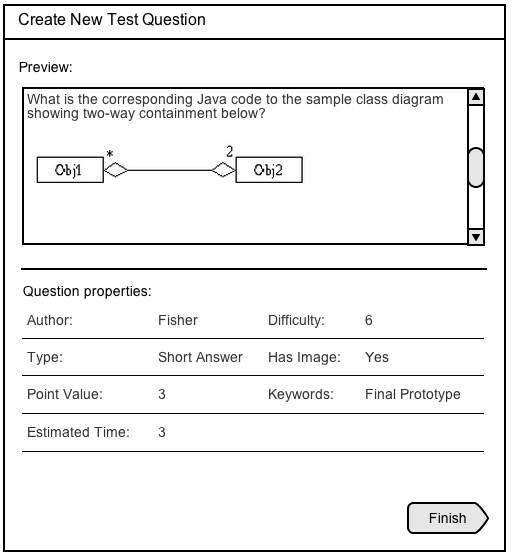
Figure 29: Short Answer Question Preview Example
In the example shown in Figure 29, the image inserted by the user is shown in place of the text "(Image Inserted)" in the previous window. Once the user clicks the "Finish" button in the preview window, the question would then be added to the Question Bank database.

Figure 30: Programming Question Construction
The user can create a programming question by entering in the relevant information and coding prompt in the text area provided. A testing script can be uploaded through the "Insert Script..." button.
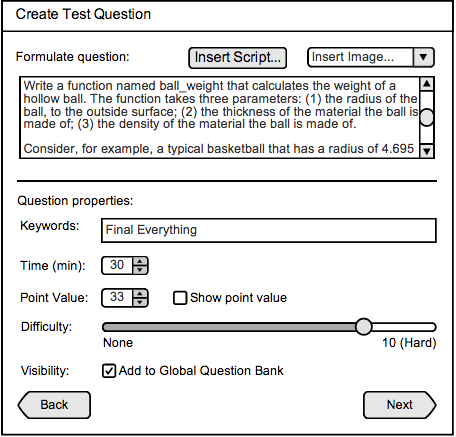
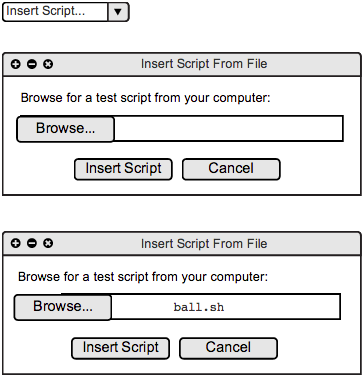
Figure 31: Programming Question Construction window completed and script inserted by the user
In a programming question, the user can insert a testing script that would be run on the student uploaded code after the test is submitted. As shown in Figure 31, the user would click the "Insert Script..." button and upload a shell script file from their computer and click the "Insert Script" button. There would not be an indication of an uploaded script file in the question preview, as the student view would only consist of an "Upload..." button for the student's programming files to be tested. The "Upload..." button at the bottom of the question content is common to all programming questions.
Once the user fills in the necessary information including the common user input fields to all question types (see Question Properties), the user can proceed by clicking the "Next" button. The user would then be presented with a preview of the question as well as a confirmation of question properties.
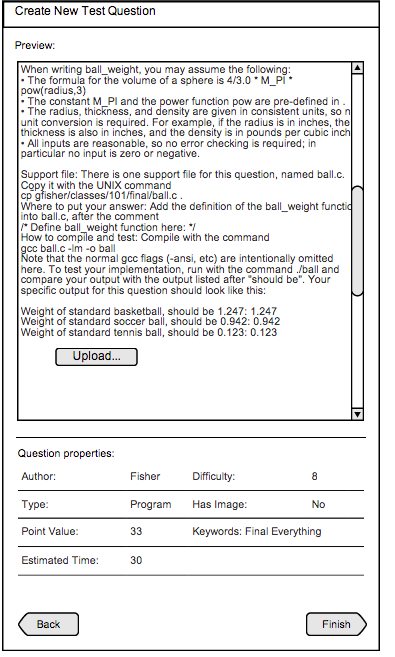
Figure 32: Programming Question Preview Example
Once the user clicks the "Finish" button in the preview window, the question would then be added to the Question Bank database.
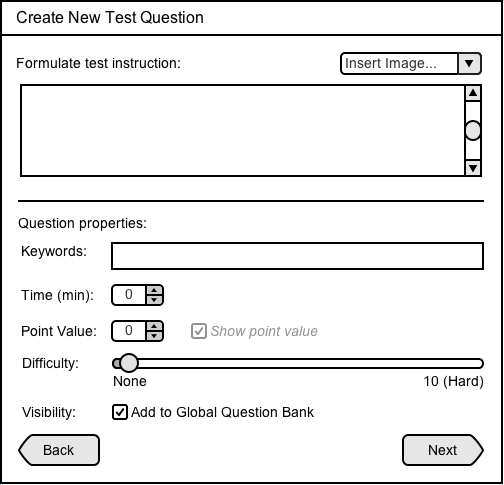
Figure 33: Instructions Construction
The user can insert non-question content into a test using the Instructions Question Type. The user must type the instructions or non-question content in the text area provided.
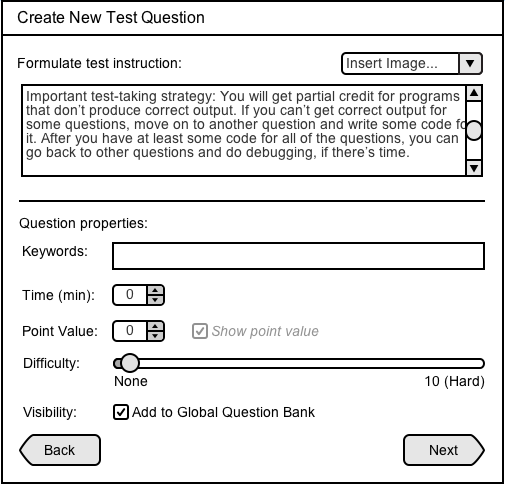
Figure 34: Instructions Construction window completed by the user
Once the user fills in the necessary information including the common user input fields to all question types (see Question Properties), the user can proceed by clicking the "Next" button. The user would then be presented with a preview of the instructions as well as a confirmation of the instruction's properties.
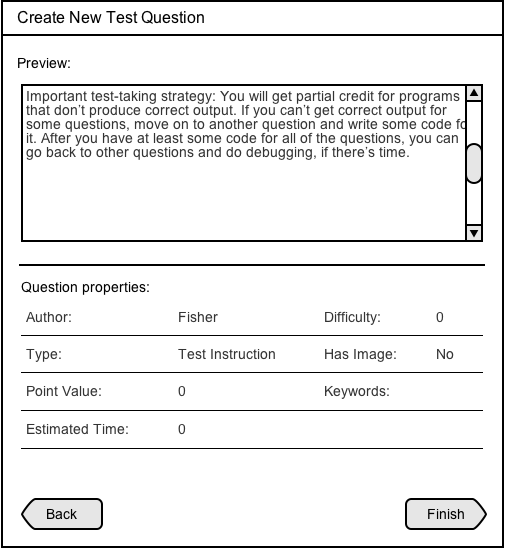
Figure 35: Instructions Preview Example
Once the user clicks the "Finish" button in the preview window, the instruction would then be added to the Question Bank database.
Editing an Existing Test Question
The user can edit an existing question by selecting a question in the Question Bank table and clicking the "Edit" in the Question Bank bottom toolbar (see Question Bank).
When the user clicks the "Edit" button, a pop-up window appears that is identical to the question construction window, allowing the user to modify the fields and properties as necessary. The user can click the "Next" button to proceed to the same preview windows as well.
Editing Questions
1. True or False
2. Multiple Choice
3. Fill in the blank
4. Short Answer
5. Program
5. Instructions
If the user edits a question that he or she did not create, a new version of the question will be created as a new question in the question bank. The name of the user who edited the question would be assigned as the new question's author (see True or False for an example).
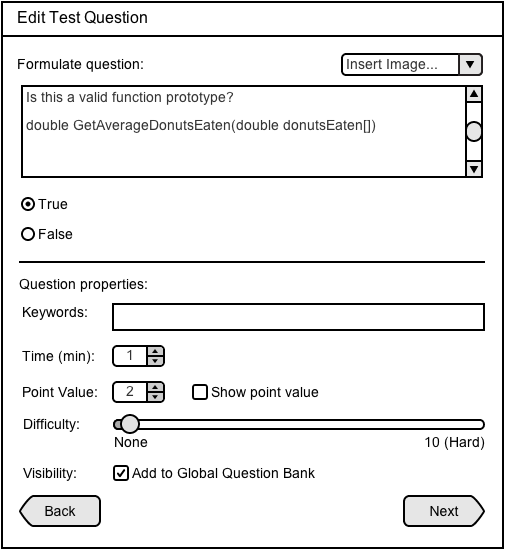
Figure 36: Editing existing True or False question window example
The user can edit any of the fields and properties in question construction.
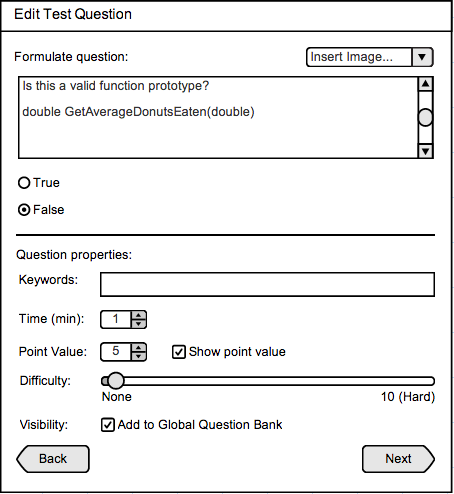
Figure 37: Window with True or False question edited by user Lau, originally created by user Ching
In Figure 37, Lau has edited the contents of the question created by Ching, and changed the truth value to False. Lau also changed the point value from 2 to 5 and checked the "Show point value" box. When Lau proceeds, she would see the Preview window in Figure 38. The Preview window confirms the new properties and changed the author to Lau (originally Ching).
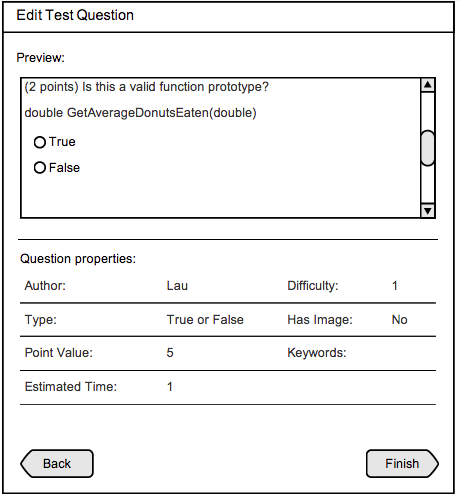
Figure 38: Preview window with True or False question edited, showing the edited question content, author, and point value.
Once Lau clicks the "Finish" button, a new copy of this question would be created and appear in the Question Bank database.
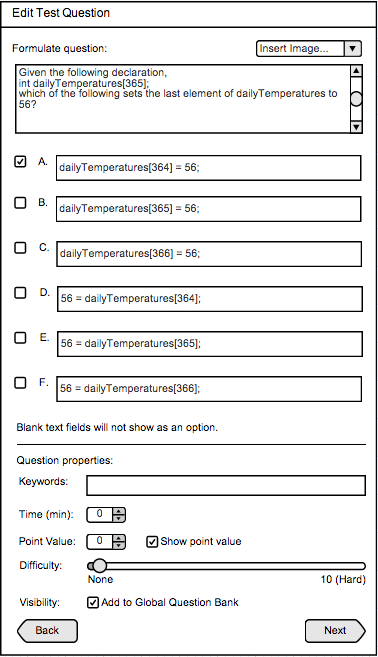
Figure 39: Editing existing Multiple Choice question window example
The user can edit any of the fields and properties in question construction.

Figure 40: Editing existing Fill In The Blank question window example
The user can edit any of the fields and properties in question construction.
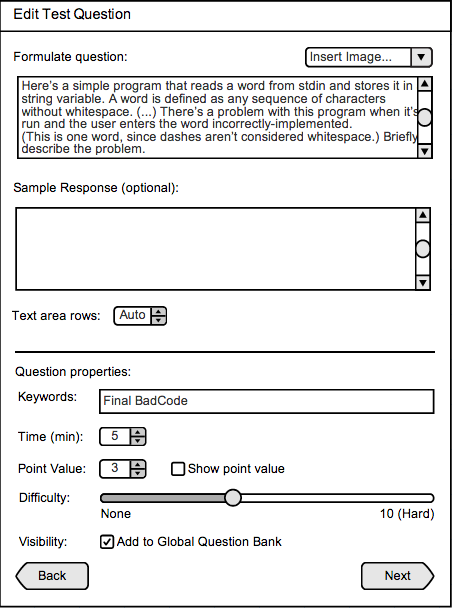
Figure 41: Editing existing Short Answer question window example
The user can edit any of the fields and properties in question construction.
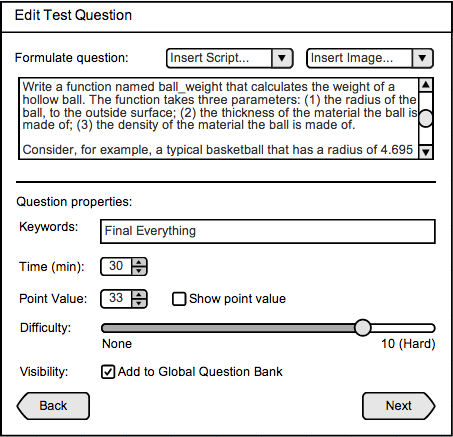
Figure 42: diting existing Programming question window example
The user can edit any of the fields and properties in question construction.
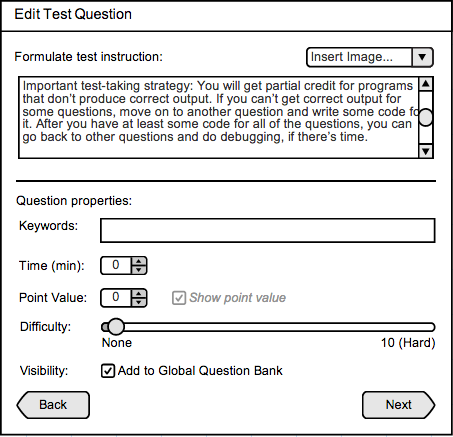
Figure 43: Editing existing Instructions window example
The user can edit any of the fields and properties in question construction.