Figure 2.4.1a
This section covers the following topics:
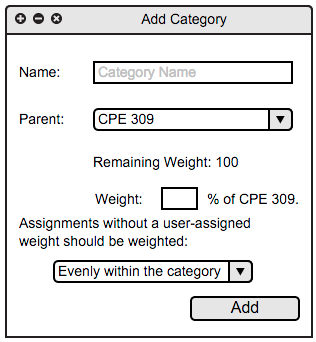
From the top level Grades menu (shown in Section 2.1: UI Overview), the instructor selects Add Category and the dialog box Figure 2.4.1a appears.
From the top level Grades menu (shown in Section 2.1: UI Overview), the instructor selects Add Category and the dialog box Figure 2.4.1a appears.

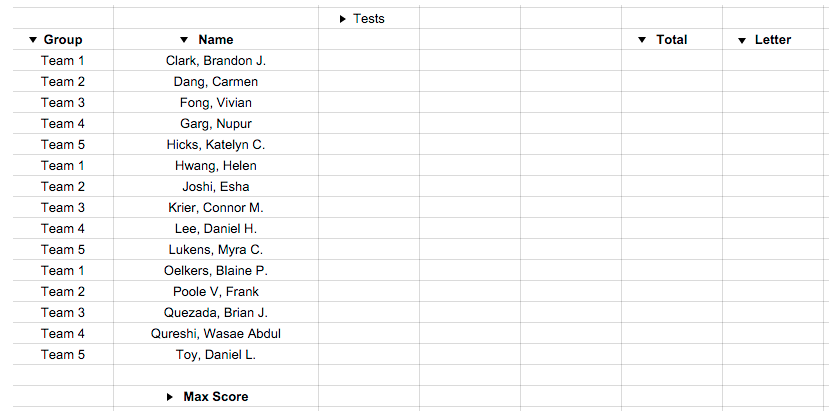
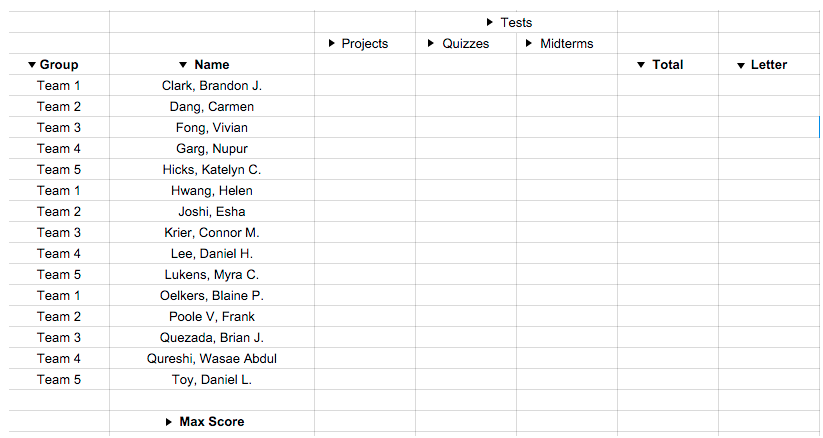
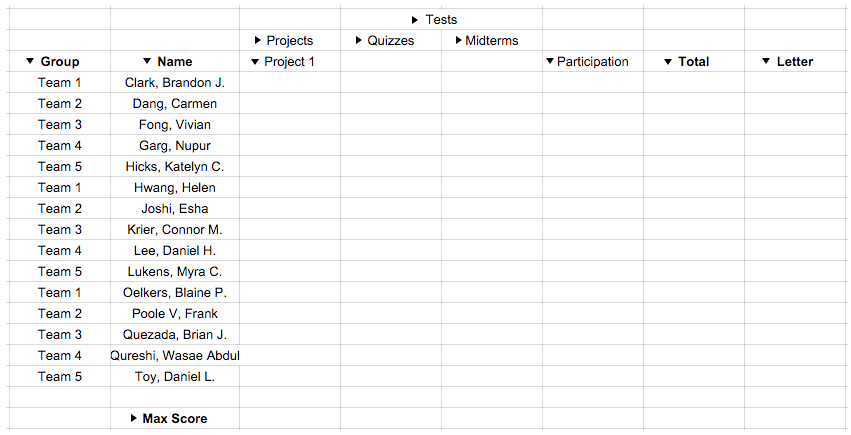
Once the instructor is finished and clicks Add, the category is added to the gradebook, as shown in Figure 2.4.2c.
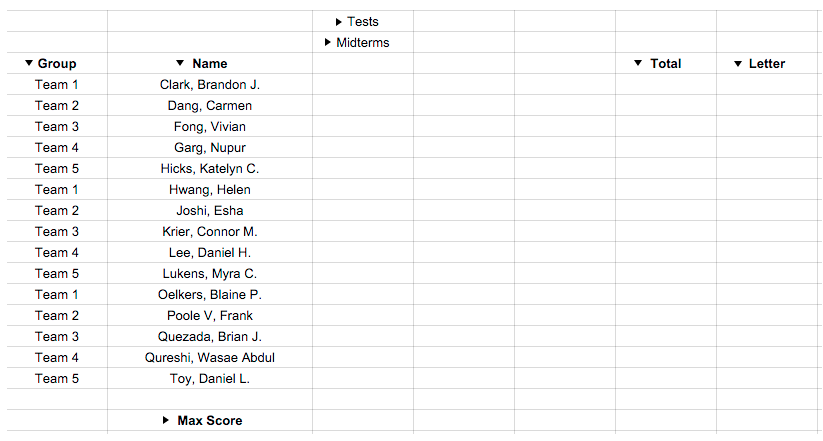
Continuing this process of adding categories results in Figure 2.4.2d.
2.4.3 Adding an Assignment to a Course
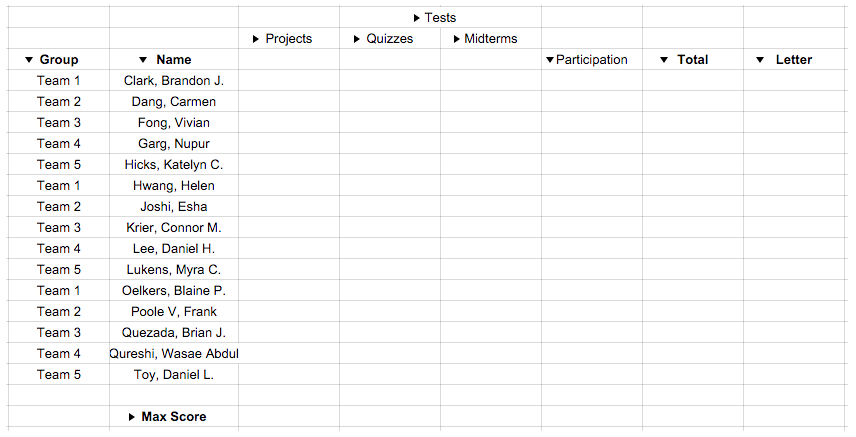
From the top level Grades menu (shown in Section 2.1: UI Overview), the instructor selects Add Assignment and the system displays the dialog box shown in Figure 2.4.3a.
The dropdown menu next to "Parent:" allows the instructor to select the parent category for the assignment from a list of categories that they have created. To add an assignment to the course without adding it to a custom category, the instructor must select the course name from this dropdown list as shown in Figure 2.4.3b.
The instructor can then enter information relevant to the assignment, as shown in Figure 2.4.3c.
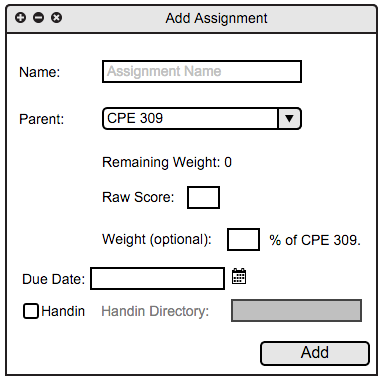
Figure 2.4.3a
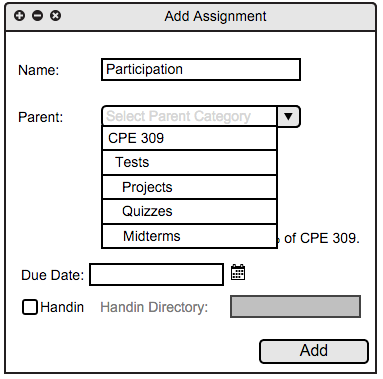
Figure 2.4.3b
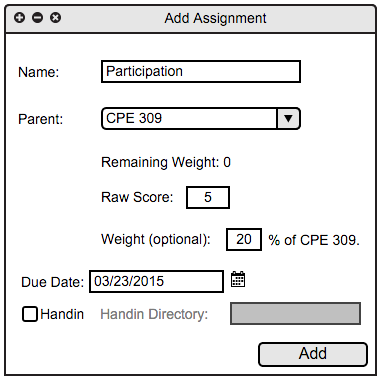
Figure 2.4.3c
2.4.4 Adding an Assignment to a Category
From the top level Grades menu (shown in Section 2.1: UI Overview), the instructor selects Add Assignment and the system displays the dialog box shown in Figure 2.4.4a.
The dropdown menu next to "Parent:" allows the instructor to select the parent category for the assignment from a list of categories that they have created. To add an assignment to a category , the instructor must select the category name from this dropdown list as shown in Figure 2.4.4b.
The instructor can then enter information relevant to the assignment, as shown in Figure 2.4.4c.
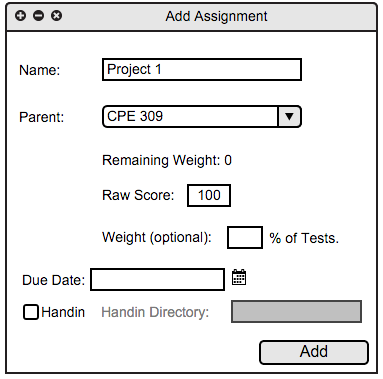
Figure 2.4.4a

Figure 2.4.4b
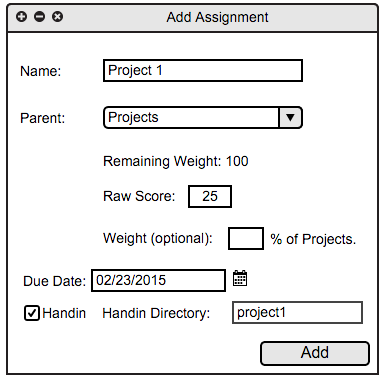
Figure 2.4.4c
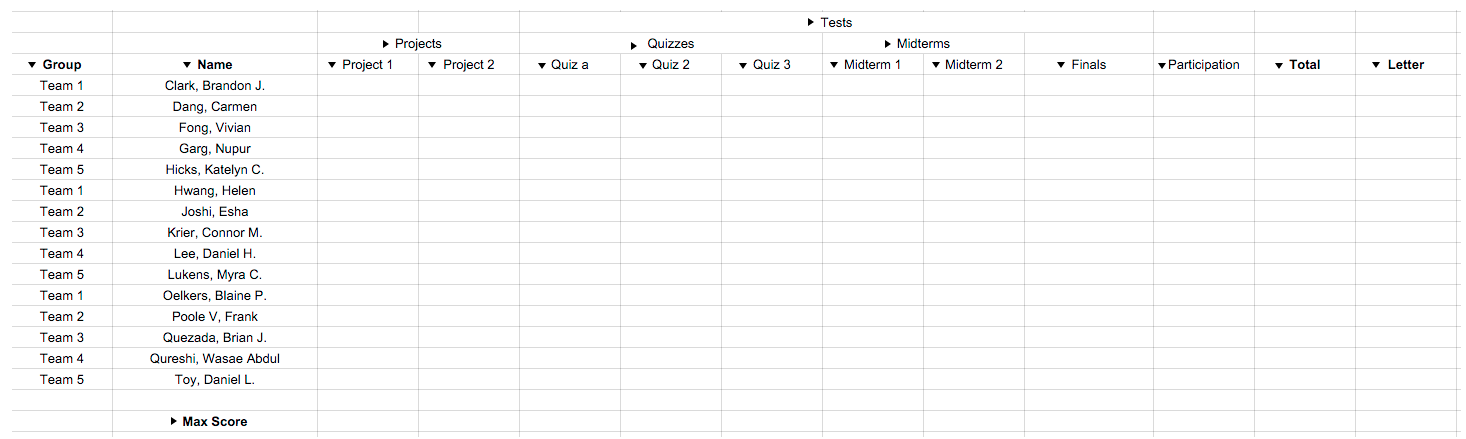
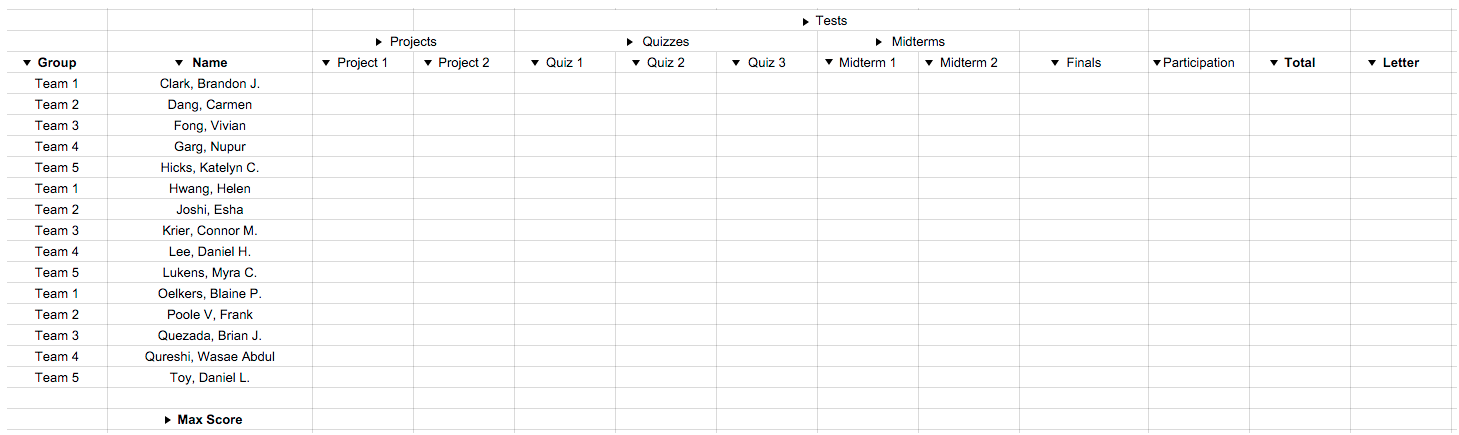
Continuing this process of adding assignments results in Figure 2.4.4e.
From the top level Grades menu (shown in Section 2.1: UI Overview), the instructor selects Manage and dialog box from Figure 2.4.5a appears.

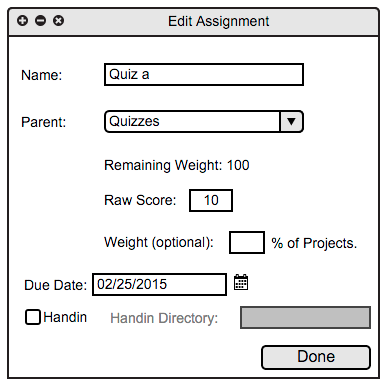
The instructor can then click on the cog icon and Grader shows a new dialog box, as shown in Figure 2.4.5b after the user clicks on the cog next to 'Quiz a'.
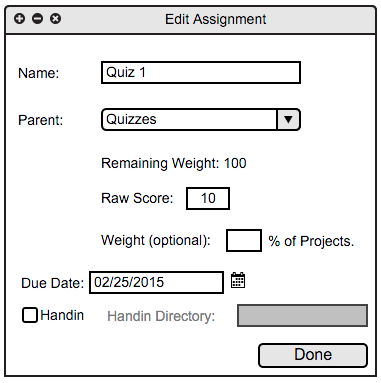
Once the instructor has finished making their changes, as shown in Figure 2.4.5c, and clicks on Done, they may view their changes in the Gradebook as shown in Figure 2.4.5d.
2.4.6 Deleting Categories and Assignments
From the top level Grades menu (shown in Section 2.1: UI Overview), the instructor selects Manage and dialog box from Figure 2.4.6a appears.
The instructor can then click on the trash icon and Grader shows a new dialog box, as shown in Figure 2.4.6b.
Once the instructor has confirmed they wish to delete their Categories and Assignments and click on Yes, then they may view their change in the Gradebook as shown in Figure 2.4.6c. Clicking on No will make no changes to the Gradebook.
To enter a raw score for a student's assignment, the instructor can double-click on the cell of interest, Grader changes the cell to editable, and allows the instructor to enter a score as shown in Figure 2.4.7a. When scores have been entered, Grader changes the background color of the cell to indicate a change.
Continuing this process for all grades results in the following gradebook, as shown in Figure 2.4.7b.
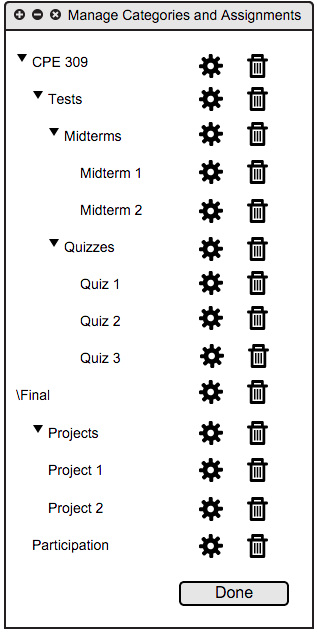
Figure 2.4.6a

Figure 2.4.6b
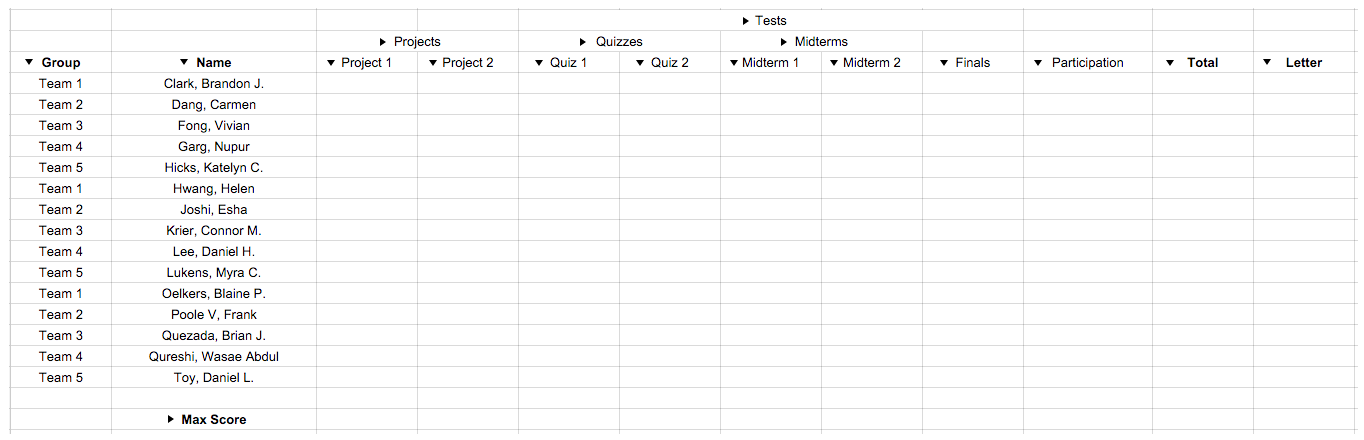
Figure 2.4.6c
2.4.7 Entering Grades

Figure 2.4.7a
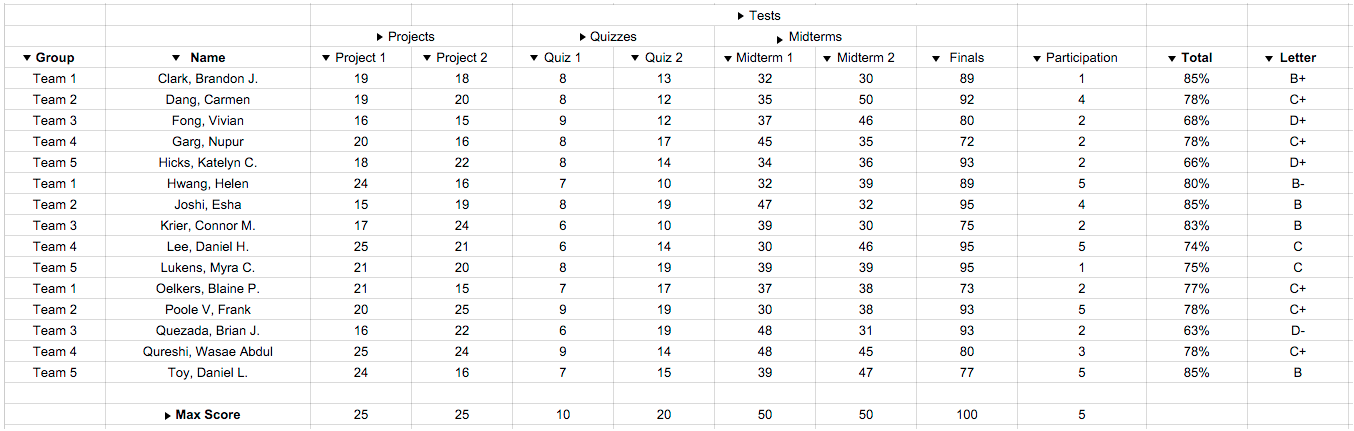
Figure 2.4.7b