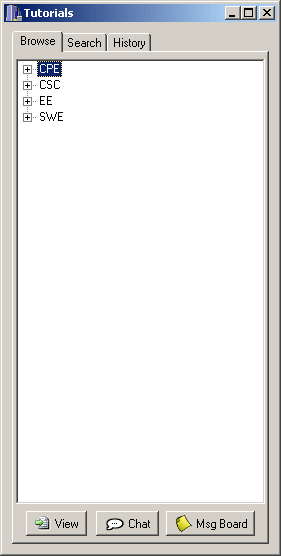
To locate a tutorial via Course and Teacher, the user highlights the
Tutorials window and selects the Browse tab, whereupon the
system displays a list of departments similar to the window shown in Figure
2.4.1a. Although this system is primarily designed for Computer Science
material, there are several departments which share similar subject matter, so
the system supports them as well. This scenario assumes that the teacher has
uploaded several tutorials in addition to the one he constructs in Section 2.3.
Figure 2.4.1a: Initial Browse tab in Tutorials window.
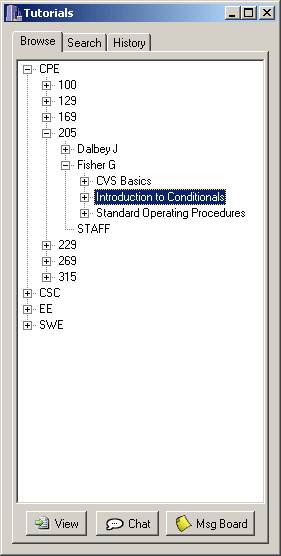
Figure 2.4.1b: Final Browse tab in Tutorials window.
The View button opens the selected tutorial in a new window.
The Chat button opens the chat room window for the selected tutorial.
The Msg Board button opens the message board topic associated with the
selected tutorial.
Finally, the user either clicks the View button or double-clicks the tutorial's name from the list. The system then retrieves the tutorial, opening it in a new navigation window. This window is covered in detail in Section 2.4.5.
The user may optionally choose to browse to a specific page in the selected
tutorial by expanding the plus icon next to the tutorial name. When the user
opens a page in this way, the tutorial loads as described above, but
immediately opens the selected page. Alternatively, the user may double click a
page in the browser while the tutorial is already open
Figure 2.4.1c shows a sample expanded
tutorial view.
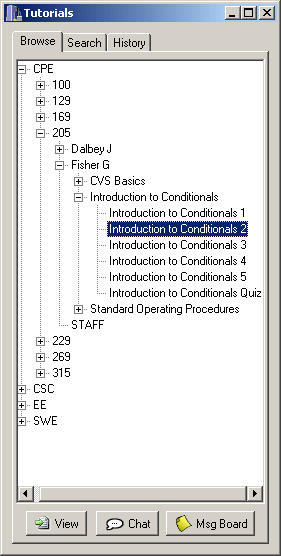
Figure 2.4.1c: Browse tab with Tutorial view expanded.
If the user is looking for information on a certain topic rather than
course-specific tutorials, he instead chooses to do a search. In this case he
highlights the Tutorials window and selects the Search tab.
The system then displays the options shown in Figure 2.4.2a.
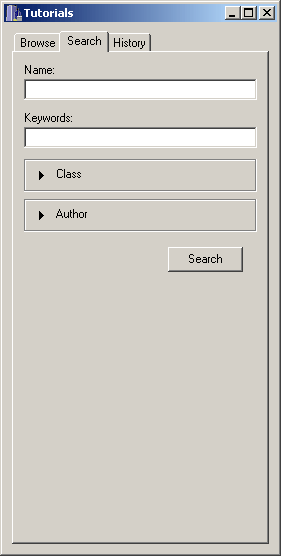
Figure 2.4.2a: Initial Search tab in Tutorials window.
The Keywords field contains specific words to be found in the text of a tutorial. This option and the other categories displayed are covered in detail in Section 2.4.3. When the system displays the search options, the user enters a specific word or phrase describing the subject matter to be found.
After the user enters the text string to search for, the dialog will resemble
Figure 2.4.2b.
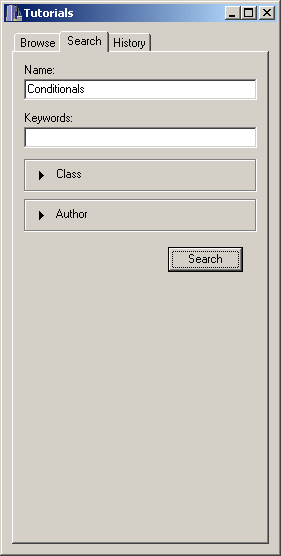
Figure 2.4.2b: Completed Search tab in Tutorials window.
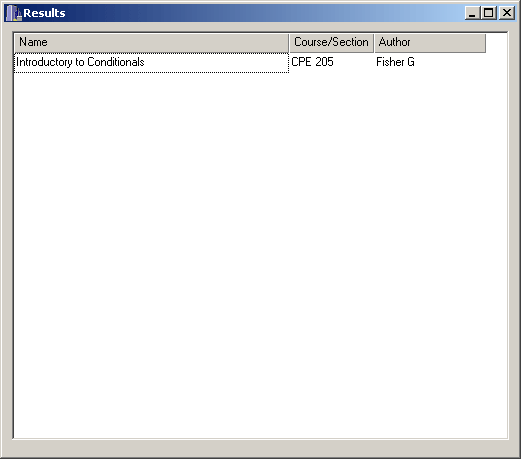
Figure 2.4.2c: Search Results window.
The user then double-clicks an appropriate tutorial from the list, causing the system to retrieve the tutorial and open it in a new window.
The user highlights the Tutorials window and again selects the
Search tab, but also clicks the arrow next to one or more of the
advanced search options. This prompts the system to display more precise fields
for search conditions, as shown in Figure 2.4.3a.
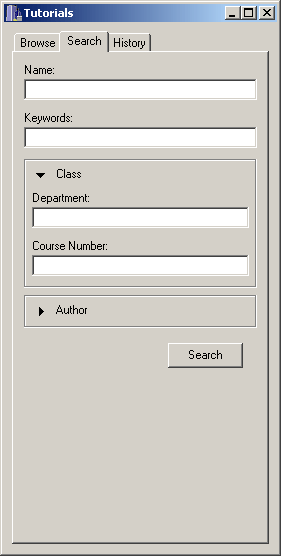
Figure 2.4.3a: Initial Search tab in Tutorials window with some advanced options displayed.
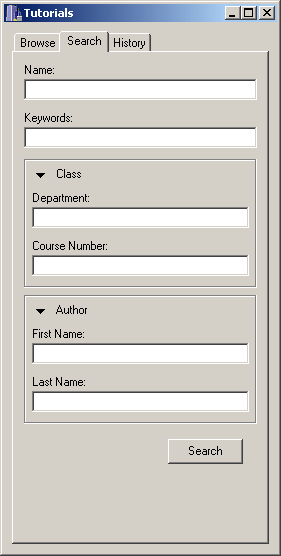
Figure 2.4.3b: Initial Search tab in Tutorials window with all advanced options displayed.
The Keywords field is a one-line string containing one or more words to be found in the text of the tutorial.
The Class section contains the following fields:
The Department field is a one-line string containing the department
code for the desired class.
The Course Number field is an integer containing the course code for
the desired class.
The Author section contains the following fields:
The First Name field is a one-line string containing the first name of
the user who created the tutorial.
The Last Name field is a one-line string containing the last name of
the user who created the tutorial.
Note that the user may leave a field blank to exclude it from the search. When
completed, the search form in Figure 2.4.3a will resemble Figure 2.4.3c.
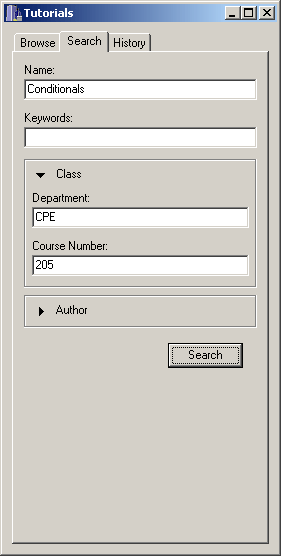
Figure 2.4.3c: Completed Search tab in Tutorials window with some advanced options displayed.
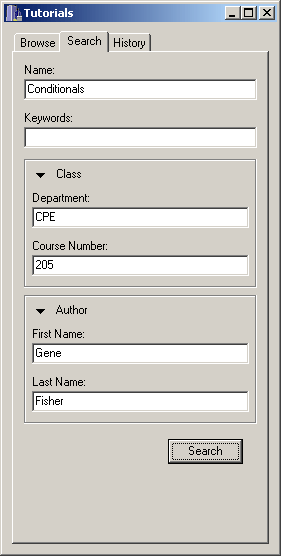
Figure 2.4.3d: Completed Search tab in Tutorials window with all advanced options displayed.
After a logged-in user views a tutorial, it is added to his Tutorial History
list. This tab will be empty for an anonymous user. To locate a tutorial that
the user has previously viewed, he user highlights the Tutorials
window and selects the History tab, whereupon the system displays a
list of folders as shown in Figure 2.4.4a.
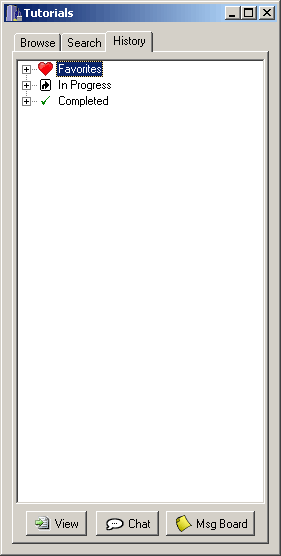
Figure 2.4.4a: History tab in Tutorials window.
If the user begins a tutorial but does not complete it, it is added to the
In Progress folder. When the user completes the tutorial, it is moved
to the Completed folder. Finally, any tutorials the user has
bookmarked are added to the Favorites folder. The user may open any of
these folders by selecting it and clicking the plus icon or double-clicking the
name. The History tab with all folders expanded is displayed in Figure 2.4.4b.
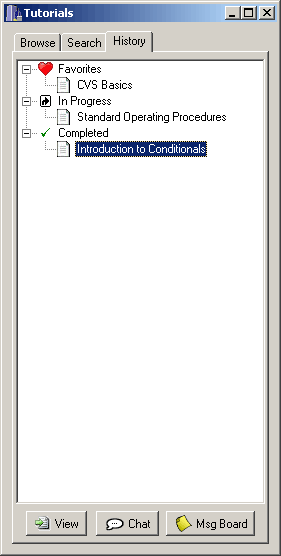
Figure 2.4.4b: Fully expanded History tab in Tutorials window.