2.2 A Simple Tutorial
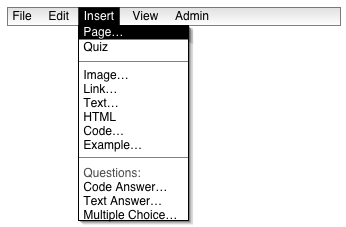
This introductory scenario shows the user creating a simple tutorial. Creating tutorials is the most important operation an instructor completes when using the CSTutor. This scenario assumes that he is signed in as an instructor and has the proper permissions to use the tool. When the instructor first chooses to create a tutorial, he is presented with a blank roadmap. To add a lesson the user selects the 'Page' option in the Insert menu, as shown in Figure 2.2.1.
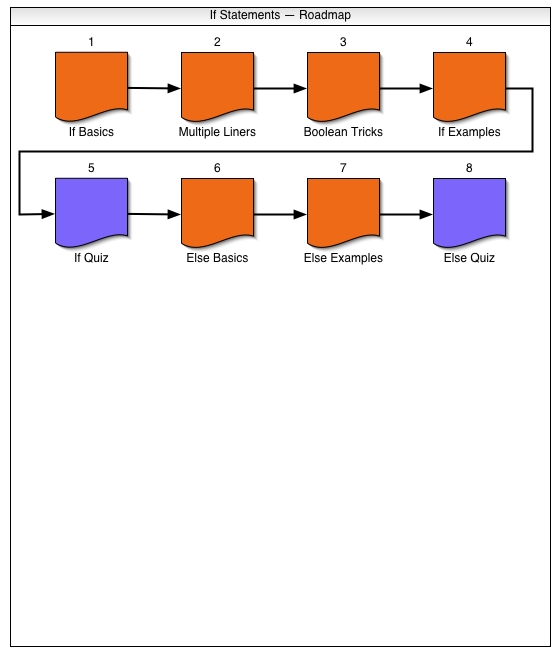
After inserting several pages into the lesson, the roadmap looks like Figure 2.2.1.2.
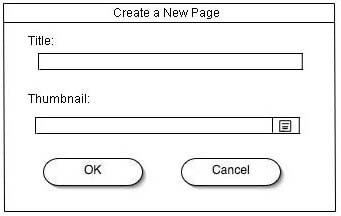
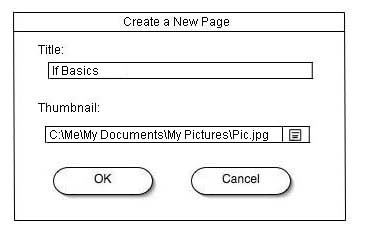
The instructor then double clicks on the page box within the roadmap, and the CSTutor opens the new page, prompting a dialogue box shown in Figure 2.2.2. Here the instructor fills in the name of the page under the Title data field and an image to use as the thumbnail, if he wishes to in the Thumbnail field. The instructor can also select the file button to open a file manager and select the image manually.
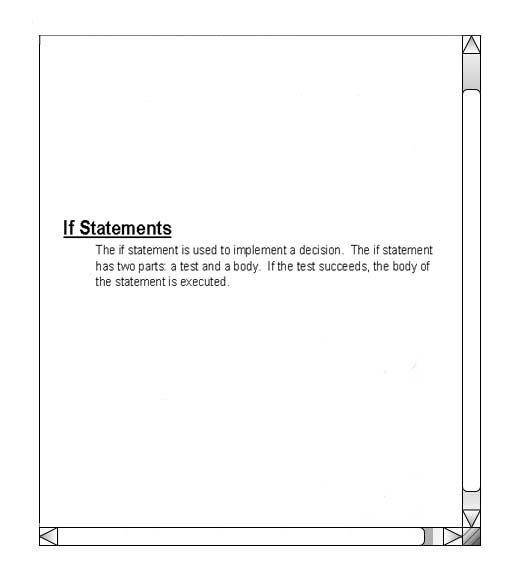
When the instructor clicks ok, he is allowed to edit the page. First, he inserts a text box. A text box is a place to enter simple text into the page. See Figure 2.2.3.

Then the instructor double clicks the text box and types in it. The result is a filled in text box, where the lines defining the box have disappeared and the entered text remains, as shown in Figure 2.2.4. Double clicking on the text box again makes it editable once more.
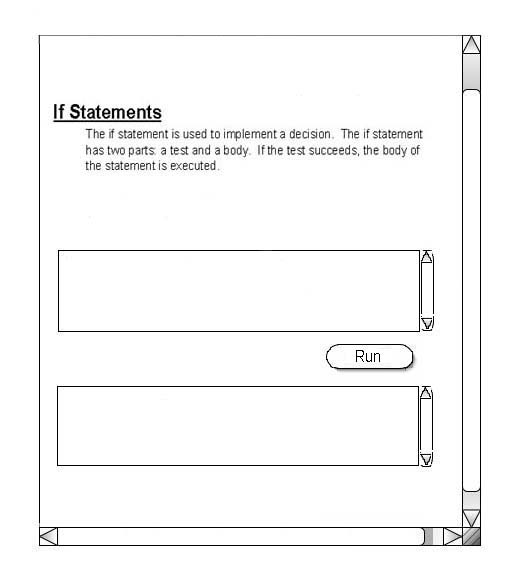
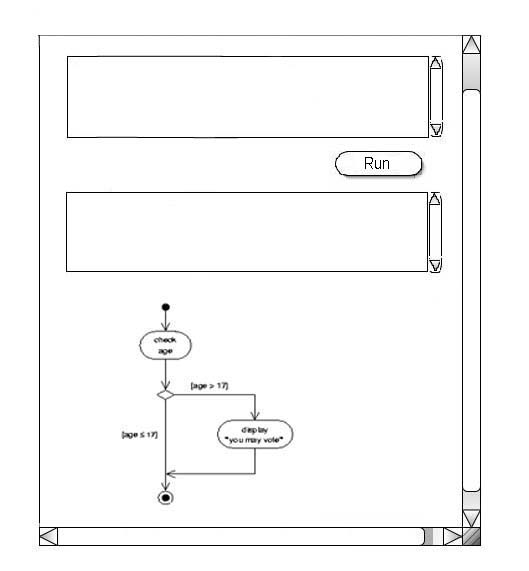
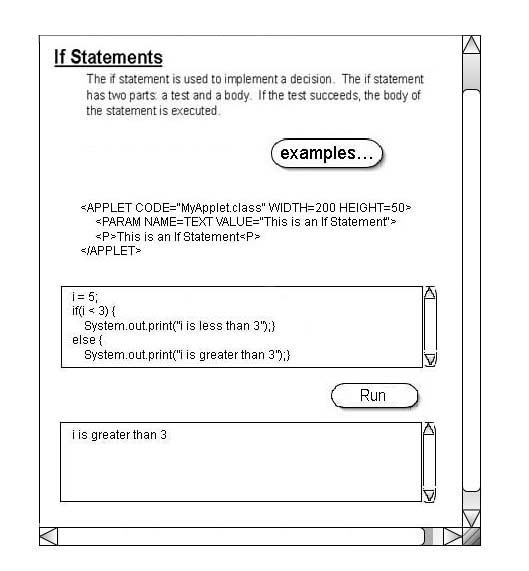
Then the instructor chooses to insert a code box by selecting Code Box from the Image menu in Figure 2.2.5. A code box provides a simple way to test code throught the Java Beanshell, as shown in Figure 2.2.6.

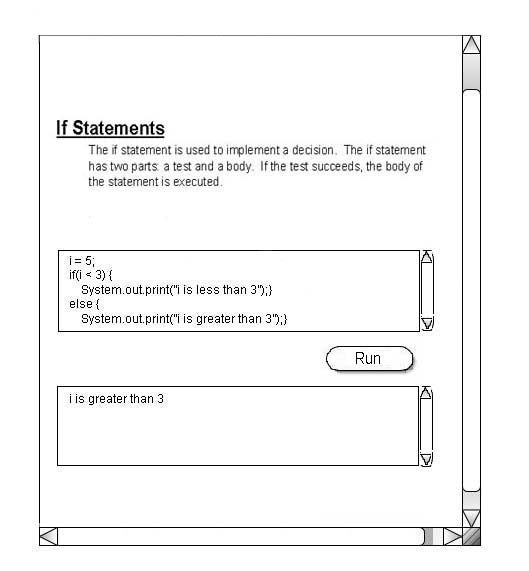
The instructor chooses to edit a code box. Code to be run is entered in the upper box, and pressing Run runs the entered code. The lower box, which is not editable, displays the output of the code entered in the upper box. In this example, the instructor types some code into the upper box, and presses Run to run it, and the CSTutor displays the output in the lower box in Figure 2.2.7.
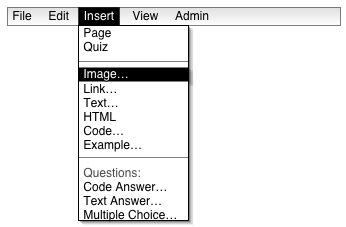
Then the instructor chooses to insert an image by selecting Image from the Insert menu in Figure 2.2.8.
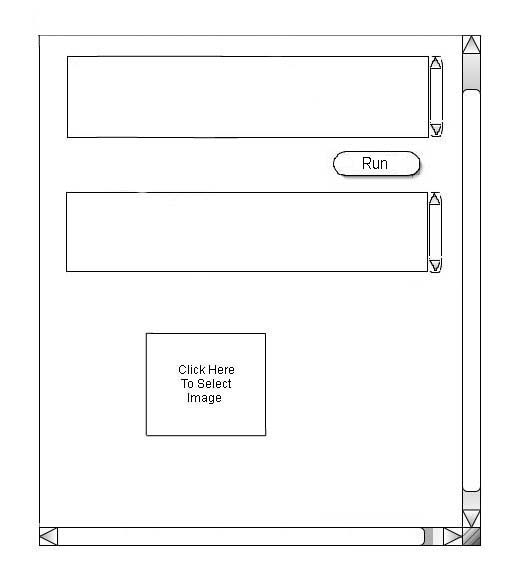
Double clicking on the image box brings up an open dialogue box. The instructor then can choose the image he wants and insert it into the Image. When this is completed, the image replaces the blank image box in the page, as seen in Figure 2.2.10.
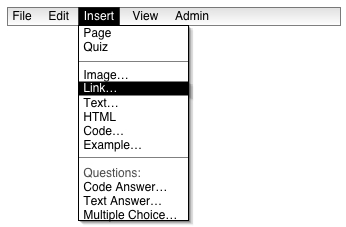
Lastly the instructor inserts a link by selecting Link from the Insert menu in Figure 2.2.11.

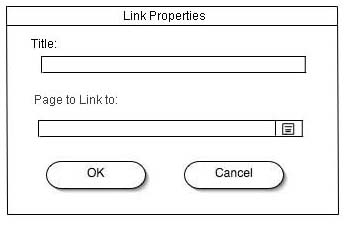
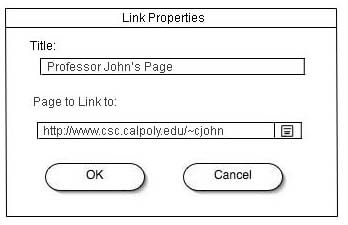
Double clicking on the Link box opens up a dialogue box in Figure 2.2.13 which lets the instructor name the link and choose where it points to. Both of these fields must be filled in before the Link can be created.
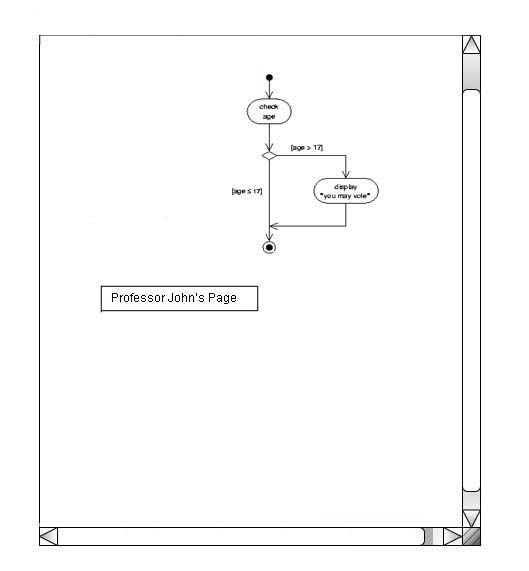
After creating the Link, the page looks like Figure 2.2.14.
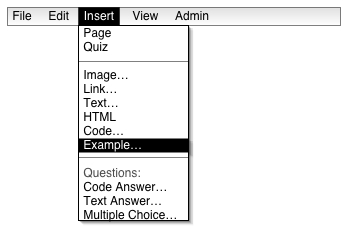
The instructor can also insert an example that points to another page. He does selects Example in the Insert menu in Figure 2.2.15. Inserting an example creates a new Page that the example points to, and brings up the New Page. It does not bring up the New Page dialogue because the page is linked directly to the example. For information on creating a page, refer to Creating Pages.
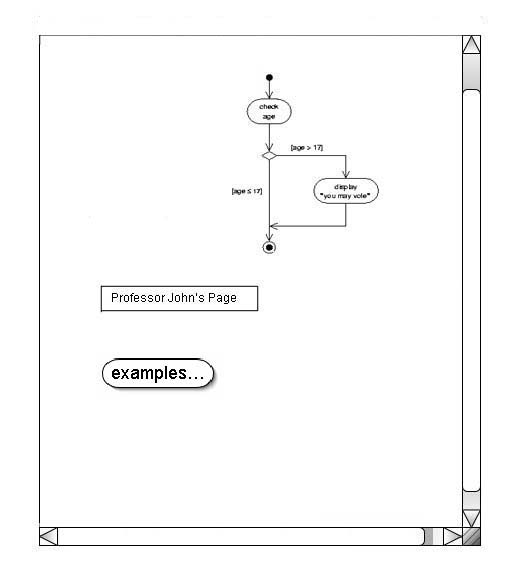
When the instructor is finished creating the page that the example points to, he saves that page and closes it. Returning to the main page there is now an Example on the page as shown in Figure 2.2.16. Double clicking on the Example allows the instructor to edit the page it points to.
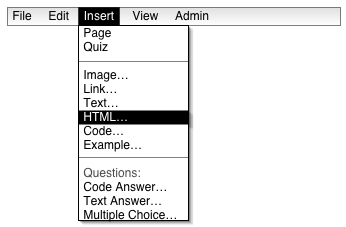
The final option available to the instructor is to insert HTML. HTML allows the instructor to insert code that is not supported any other way by the CSTutor, such as applets and hit counters. To insert HTML, the instructor chooses HTML from the Insert menu shown in Figure 2.2.17.
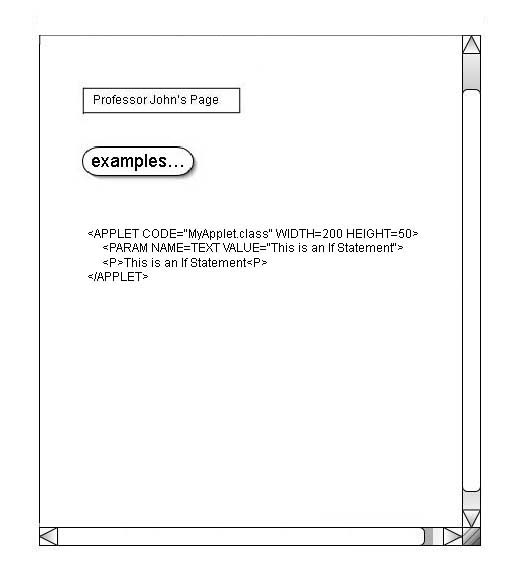
To edit the HTML, the instructor double clicks on the HTML and types just like a Text Box. All text entered into the HTML is seen as how the HTML would look like as viewed in a browser when the page is viewed.
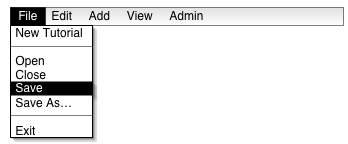
After moving several pieces around, the instructor is finished. He selects Save from the File menu and saves the page.
When the instructor is finished with the page, he can then close the window and return to the roadmap, which shows the completed page.