2.9 Detail of File and Edit Commands
Refer back to section 2.1 User Interface Overview to see all menu options that are available to the instructors and students. This section explains all of the File and Edit operations that are available in eClass. Details for each are provided below.
2.9.1. File New
File New is used to open a new set of blank windows including a blank lecture template. By clicking 'File New' an empty set of windows will open. If a current lecture is already open, the new set of windows will open over the current lecture viewed, but opens in a new tab to avoid losing any work that has not yet been saved. If the user would only like to keep one tab open, they can close or 'Exit' the other open tabs. (see Figure 1: Clicking File New)
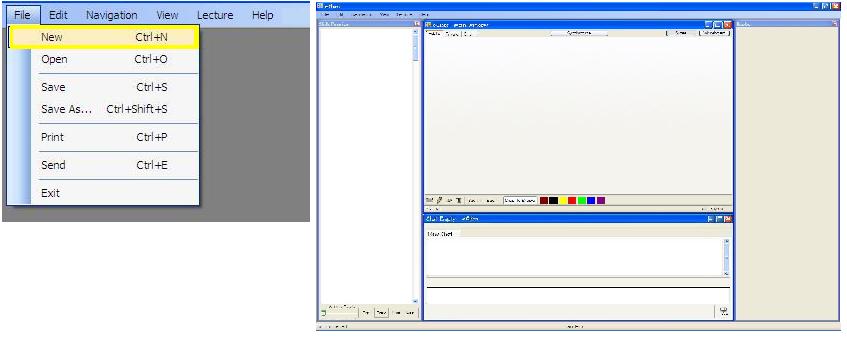
Figure 1: Clicking File New
2.9.2. File Open
To open a lecture that has already been presented in class or a lecture that will be viewed during the lecture period, click on 'File Open'. This will bring up a window that allows the user to chose what file they would like to open. To open a file, the user must click the file that they would like to open. This will highlight the file the user has chosen. User must then click the open button at the bottom right-corner of the screen. This will load the lecture file and all private notes that have been saved along with the file. The lecture just opened appears the same way as when the lecture was originally saved as if the lecture was never closed. (See Figure 2: Opening a Lecture)
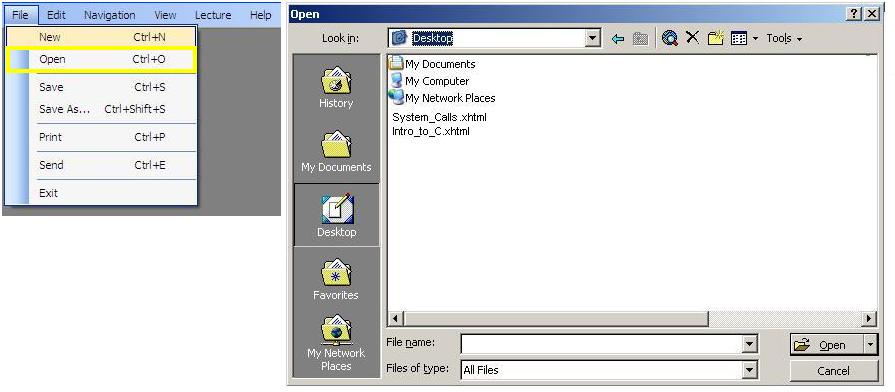
Figure 2: Opening a Lecture
2.9.3. File Save and File Save As
To save a lecture at the end of the class period, user must go to 'File Save As'. The user can then chose to save the lecture into a specific directory or on the desktop. The user must type in a file name and click the Save button located at the bottom-right corner of the Save As window. This will save any additions that the user has made to the lecture including private notes and drawings that may have been added during the lecture presentation. The saved file is located on the hard drive of the individual computer that the user uses during the lecture period. The file may be transferred to the network or sent through email as the user sees fit. If a file has already been saved but information has been added by the user, they click 'File Save'and any additions to the existing file will be saved the same way as 'File Save As'. (see Figure 3: Saving)
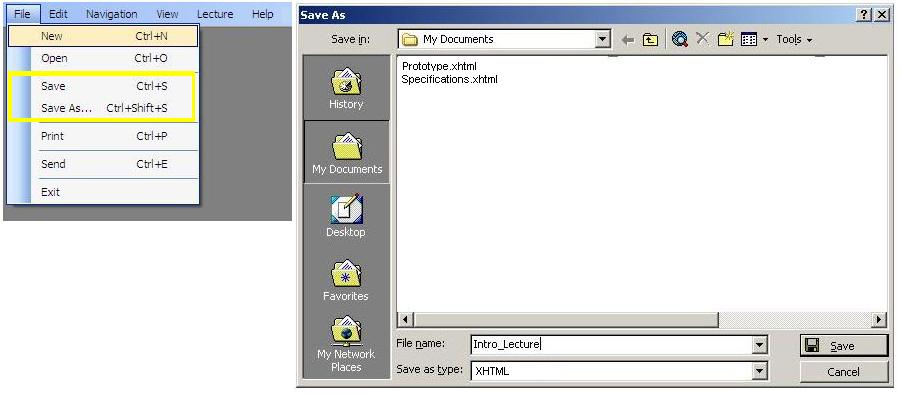
Figure 3: Saving a Lecture
2.9.4. File Send
To send a slide to another user, the user must highlight the slide they wish to send and then click on 'File Send'. A window will pop-up and ask the user to enter the username of the user they wish to send the slide to. Click the Send button located at the bottom of the window. The slide has now been sent. (see Figure 4: Sending a Slide)

Figure 4: Sending a Slide
2.9.5. File Print
To print the current lecture, user must go to 'File Print'. This brings up a new menu that asks what format the user would like to print the slides in, as well as what extra information (i.e. private notes) the user may wish to print. Once options are chosen, the user must click the Print button located in the bottom right-corner of the window. The selected slides will be printed to the printer chosen by the user. (see Figure 5: Printing a Lecture)
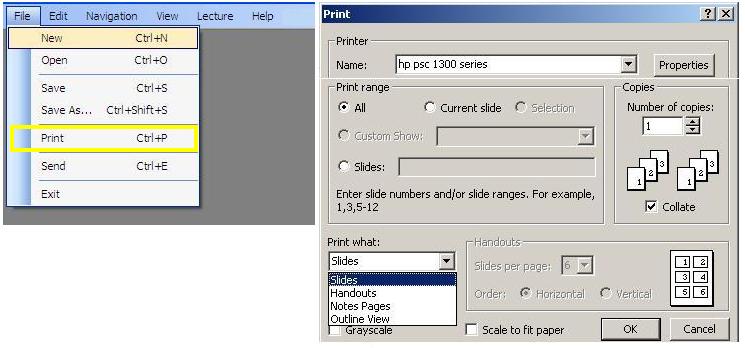
Figure 5: Printing a Lecture
2.9.6. File Exit
To Exit the program, the user must go to 'File Exit'. This brings up a dialogue asking if the user is "sure they want to quit?" This prevents users from quitting the program without having the opportunity to save any work they have done. This will close the entire program, including windows like chat or roster. To use the program at a later time, the user must re-open the program by double-clicking the icon on the user's desktop or start menu. (see Figure 6: Exiting a Lecture)
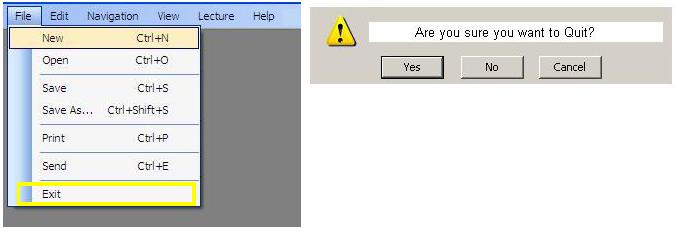
Figure 6: Exiting a Lecture
2.9.7. Edit Undo, Edit Redo
If the user uses one of the drawing tools and does not like the way that it looks, they can click 'Edit Undo'. This undoes the last mark that was made on the lecture or chat window. If the user continues to click 'Edit Undo', the previously made marks will also be deleted from the screen one by one with each Undo. If the user clicks the Undo button but decides that they want to have the image back on the screen the user can click the 'Edit Redo' button. This will bring the last image that was undone back onto the screen. Continuing to click 'Edit Redo' brings back previous images that were undone one-by-one. (See Figure 7: Undo and Redo)
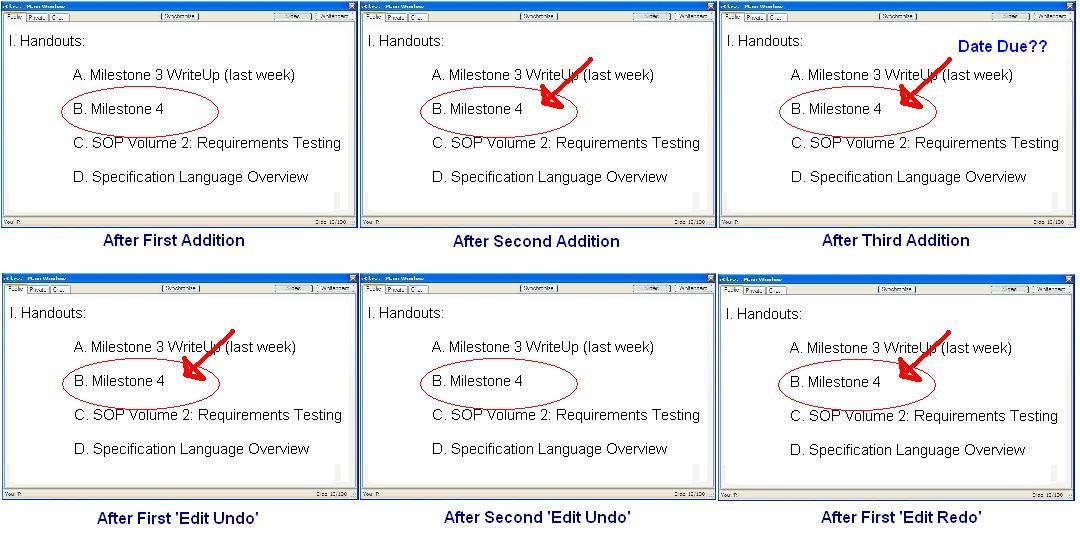
Figure 7: Undo and Redo
2.9.8. Edit Cut
If a drawing is drawn on the screen by a user, but they would like to change the location of that image, they can highlight the image by left-clicking and holding down the mouse, dragging the cursor over the image and then letting go of the mouse to capture the image. The user must then click 'Edit Cut' and this cuts the image out of the current place. To make the image reappear, click 'Edit Paste' this will paste the image back into the lecture or chat window and then can be moved around until the desired place is found. The user must click outside the image box to paste the image onto the window. (See Figure 8: Using Cut)
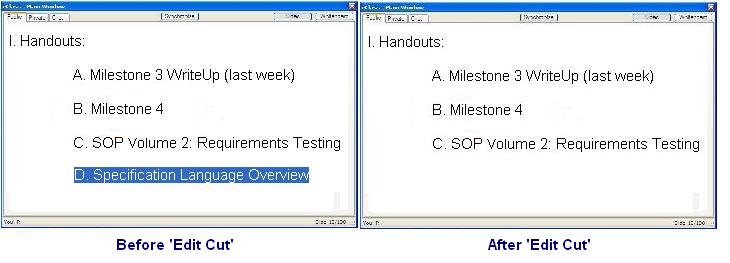
Figure 8: Using Cut
2.9.9. Edit Copy
To create a duplicate of an image that is already on the screen, highlight the image the same way as Cut and click 'Edit Copy'. To add the duplicate to the window, click 'Edit Paste' to paste the image. The actual image stays in the same place and the duplicate image can be placed in the desired location of the user. There is now two duplicate images. (See Figure 9: Copying an Image)
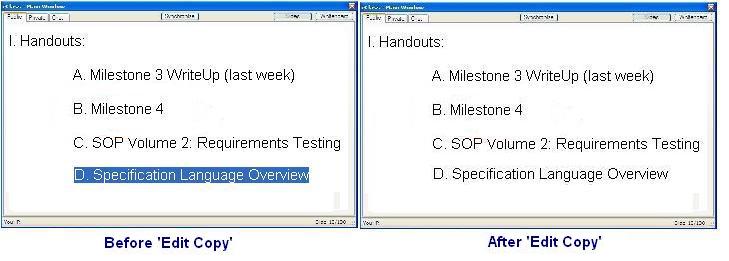
Figure 9: Copying an Image
2.9.10. Edit Paste
After using the Cut or Copy operation, the user must use the Paste operation to make the cut or copied image appear on the screen. User clicks 'Edit Paste'and the image appears on the screen. The image can be moved to the desired location of the user. After the user has chosen the correct desired location, they must click outside the image and this will set the image. (See Figure 10: Pasting an Image)
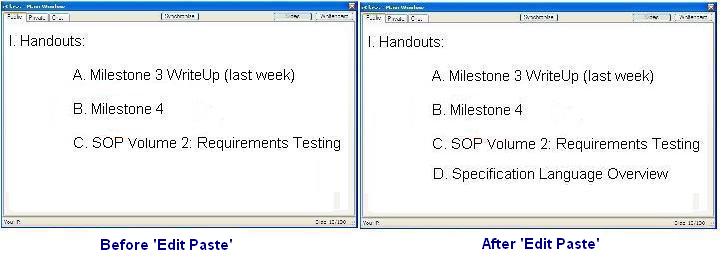
Figure 10: Pasting an Image
2.9.11. Edit Delete
To delete an image from the screen, the user must highlight the image they wish to delete using the highlighting technique used in Cut and Copy. Then the user must click 'Edit Delete', this will delete the image and will not save the image anywhere to be re-pasted. The only way for a user to get the deleted image back to the window is to use 'Edit Undo' operation which will undo the 'Edit Delete' command. (See Figure 11: Deleting an Image)
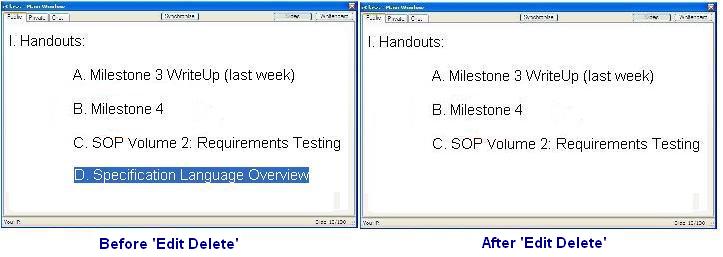
Figure 11: Deleting an Image
2.9.12. Edit Select All
To Select all images and text on an entire slide, the user must click 'Edit Select All'. This will highlight the entire slide for the user without having to click and drag themselves. This operation is useful if the user would like to copy or cut an entire slide. (See Figure 12: Select All operation)
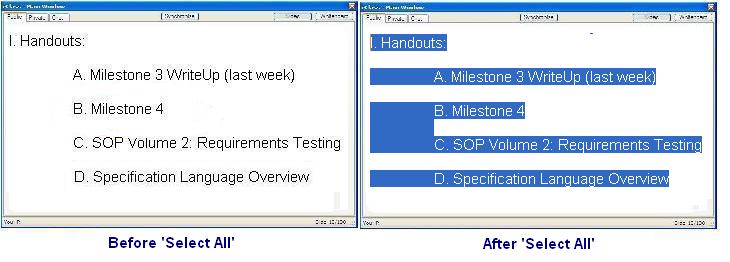
Figure 12: Select All Operation
2.9.13. Edit Find
If the user is searching for a key word that may be in the slides or private notes, they click 'Edit Find'. This opens a window that allows the user to input a search word. Then by clicking "Find Next" in the pop-up window the program finds the next occurence of the word in the file and highlights the word for easy viewing. If there are no more occurances of the word, the program pops up a window saying "No More Matches Found". (See Figure 13: Using Find)

Figure 13: Using Find