2.7 Navigating and Using the Roster
Before we can begin understanding the functionalities for both the
Roster and Participation Screen, we need to dissect the respective
student and teacher views of the eClass program.
This is what a typical Teacher view looks like:
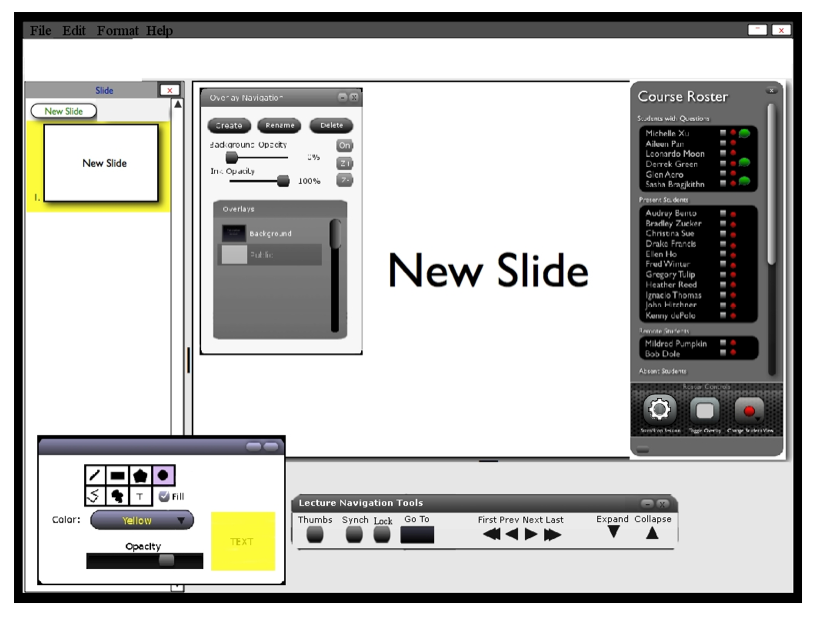
Figure 1: Teacher View
This is what a typical Student view looks like:
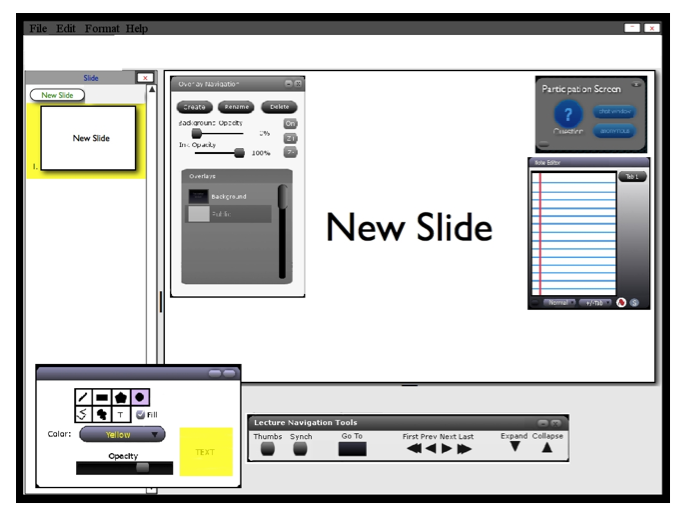
Figure 2: Student View
To assist the understanding of the scenarios to follow, here is
a description of the icons that appear on the roster window.
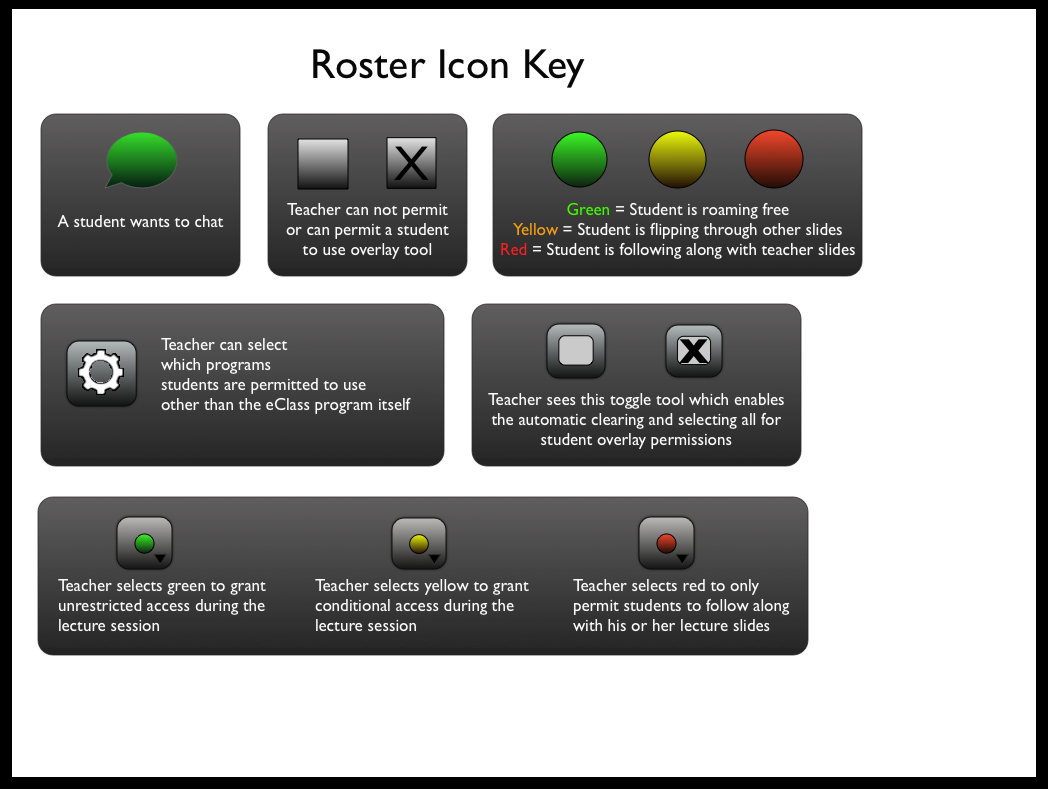
Figure 3: The Roster Icon Key
The process of joining a lecture is described in Section 2.8. After joining
a lecture, the teacher sees an empty roster.
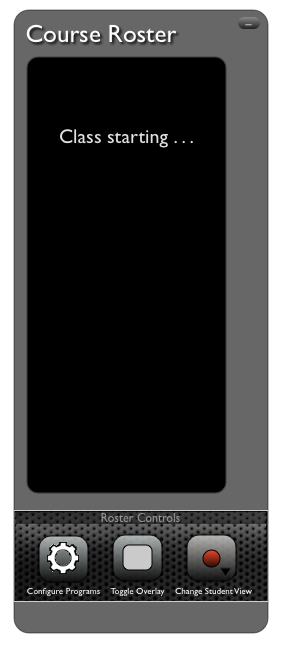
Figure 4: The empty roster, where no student has signed in yet.
As students sign into a lecture session, the roster automatically
takes role, accounting for both present and absent students.
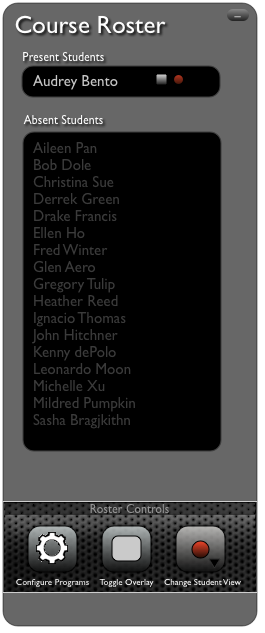
Figure 5: Student Audrey Bento is the first student to sign in.
When a student first signs in, he or she sees a participation
screen looking like the following.
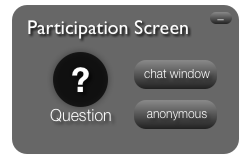
Figure 6: An inactive Participation Screen
As more students sign in, the roster displays their names in the
"Present Students" list.
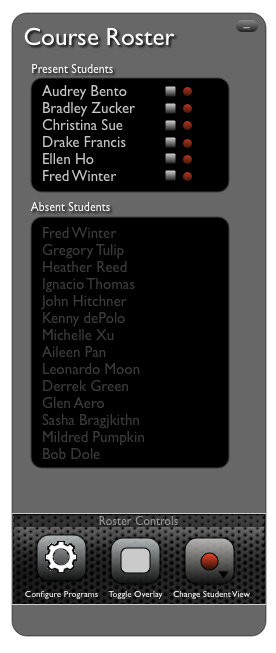
Figure 7: Students Bradley, Christina, Drake, Ellen, and Fred sign in
after Audrey.
These students will be seeing a Participation Screen on their
respective monitors as shown in Figure 6.
Throughout the entire lecture session, the Participation Screen will
be physically present in the student's view, and the Roster will
always be physical present in the teacher's view. The student can
choose to minimize the Participation Screen or move it to another
preferred location. The teacher can do the same for the roster.
When a student wants to ask a question, he or she can ping the
teacher by clicking the "Question" icon. A student can choose to
ask a question orally.
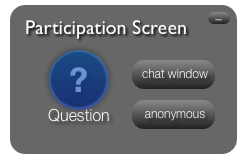
Figure 8: Student Michelle Xu wants to ping the teacher. The Question icon is
highlighted the moment she releases her mouse.
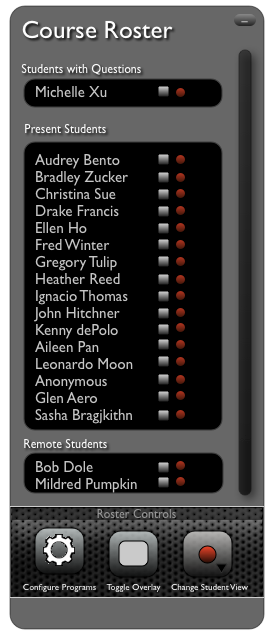
Figure 9: Meanwhile, the teacher's roster displays Michelle's name
under the list "Students with Questions".
If the student does not want to ask a question orally, he or she
can ping the teacher, and open up a chat window to type in the question.
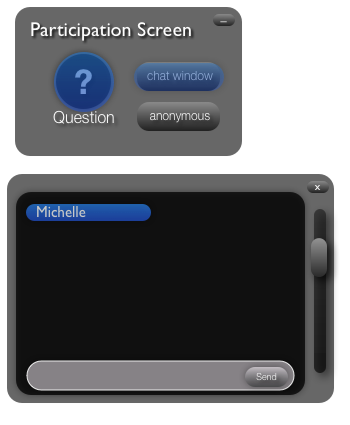
Figure 10: Here, Michelle wants to ask a question. She wants
to open up a chat window, so she clicks the icon "chat window" to
do so. Then an empty chat box pops up immediately after.
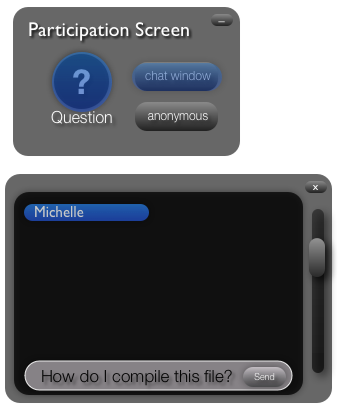
Figure 11: Michelle asks the question: "How do I compile this file?"
from her student view.
After the student presses "send" to send off a written question,
the teacher's roster displays a green chat bubble next
to the student who has the question.
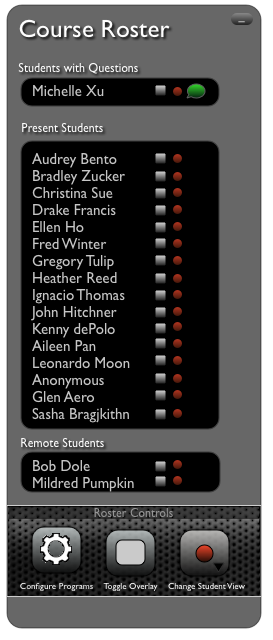
Figure 12: Green chat bubble appears next to Michelle Xu's name.
To view a question, the teacher clicks the green chat bubble. Once
the teacher clicks the icon, a green box with the student's question
appears. This question box appears on the left of the Roster.

Figure 13: Teacher views Michelle's question.
A student can choose to ask a question anonymously as well. To ask an
anonymous question, the student clicks "anonymous" and in the chat window,
he or she will see "Anonymous" displayed as the sender instead of his
or her real name. Then the student types in the question.
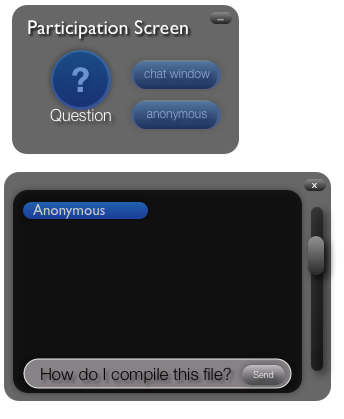
Figure 14: Our sample student Michelle wants to ask a question anonymously.
The teacher views the question the same way as if he or she were to read a
non-anonymous question.
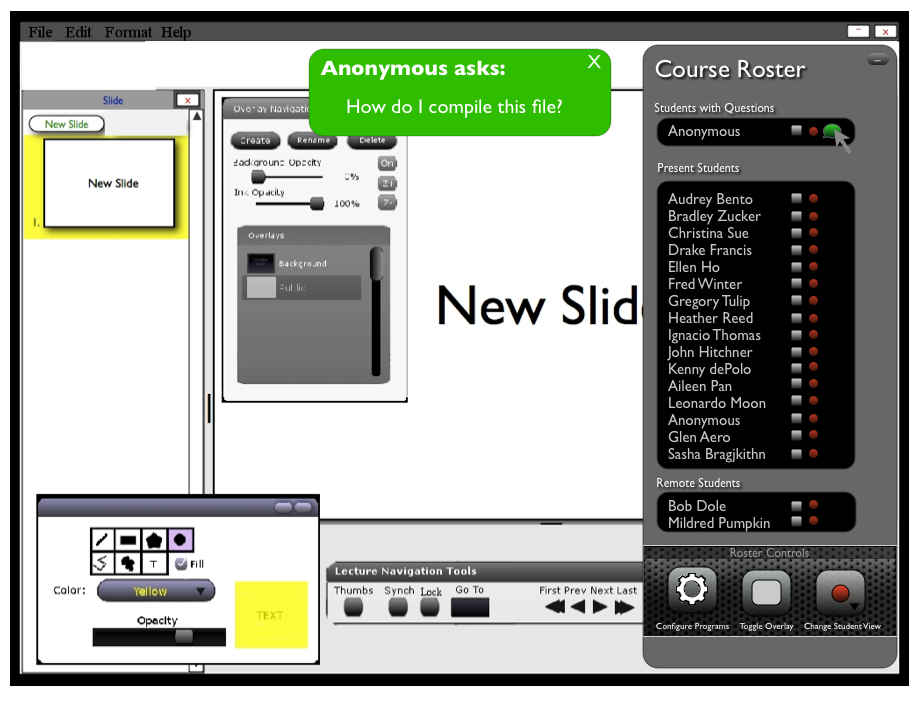
Figure 15: Teacher views the anonymous question, not knowing it was sent
by Michelle.
Multiple students can ask questions, and the if the students choose to ask
via chat, green bubbles will show next to the respective askers.
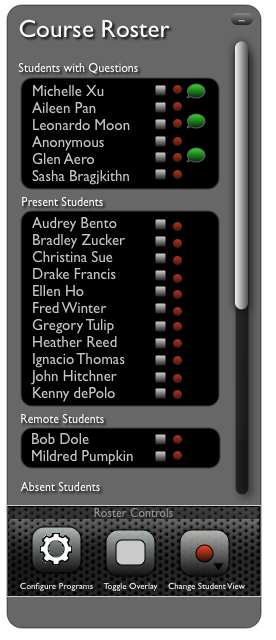
Figure 16: Michelle, Leonardo, and Glen ask questions via chat window.
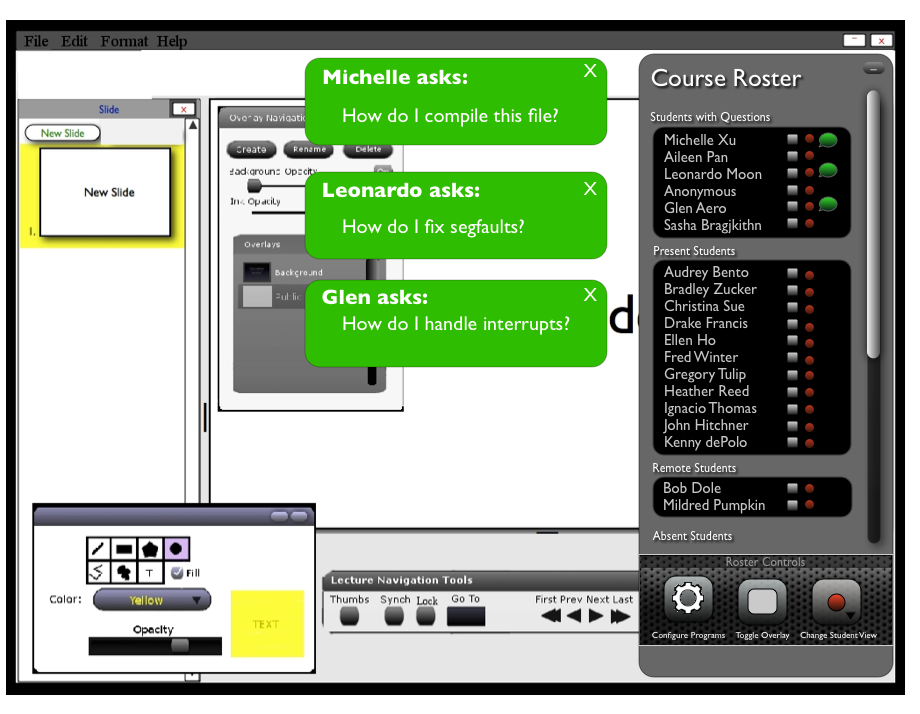
Figure 17: When the teacher clicks the green chat bubbles for Michelle,
Leonardo, and Glen, the question text bubbles line up vertically
on the left of the roster by default.
The teacher can permit anybody to use the overlay feature. By default,
no students are permitted to use the overlay, and so the boxes
next to each student name remain blank until clicked. To permit a student,
the teacher selects the box next to a students name, and an "X" appears
after the mouse release.
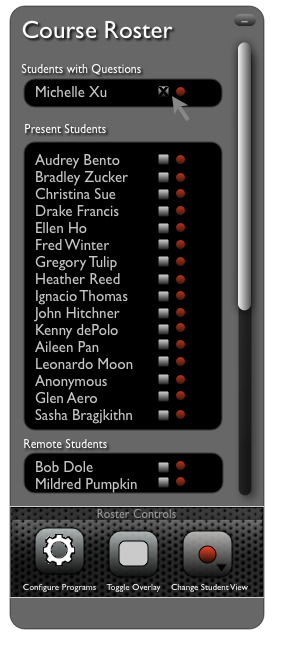
Figure 18: Teacher is only permitting Michelle to use the overlay feature.
The Teacher can manually select as many students to permit using the overlay
as preferred.
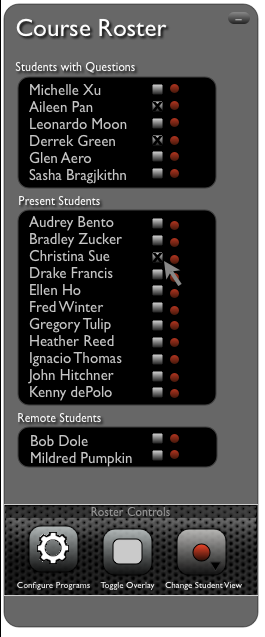
Figure 19: Teacher is only permitting Aileen, Derrek, and Christina to use
the overlay feature.
To remove permission to use the overlay, the teacher de-selects the X in the
box next to the student's name.
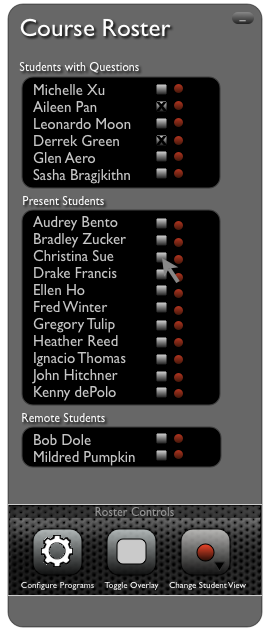
Figure 20: Teacher removes Christina's permission to use the overlay.
The teacher can choose to have every student's overlay permissions cleared
by clicking "Toggle Overlay." After clicking Toggle Overlay, its icon
automatically changes into an Xed box, symbolizing that if the teacher preferred,
he or she could permit all students to use the overlay.
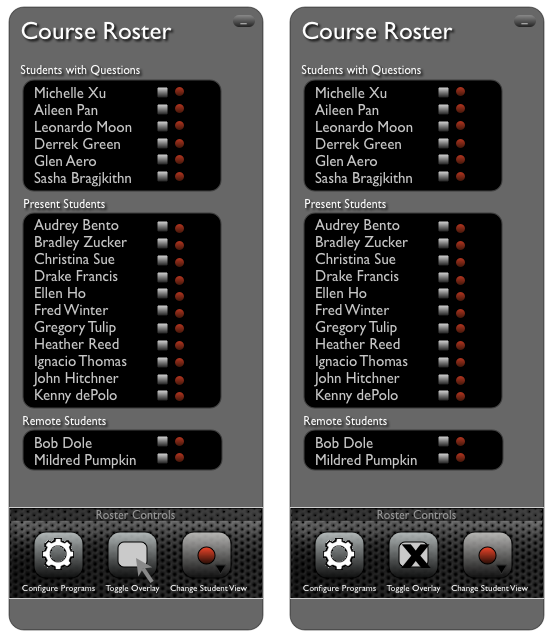
Figure 21: Teacher toggles to deny permission to all students to use overlay.
When the teacher wants to permit all students to use overlay, he or she
clicks Toggle Overlay again. Automatically the icon changes back into
an un-Xed box, signaling to the teacher that he or she is enabled to
remove overlay permissions for all students.
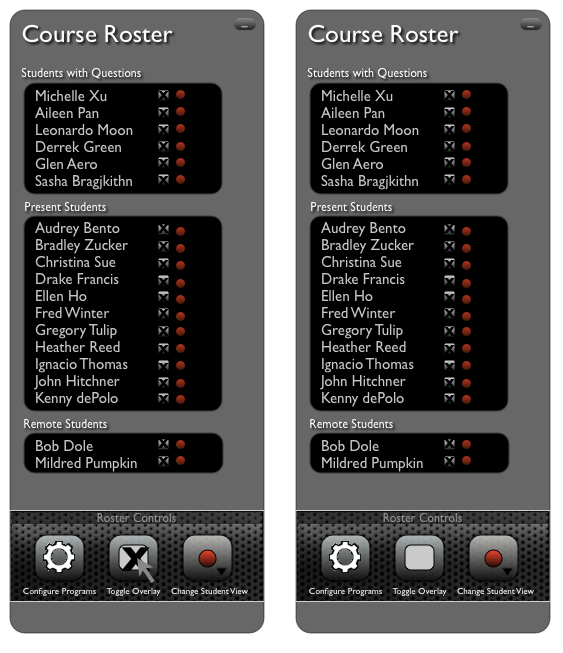
Figure 22: Teacher toggles to grant permission to all students to use overlay.
In addition to changing the overlay permissions for students, the teacher
can adjust the viewing permissions as well. There are 3 main states that
a student can experience:
1. (RED) Total lockdown
2. (YELLOW) Conditional lockdown
3. (GREEN) Complete viewing freedom
Total lockdown means that students can only follow along with the teacher
slides. On his or her monitor, the student can only see the eClass program,
and no other programs.
Conditional lockdown means that students can follow along with the lecture
and only use the programs the teacher permits to use simultaneously with eClass.
Complete viewing freedom means that students can use any program freely, be it
eClass or any other program available on the machine.
The teacher can adjust the permissions by clicking on the "Change Student View"
icon, and select the new permission denoted by a color.
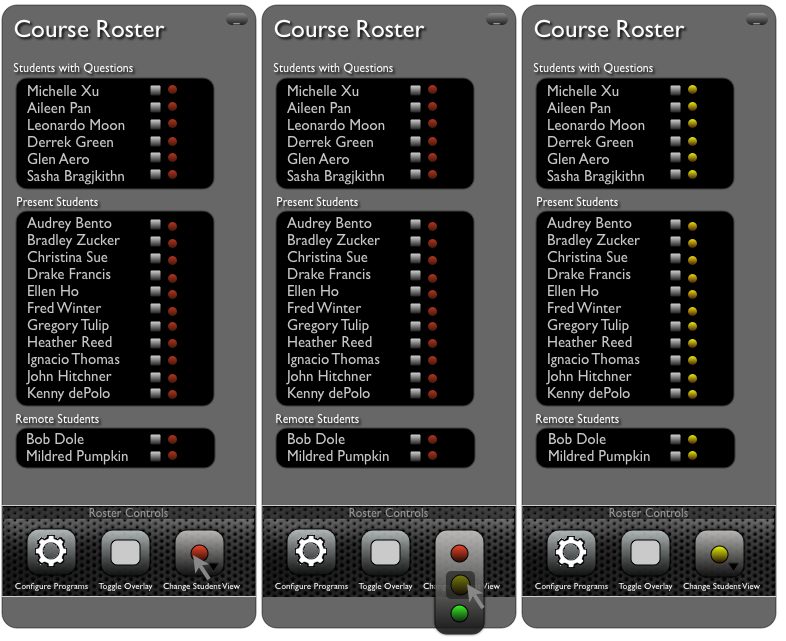
Figure 23: Teacher wants students to experience conditional lockdown.
When the teacher wants conditional lockdown, he or she can specify which programs
students can use apart from eClass. When the "Configure Programs" icon is clicked,
a Permitted Program popup appears. It lists all of the programs available on
the machine.
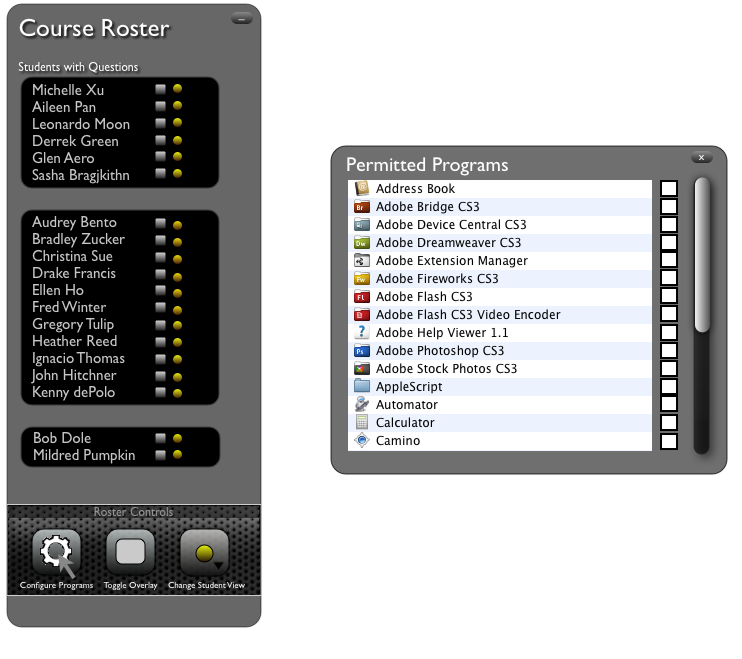
Figure 24: Teacher sees a Permitted Program popup after clicking on Configure Programs.
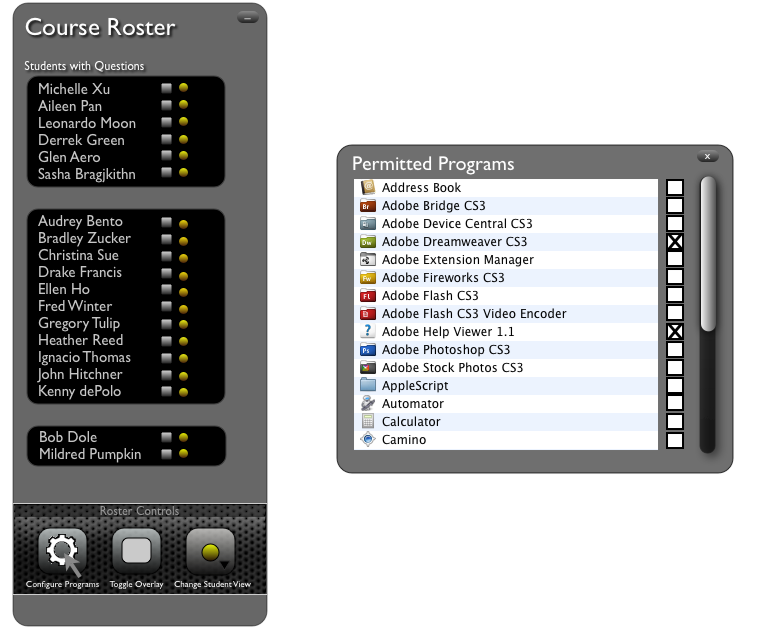
Figure 25: Teacher specifies two programs that the student can use: DreamWeaver and
Adobe Help Viewer.
After the teacher is finished, he or she can close the Permitted Programs window by
clicking on the "X" on the right hand corner. Meanwhile in the student view, all
students can see a listing of permitted programs in the bottom right hand corner of
the screen. To launch the program within eClass, the student just double clicks
the name of the program.
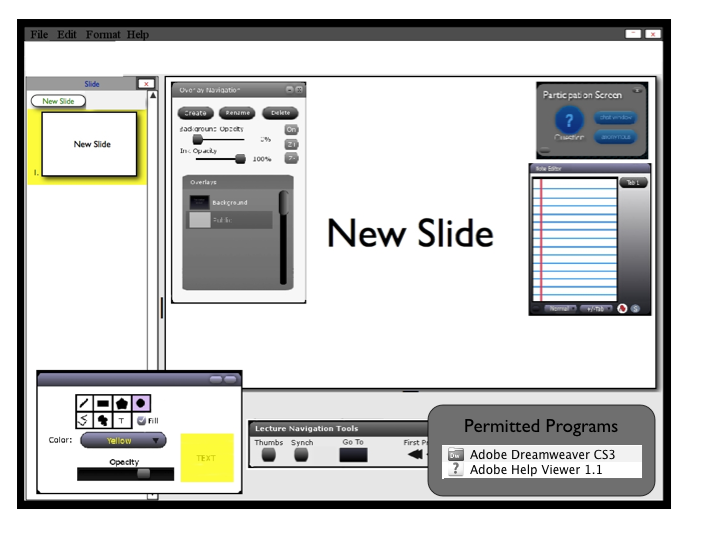
Figure 26: The student sees the Permitted Programs listing on the bottom
right hand corner.
During the session, the teacher can track what students are doing through glancing at
the roster. When the viewing permissions is set to green, the students can either
follow along with the teacher, use permitted teacher programs/flip through slides
freely, or can use other programs that the teacher did not specify. When the viewing
permissions is set to yellow, students can either follow along exactly with the teacher
or use permitted programs. When the viewing permissions is set to red, students can
only follow along with teacher slides.
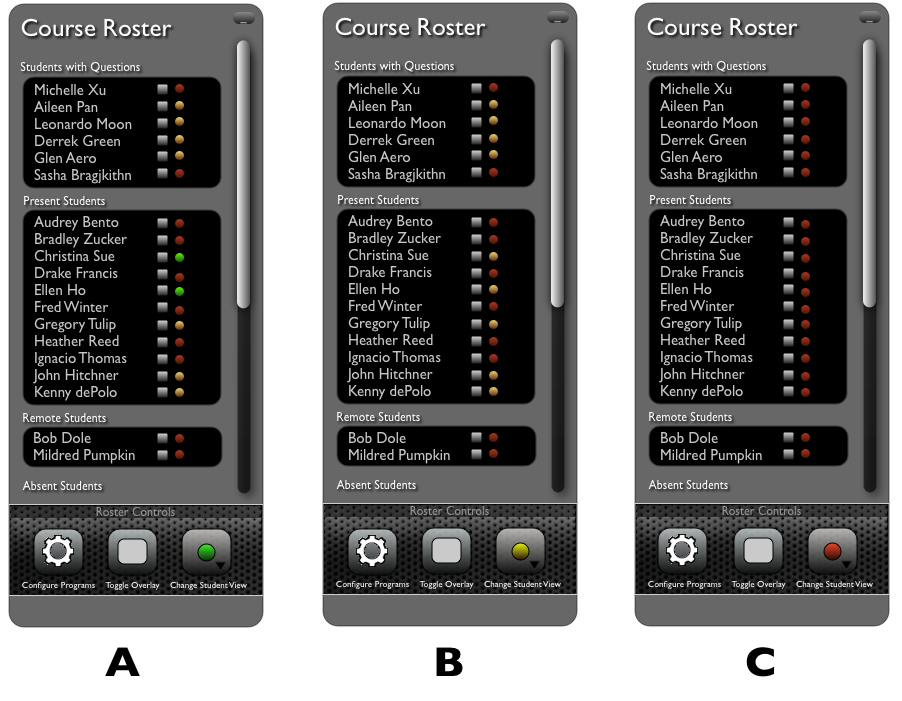
Figure 27: (A) Students Christina and Ellen are using any program and aren't following
along with teacher slides. (B) Students in yellow like Aileen and Leonardo are flipping
through slides and are only using the programs the teacher permitted. (C) All students
are forced to look at the teacher slides.
Prev: Starting A Lecture
| Next: Giving A Lecture
| Up: Functional Requirements
| Top: index


