2.2.3 Manually adding a student
In this walkthrough, a user is adding a student to the grade sheet.
The user is assumed to have just created a new grade sheet, with all default
entries nd settings. To add a student, the user selects "Add" from the "Students" menu.
In response the system displays the dialog shown in Figure 2.2.3.1.
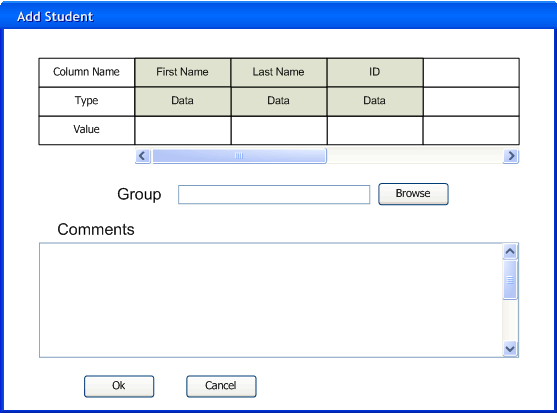
Figure 2.2.3.1
This dialog presents a data view similar to that of the main grade sheet.
The top row of the dialog shows the name of each individual column.
The second row specifies whether the column is a text-only column or a graded score column.
These two rows are uneditable, and exist to make filling in value easier for the user.
The third row is for the user to enter values directly for the student. ID is the only field that
must be filled in order to add the student. If is not filled, the message in Figure 2.2.3.2 appears.
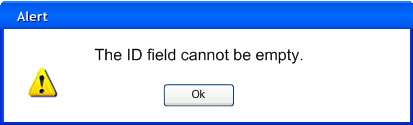
Figure 2.2.3.2
The "Group" text field specifies which, if any, group the student is associated with.
The user types the name of the group directly into the text field, or pushes the "browse" button to select
a group from the existing choices, if any. When the user pushes "browse", the dialog in Figure 2.2.3.3 appears.
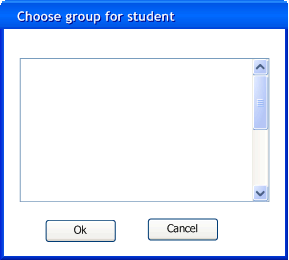
Figure 2.2.3.3
In this case, there are no groups as the grade sheet does not start with any. A hypothetical list of groups
is presented in Figure 2.2.3.4.
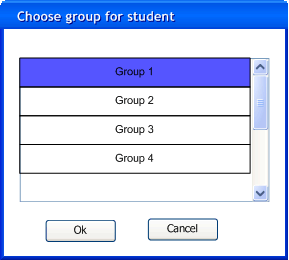
Figure 2.2.3.4
The comment box is for any information wants to associate with the student that
does not belong in any of the existing columns.
When the dialog appears on the screen, the user enters information corresponding
to an example student, as shown in Figure 2.2.3.5.
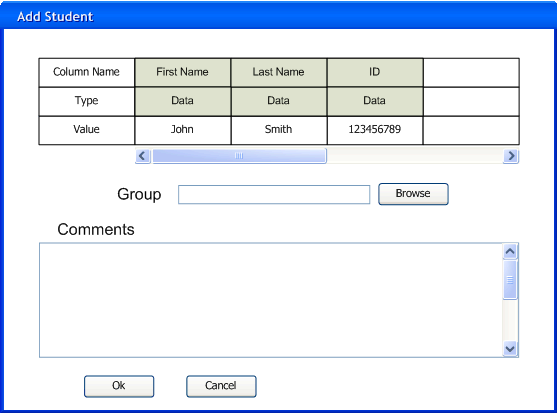
Figure 2.2.3.5
When the user is finished entering student information, he adds it to the grade sheet
by pushing "Ok" or closes the dialog with no changes to the grade sheet by pushing "Cancel".
Prev: Managing Groups
| Next: Manually editing a student
| Up: Initial setup
| Top: index