At any time the instructor may wish to add a new student to the gradebook. To do
so, the instructor select the Student->Add menu command. Refer
to section 2.1 to see the menu bar commands. In response, the system opens a new
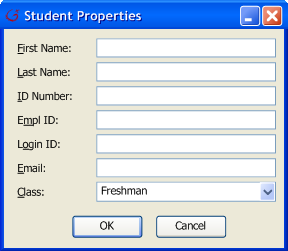
window. Figure 1 displays the default window for adding a new student. At the
top of Figure 1 is the "Student Last Name" and "Student First Name" field for
the instructor to enter the student's name. Below name is "Student ID", the
instructor must enter the last 4 digits of the student's ID number. Below ID
Number is the EMPL ID a.k.a Employee ID number. Below EMPL ID is Login ID, which
is the student's campus account. Under Login ID is the student's email address
and below email is Class standing. Class standing has a pull-down field
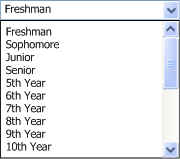
with a listing of standings for the instructor to choose from. Figure 2
has the detail view of all the standings possible.

|

|
|
Figure 1
|
Figure 2
|
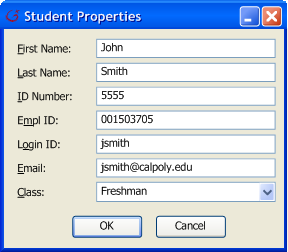
See Figure 3 as an example of adding a new student. The figure indicates adding
the student's name, ID number, EMPL ID, Login ID, email, and a Class standing.
To add the student, the instructor clicks on the 'Ok' button at the bottom of
the screen. A prompt window appears in response to inform the instructor that
the student has been added. To close the window, the instructor clicks the
'Cancel' button at the bottom of the window.

|
|
Figure 3
|
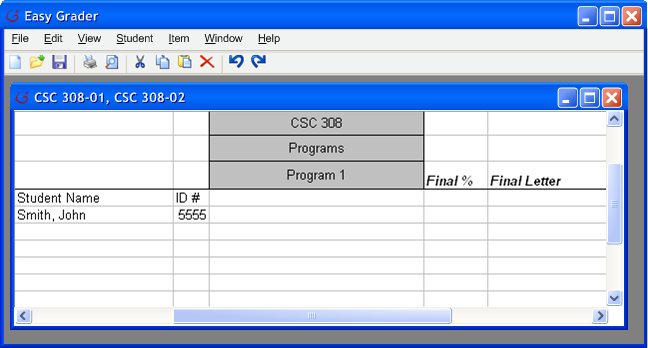
Assuming the instructor is adding a brand new student to a gradebook, then the grader displays the gradebook shown in Figure 4. Figure 4 only has 1 student, 1 category and 1 grade item. There is no score grade for the grade item therefore no final grade.
 |
| Figure 4 |
Prev:
[None] Next:
Edit Students |
Up: Editing the Roster | Top:
index


