2.5.1 Administrator Room Database Management
The first time the Scheduling Administrator chooses the Room Database management operation, the software displays the following window:
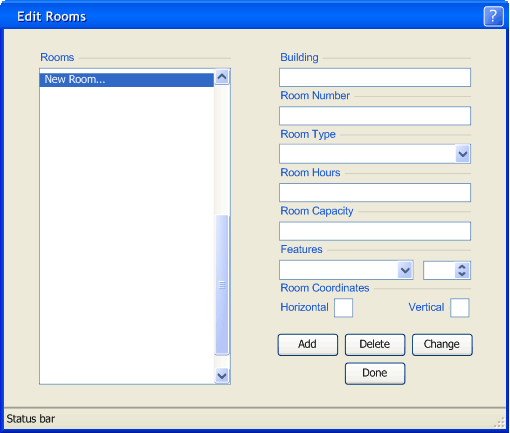
Figure 2.5.1.1: Initial View Of Room Database Management Interface
The scrolling list box on the left shows all the Room Records currently in the Room Database used by the Scheduler Tool in alphanumeric order. On the right are the seven data fields corresponding to each Room Record:
- Building
- Room Number
- Room Type
- Room Hours
- Room Capacity
- Room Features
- Room Coordinates
The Scheduling Administrator also uses four buttons to edit the Room Database. The 'Add' button lets the Scheduling Administrator add a room to the Room Database. The 'Delete' button removes a room from the Room Database. The 'Change' button changes the properties of the room selected from the left-hand list. The 'Done' button closes the window.
Adding a Room
In this scenario, the Scheduling Administrator creates a record for Lab room 14-256. For purposes of illustrating list sorting only, the figures below show three Room Records in the Room Database already: 14-241, 14-245, and 14-256, all lecture rooms. These entries have no bearing on the actions taken by the Scheduling Administrator or subsequent results.
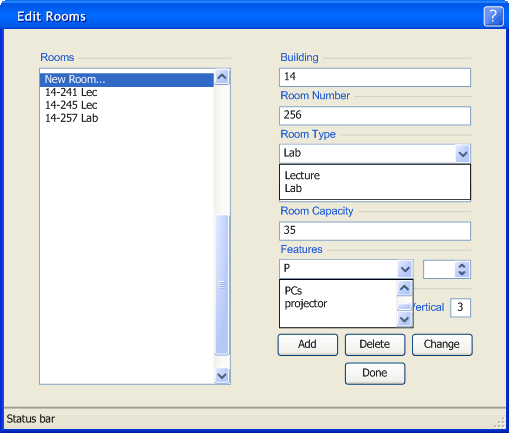
Figure 2.5.1.2: Example of Adding Features to a Room
To add a room to the Room Database, The Scheduling Administrator first double-clicks on the New Room... entry in the Room Database. The software then clears all the values in the fields on the right, and the cursor is placed into the text box labeled "Building", where editing of each field then begins.
- Building
- This is the name/number of the building associated with the room; the Scheduling Administrator enters it as a string of characters, in this case 14.
- Room Number
- This is the name/number of the room itself; the Scheduling Administrator enters it as a string of characters, in this case 256.
- Room Type
- This field designates the common usage of the room; the Scheduling Administrator selects either Lecture or Lab from the combo box.
- Room Hours
- This field designates hours the room is open; the Scheduling Administrator adds hours as days and hour ranges. To designate a set of days and hour ranges, the Scheduling Administrator enters letters corresponding to the different days of the week followed by a space, followed by an hour range, which contains a start hour and an end hour (using a for AM and p for PM) split by a dash; as many hour ranges may be entered in a row as desired, but a new set of days must be delimited by a comma. For this scenario, the Scheduling Administrator enters MTWRFS 8a-5p, U 5p-8p 9p-12a.
- Room Capacity
- This field designates the maximum amount of persons that are allowed to occupy the room at once; the Scheduling Administrator enters it as an integer value, in this case 35.
- Room Features
- These fields are for use in matching Course "Features Requested" requests; the left field corresponds to a feature name, the right field corresponds to the feature count. The Scheduling Administrator adds features by filling in the feature name field, and (before typing a new name) changing the count field to a value greater than 0 by using the up or down arrows. For this scenario, the Scheduling Administrator adds 30 PCs, 1 projector, and 3 whiteboards to the Room Record. NOTE: if feature names already exist in the database (as shown in the above figure), the software will display a list of all existing items that start with the characters already typed. Once features have been added, the Scheduling Administrator verifies the feature names and counts by using the combo-box arrow to list all feature names associated with the current Room Record.
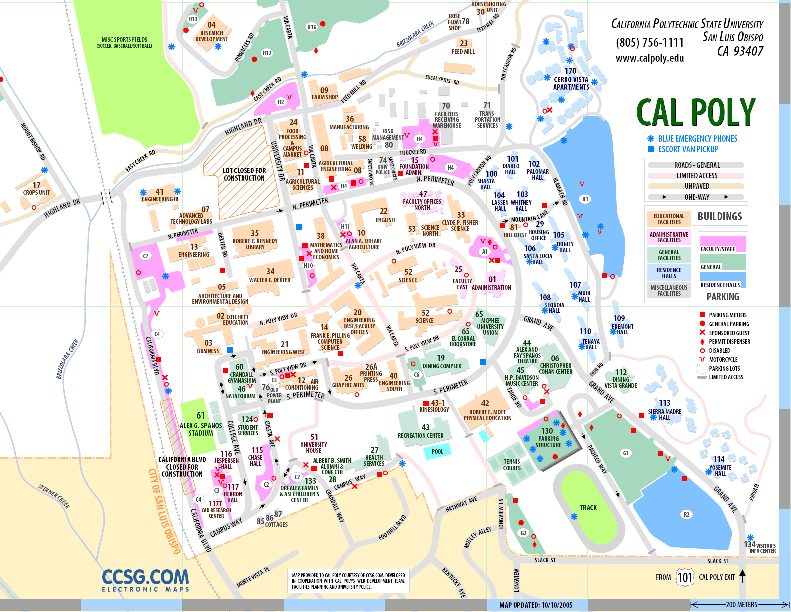
Figure 2.5.1.3: Example Room Database Coordinate Map
- Room Coordinates
- This field designates the location of the building in cartographical coordinates; it is used for calculating walking distance penalties, and based on a 200m = 1 grid width map (see above for example). The scheduling administrator enters this value based on relative grid coordinates from the bottom-left (Horizontal 1, Vertical 1) of the reference campus map, in this case Horizontal 4 and Vertical 3.
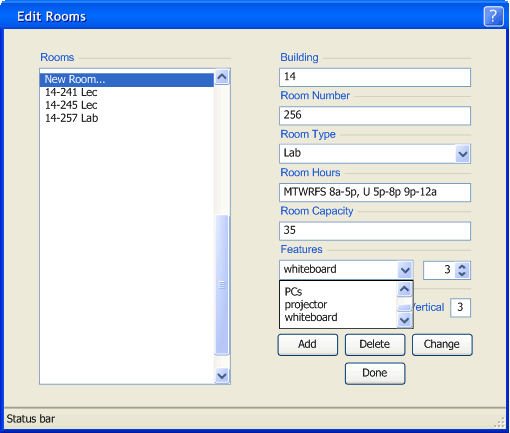
Figure 2.5.1.4: Example of Editing the Features of a Room
When all appropriate fields have been filled, the Scheduling Administrator then clicks on the 'Add' button. The software then adds the Room Record to the database, and adds and highlights the room's building, number, and type in the the list on the left.
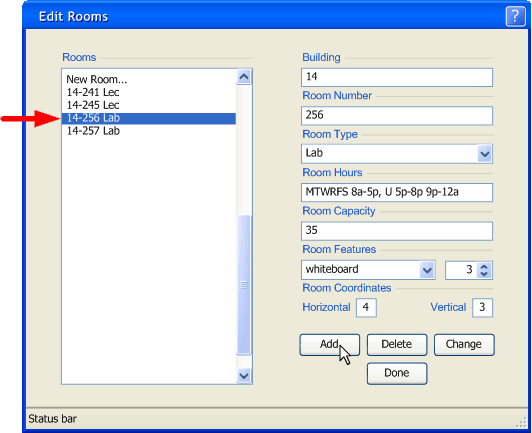
Figure 2.5.1.5: Example results of Add/Change buttons
Editing A Room
To edit a room, the Scheduling Administrator double-clicks on the desired entry in the scrolling list-box. The software then fills the data fields on the right with the known data corresponding to those fields. From here, editing is the same as adding a room to the Room Database, with the exception that the Scheduling Administrator then clicks the 'Change' button when sufficient data is entered.
To cancel an edit in progress, the Scheduling Administrator double-clicks on any other entry in the Room List. The software then displays a confirmation dialog denoting that the entry will not be saved:
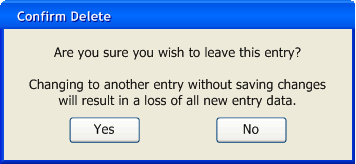
Figure 2.5.1.6: Confirm Loss of Editing Changes
The Scheduling Administrator clicks 'Yes' to confirm the loss of changes to the room or clicks 'No' to return to the editing operation. Both buttons close the Editing Loss Confirmation Dialog.
Errors and Special Cases
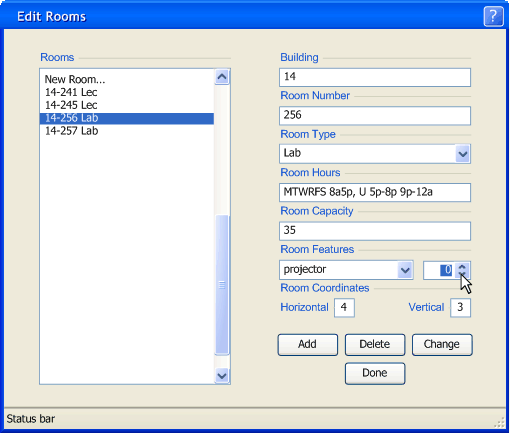
Figure 2.5.1.7: Special Modifications
The scheduling administrator now selects the 14-256 Lab to edit it, then removes the dash from the first hour range and sets the projector Room Feature count to 0, then clicks the 'Change' button.

Figure 2.5.1.8: Status bar error message
When an error in the formatting or contents of one of the fields occurs, the program generates a status bar message to inform the Scheduling Administrator of the error and also blocks any add or change operation. The Scheduling Administrator now replaces the missing dash, then clicks the 'Change" button.
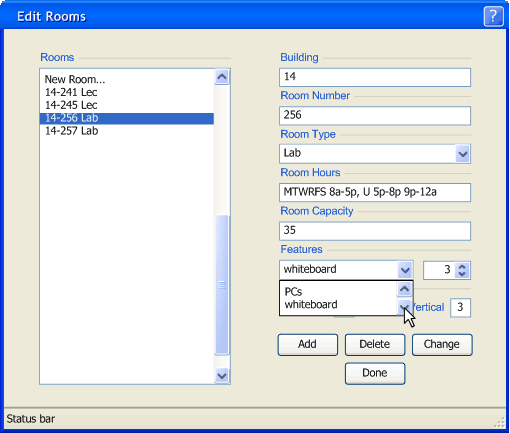
Figure 2.5.1.9: Room Feature Erased
Now that the Room Record has been successfully changed, the System Administrator examines the features of the room by clicking the arrow on the Features combo box. The software erased the projector feature because it interprets a Room Feature of count less than 1 to be non-existent.
Delete Room Dialog
To delete a room from the Room Database, the Scheduling Administrator double-clicks on a room in the left-hand list as if to edit it, but instead then clicks the 'Delete' button. The software takes the Scheduling Administrator to the Delete Confirmation dialog:
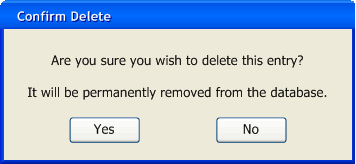
Figure 2.5.1.10: Delete Room dialog
The Scheduling Administrator Clicks 'Yes' to confirm the deletion of the room, or clicks 'No' to cancel the delete operation. Both buttons close the Delete Confirmation Dialog.
Closing the Room Database Management Window
To close the Room Database Management window, the Scheduling Administrator clicks on the 'Done' button; this returns the Scheduling Administrator to his/her previous view.
Prev: [none]
| Next: Course Database Editing
| Up: Administrator Database Editing
| Top: index


