2.6.1 Changing Preferences
The scenarios in this section show a user changing his personal preferences. This scenario shows what a “bad” schedule looks like and the user changing the preferences to produce a fair schedule.
The figure below shows the list of teachers and their fairness points showing how well their preferences were met. This window is shown after a schedule is generated, or can be viewed at any time by navigating to it. Obviously there is a professor whose preferences were barely met at all.

Figure 2.6.1 - 1: Measure of how well each professor’s preferences were met
The user then navigates to the schedule view to see the class that that particular instructor got. The user sees the following schedule and examines the class assigned to the instructor with the low fairness level.
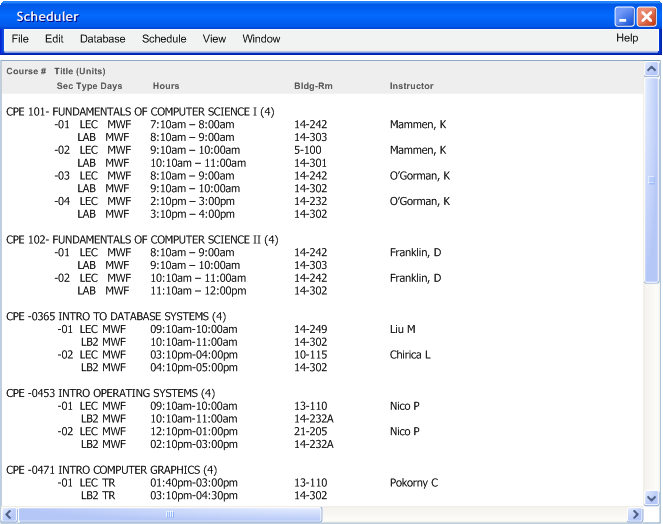
Figure 2.6.1 - 2: Schedule view with the “bad” schedule being examined
In the likely case that the admin doesn’t know the exact attributes of a class that the professors want, the preferences of each instructor can be edited. In this case, the preferences of the professor with a bad schedule need to be edited. Assuming that the admin is logged in, the user navigates to the “Edit Teacher Preferences” item in the menu under the “Database” item. To automatically cause the scheduler to generate a fairer schedule for professors, in this case the professor with a “1” in the fairness scoring window, the admin will want to override the preferences for this particular instructor. The admin sees the following window which will allow the selection of the professor whose preferences will be adjusted. Professors will be listed alphabetically by last name.
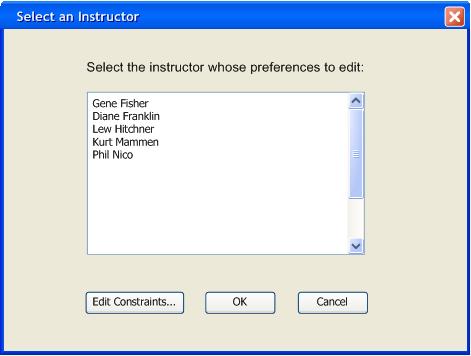
Figure 2.6.1 - 3: Professor Selection dialog
The admin chooses the professor with a bad schedule and clicks “OK”. The user sees the following dialog to choose which preferences to edit. After editing preferences the user will be taken back to this dialog. If all preferences have been edited accordingly the user may click “OK” in this window to confirm the changes and return to the main dialog.
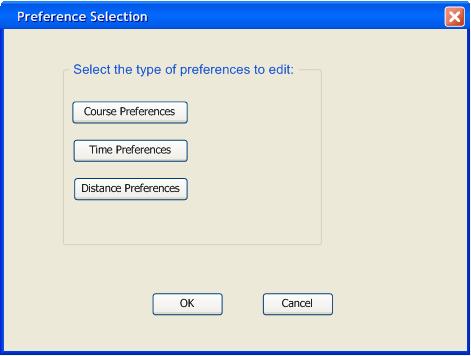
Figure 2.6.1 - 4: Preference Selection dialog
The admin then clicks on the “Course Preferences” button. The following dialog allows the admin to view the entered preferences for the instructor, as well as change any of these in order to attain a better schedule. The default settings for this dialog are all courses preset at a value of zero. This is due to the fact that professors should not have defaults higher than one lest they are scheduled courses they are not qualified to teach.The admin sees that the professor with a bad schedule has entered “8” for his preference to teach CPE 102 and “2” for CPE 101. Since this professor did not get the class with the higher preference for some reason (likely that another professor had a higher preference for the course and/or the sections were filled. The admin now can tweak the preferences by inputting “10” in the place of the “8” and “1” in the place of the “2”. Additional actions that may be useful for users to perform are selecting multiple courses by dragging the mouse around the items. These can then be all set or changed at once. Now the admin clicks “Generate Schedule” in the menu and the results of the re-scheduling are shown below.
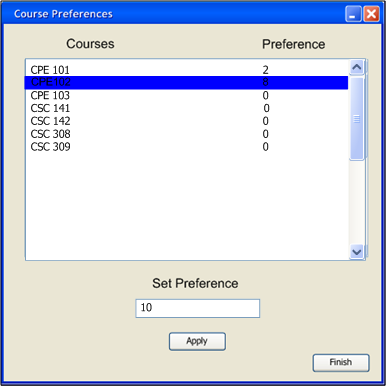
Figure 2.6.1 - 5: Course Preferences that the instructor initially entered
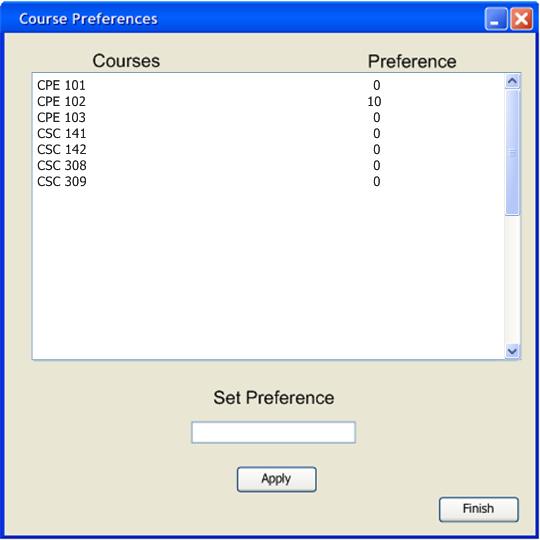
Figure 2.6.1 - 6: Course Preferences that have been changed by the admin
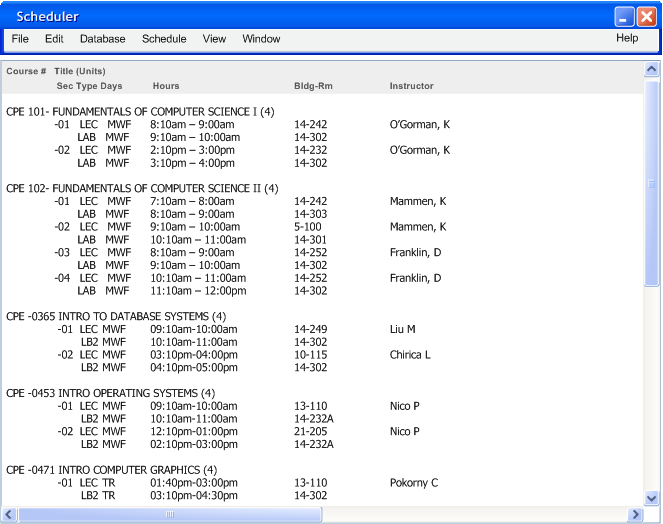
Figure 2.6.1 - 7: Schedule view after the schedule has been generated again
Amazingly enough, the professor with the bad schedule seems to have attained the class he wanted. Going back to the “fairness” dialog shows a readjustment of the instructors’ scores. Sure enough, the scores are more even than before.

Figure 2.6.1 - 8: Scores that have changed after rescheduling
Moving onto the next preference adjustments, the admin tries to even the fairness even more. The admin navigates back to the preference selection dialog once again and chooses the “Time Preferences” button. The default apprearance of the following dialog has blank boxes. A blank preference box indicates an preset value of 5. Now, the admin sees the time preferences that the instructor entered. Again, the admin tweaks these numbers to create a fairer schedule. The admin can edit multiple preferences at once by first selecting the pull down menu to choose the day or set of days to adjust time preferences for. Then he types in a range in the text box labeled ‘Time’ to adjust the preference for. Use standard time conventions like 'am' and 'pm.' separate the range with a dash '-' or minus sign. This same process is also done when an instructor is selecting his own preferences. The instructor has entered 7 for MWF 8-10 AM and 7 for MWF 10-12 AM. Since another professor had this time in the same course and classroom at first, it is likely that professor entered a higher preference point than 7. To fix this, the admin manually enters 9's in these fields. Again, the admin presses OK and clicks on "Generate Schedule". The schedule shows the effects of the changes.
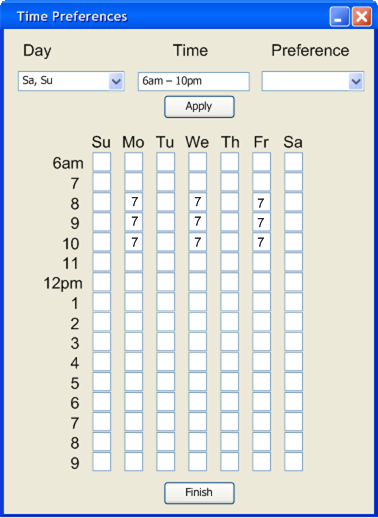
Figure 2.6.1 - 9: Time Preferences that the instructor initially entered

Figure 2.6.1 - 10: Time Preferences that have been changed by the admin
After the admin has changed these values in the time preferences, the admin goes to “Generate Schedule” once again the menu. The results are shown in the schedule view, and the constraints list of fairness scores has changed as well.
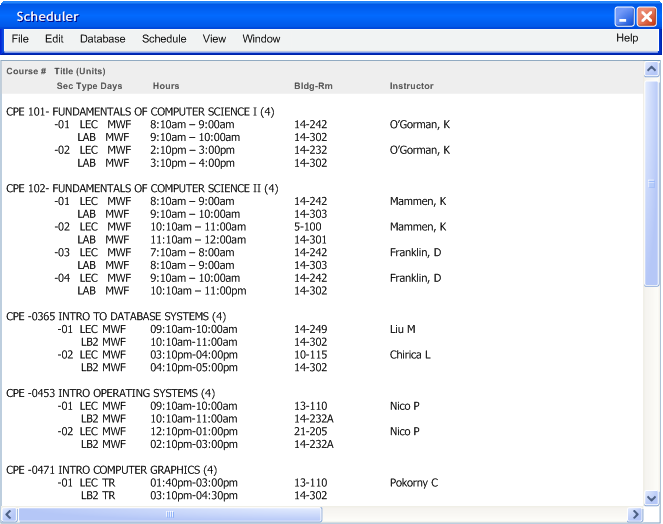
Figure 2.6.1 - 11: Schedule view after the time preferences have been changed
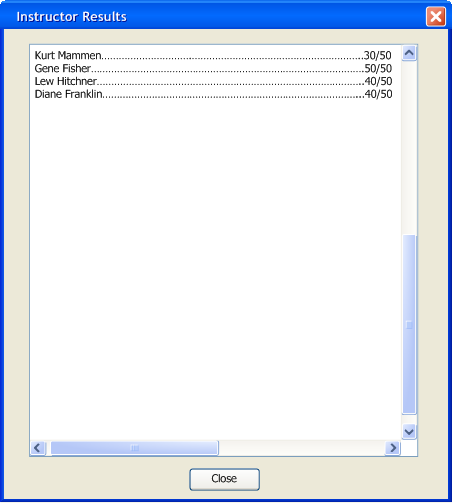
Figure 2.6.1 - 12: Scores that have changed after rescheduling
The results of these changes further increase the fairness of the schedule. Again, the admin can view the fairness scores to validate this. Although the instructors’ scores cannot all be maxed out, compromises have been made after preferences were changed. This results in an overall fairer schedule so that no one professor has a significantly worse schedule than the other.
Finally, the admin goes back to the preference selection dialog in order to adjust distance preferences. The admin clicks on the “Distance Preferences” button and sees the distance preferences dialog. The value entered is the maximum distance the professor prefers to have the next class. This is shown in the figure below.

Figure 2.6.1 - 13: Distance Preferences
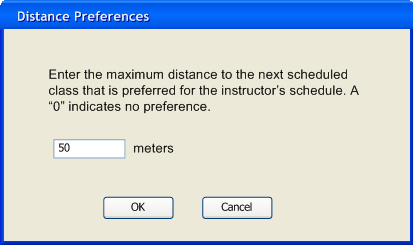
Figure 2.6.1 - 14: Distance Preferences changed by the admin
These preferences restrict the scheduler to schedule the next class in that instructor’s schedule no father than the number of meters entered in this dialog. The default preference setting is “0”. A zero in this text field would indicate that the next class may be any distance away; the farthest classroom if the scheduler deems necessary during generation. Since this professor has already entered in “10” for the maximum number of meters, this will limit his options for class choice since only a few classrooms are within 10 meters. If an available classroom cannot be found within 10 meters the scheduler will satisfy the next highest priority (this is explained in section 2.6.2). The admin proceeds to change this number to “50”. The results are shown after another schedule is generated in the schedule view and the constraints list dialog.

Figure 2.6.1 - 15: Schedule view after the distance preferences have been changed

Figure 2.6.1 - 16: Scores that have changed after rescheduling
Finally, the scores have been fixed, and every professor has a decent schedule. The adjusting of preferences directly affects the quality of the schedule, and usually it is not difficult to change a bad schedule to a better one.
Prev: [None] | Next: Dealing with Constraints | Up: Advanced Scheduling | Top: index