2.6.1. Adding Courses
The “Add Course” dialog is where courses can be added. It can be reached via “Add a Course” in the “Courses” submenu of the Edit menu.
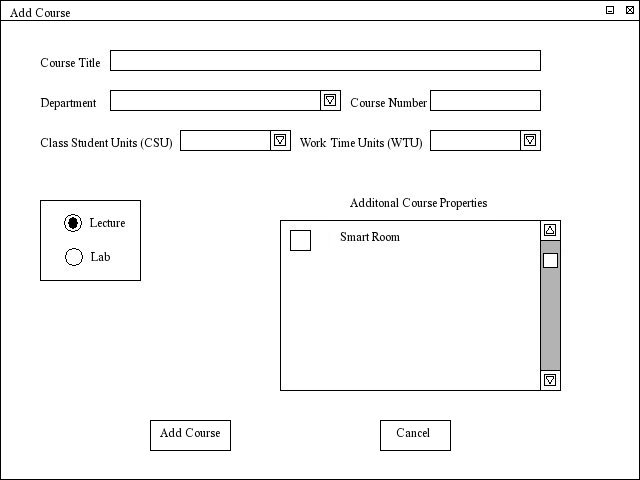
The “Add Course” dialog has seven areas to input data. The first is the “Course Title” edit box. It takes a string that represents the title of the course being added. Next is the “Department” combo box. From that, the department of the course is chosen (e.g. “Computer Science (CSC)” ). Next to that is the “Course Number” edit box. This box takes numbers only. Below those are the combo boxes that deal with units. First there are CSU units (Class Student Units). The number of units is a floating point number that is either inputted into the combo box or chosen from the drop down list of the combo box. Work Times Units (WTU) are the same. The combo box takes a floating point number or allows one from a list to be chosen. There are two data entry points beside these: the “Lecture” and “Lab” radio buttons and the “Additional Course Properties.” The Lecture and Lab radio buttons allow for the course to be either a lecture or a lab. The default is a lecture. The last area, is the “Additional Course Properties” check list box. It contains a list of additional course properties that can be checked off for that course.
There are of course the “Add Course”
and “Cancel” buttons at the bottom of the dialog box. Pressing “Add Course” adds
the course and closes the dialog, while cancel closes the dialog without adding
the course or making any other changes to the course database.
Prev: Schedule View | Next: Removing a Course | Up: functional | Top: index