This tutorial describes how a user can navigate through the scheduler to manage resources, settings, reports, and schedules within the navigation bar. This scenario will only show a user how to get there, and not the context window once a user does.
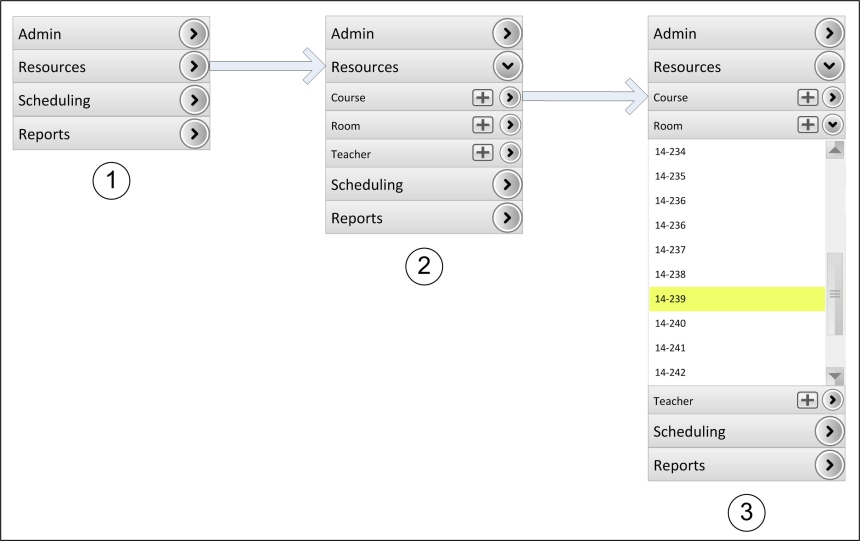
Figure 1: Navigation Bar example
On the left side of Figure 1 above Nr. 1 you can see the Navigation Bar minimized. There are three buttons always visible: 'Admin', 'Resources', 'Scheduling' and 'Reports'. On the right side of these buttons there are chevrons that point to the right to indicate there is more content in this area but hidden for the moment. The user can reach this content by clicking on the chevron.
In the middle of Figure 1 above Nr. 2 'Resources' is expanded and the chevron points to the now visible content below. If the user clicks on the Add button indicated by the '+'-Symbol, an empty menu appears like shown in resource management tutorials in order to add a new resource. By clicking on an individual subsection's chevron, such as for 'Room', this expands and shows all the rooms that are added to the Schedulers Resources so far.
In Figure 1 above Nr. 3 there are allready added severel rooms in the database to provide a discriptive example. If the database is empty like if the user opens this menu at first there is nothing shown, or to be more specific in this case 'Room' does not expand.
To find a specific room the slide bar right of the room names can be used. The user can select an existing resource (in this case, a room) by clicking on an individual listing under the nav bar subsection. Upon clicking a room, the user will be taken to the edit room page. This also applies to any other resource within the subsection.
Note: Depending on what rights the actually logged in user has the navigation bar
adapts. So all menus the user is not allowed to see are invisible and not reachable.