Assuming that the course database is empty, the course window appears as shown in Figure 2.3-1. The user presses 'New' to add a new course and the Add a Course window appears as shown in Figure 2.3.1-1.
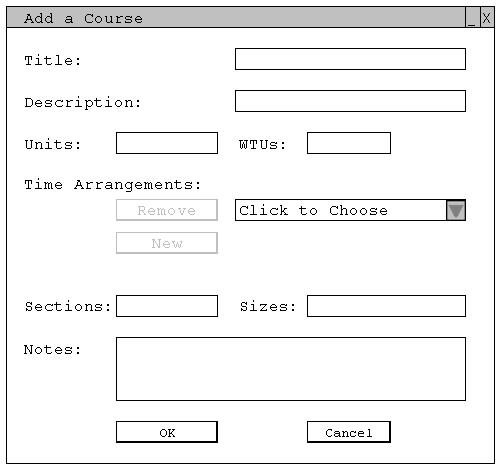
Figure 2.3.1-1: Window used to add a new course to the course database.
In this new window the user inputs all the necessary information about the new
course. The user enters the title for the course in the 'Title'
field, and a more descriptive name for the course in the
'Description' field.
He or she enters the number of units a student receives upon completing the
course in the 'Units' field and enters the number
of Work Time Units (WTU) that an instructor receives for teaching the course in the
'WTUs' field. Below this is a dropdown box
where the user selects the 'Time
Arrangements' for
this course. Time arrangements are predefined weekly schedules for various
courses. The number of WTU's a course has defines the various types of time
arrangements available. For example, a 5 WTU course may be available in two time
arrangements. The first arrangement being Monday, Wednesday, Friday for 1 hour
segments, and the second arrangement being Tuesday and Thursday for 1.5 hour
segments. When a certain time arrangement is not available, it is grayed out in the dropdown
box and not
selectable. Once the user selects one time arrangement, the 'New'
button becomes active which allows the user to enter additional time arrangements. The user deletes one of these by using the 'Remove'
button. The schedule generator uses these times arrangements to create a schedule.
The 'Sections' field is where the user inputs
the number of sections this course will have, and the 'Sizes'
field is where he or she inputs a series of sizes separated by commas, one
number for each section. The last field is the 'Notes'
field where the user makes any additional notes he or she wants to keep for
the course.
In addition to inputting all the information described above, the user also
has the ability to edit the available time arrangements for a course. He or
she goes to any of the 'Time Arrangements' dropdown
boxes and selects 'Edit Time Arrangements...'
at the bottom of the menu as shown in Figure 2.3.1-2 below.
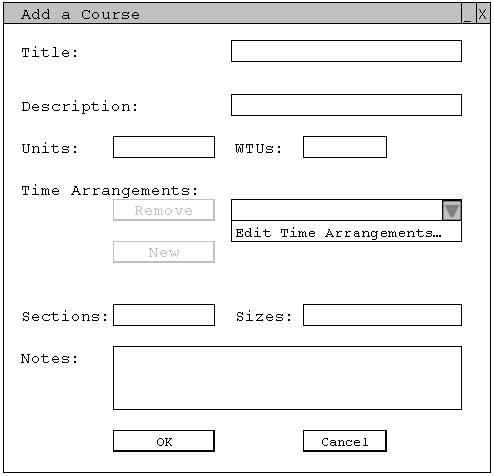
Figure 2.3.1-2: Edit Time Arrangement feature of the Add a Course window.
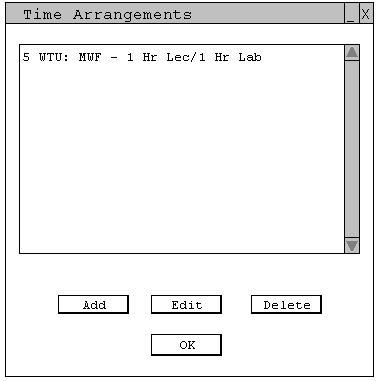
Figure 2.3.1-3: Time Arrangements Edit window.
The Time Arrangements window shows the current list of time arrangements available
for different courses. The
list of time arrangements appears for all courses, and changes made to the list
will appear when editing any course in
the database.
To modify this list, the user clicks on the three buttons
at the bottom of the window. The user clicks the 'Add'
button to add another time arrangement to the list, and the Add a Time
Arrangement window appears, as shown in Figure 2.3.1-4.
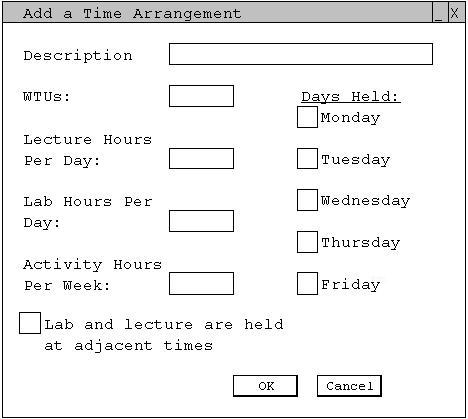
Figure 2.3.1-4: The user has chosen to add a new time arrangement.
The user fills in the fields to add a new time arrangement. The 'Description' field gives a short title of the time arrangement, such as "MWF - 1 Hr Lec/1 Hr Lab". The user enters the number of 'WTUs' to indicate which time arrangements are valid for a given course. The user enters 'Lecture Hours Per Day' and 'Lab Hours Per Day', which are used for schedule generation. 'Activity Hours Per Week' is not taken into account during schedule generation, but can be used for reference. The user enters whether or not 'Lab and lecture are held at adjacent times'. Finally, the user enters which days of the week are in the time arrangement, by clicking the boxes under 'Days Held'. The user presses 'OK' to save this time arrangement, and return to the Time Arrangements window.
To change part of a current time arrangement or delete an existing arrangement, the user selects a time arrangement from the list and clicks either the 'Edit' or 'Delete' button at the bottom of the window. When the user is is finished making changes to the time arrangement list, he or she presses 'OK' to save the data and return to the Add a Course window.
When the user is done inputting all the necessary information into the Add a course
window, he or she presses 'OK'
to save the data. The new course now appears on the first line of the courses
list as shown below in Figure 2.3.1-5.
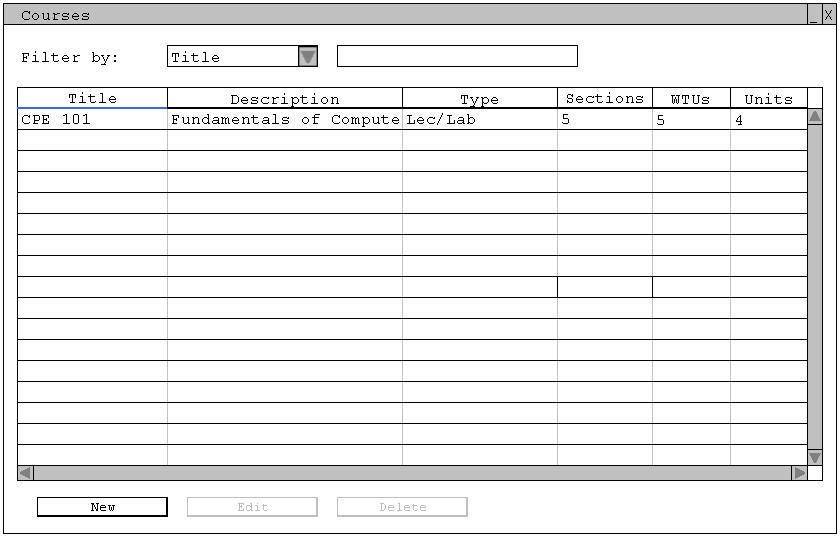
Figure 2.3.1-5: Course list window with new course added.
The user adds all courses for the quarter in a similar way. After all courses are added the Courses window would look like Figure 2.3.1-6 below.
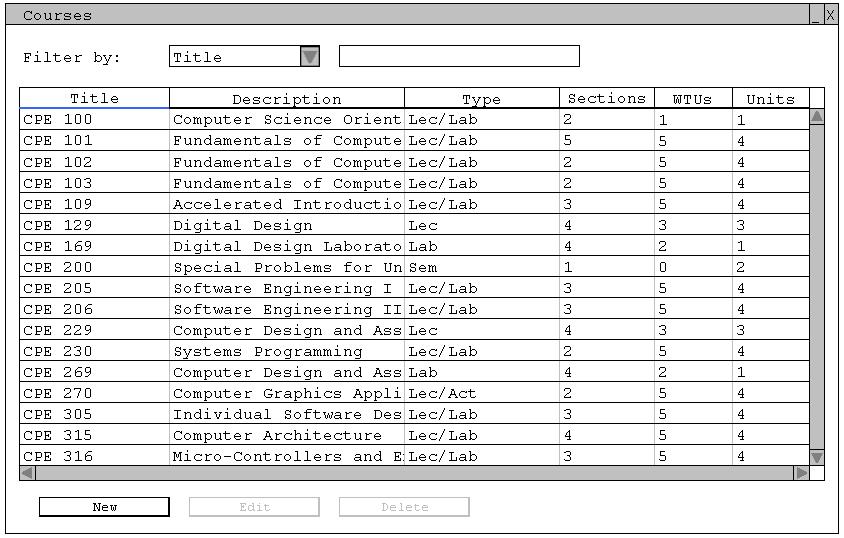
Figure 2.3.1-6: Course list window with all courses added.