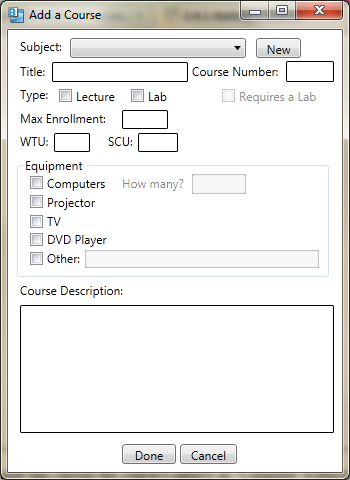
Figure 2. Add course dialog.
When the user selects 'New Course' item from the 'Insert' menu, the system displays the dialog shown in Figure 2.
Figure 2. Add course dialog.
The figure shows the 'Add a Course' dialog that contains a number of data-entry fields for the various components of the course.
The 'Subject' field is a drop down menu that displays all of the current subjects and allows the user to choose the one that the course falls under.
If the subject isn't on the menu, the user can click the 'New' button to the right and add a new subject. This dialog is explained in more detail in the
next section.
The 'Title' field is a one-line string that describes the course briefly. The 'Course Number' field contains the course number.
The 'Type' field has two choices: Lecture or Lab.
Each one has a checkbox to the left of them. If 'Lecture' is checked on, then the 'Requires a Lab' field changes from greyed-out
to solid type and the user can decide if the course requires a lab or not by checkmarking the box to the left.
The 'Max Enrollment' field specifies the maximum number of students that can be enrolled in the course.
The 'WTU' label describes the work time units that the course is worth for a teacher.
The 'SCU' label stands for "student course units" which specify how many units the course is worth for a student.
The next section in the dialog is the 'Equipment' field. This field is used for the user to choose what equipment the course requires.
It contains the following choices:
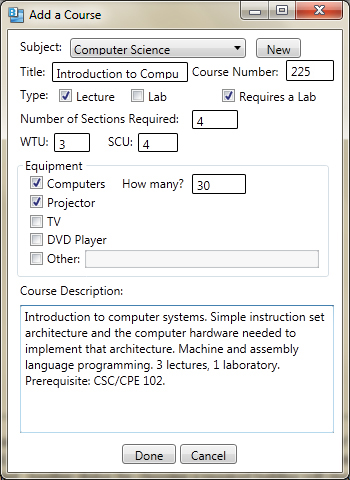
Figure 3. Adding a course.
In this case, course's subject is 'Computer Science' and the title is 'Introduction to Computing Systems'. The class number is '225'.
The user has set the type of the course to be 'Lecture' which then changed the 'Requires a Lab' field from greyed-out to solid type.
Since the box next to it is checked, the result is that a lab will be created to go together with the lecture.
The user has set the maximum enrollment to be '30' which means that only no more than 30 students can enroll in the course.
To confirm the adding of the course, the user presses the 'Done' button in the main dialog. At this point, the course is added to the courses
database. To cancel adding a course entirely, the user presses the 'Cancel' button. In response, the system removes the dialog from the screen
without adding any course.