2.3.1.1 Adding an Instructor
When the user selects 'New Instructor' item from the 'Insert' menu,
the system displays the dialog shown in Figure 2.3.1.1.1.
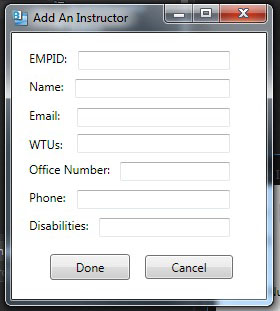
Figure 2.3.1.1.1: Add Instructor.
The figure shows the 'Add an Instructor' dialog that contains a number
of data-entry fields for the various components of the instructor. The 'EMPID'
field is where the instructor's id is entered. Inside the 'Name' field goes the
name of the instructor in the format of 'First Last'. The 'Email' field should be
filled with a valid university email address. The 'WTU' label describes the work
time units that the course is worth for a teacher. The 'Office Number' field is
where the building and room number is entered for the instructors office hours. The university
phone number assigned to the instructor is put into the 'Phone' field. Inside the
'Disabilities' field, the instructor may describe any disabilities that they may have.
After the dialog appears on the screen, the user enters information by entering all the
needed information. Figure 2.3.1.1.2 shows the result of the user having
filled in information for a new Instructor.
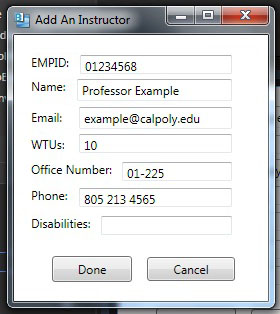
Figure 2.3.1.1.2: Add Instructor Filled.
In this case, EMPID is '012345678' and the Name is 'Professor Example'.
The Email is 'example@calpoly.edu'. The user has set the WTUs to '10' to
indicate the amount of work load that the instructor desires. The Office Number is
'01-225' and the Phone number is '805 213 4565'. This instructor does not
have any notable disabilities and therefore has not listed any in that field.
To confirm the adding of the course, the user presses the 'Done' button in the
main dialog. At this point, the instrucotr is added to the courses database.
To cancel adding an instructor entirely, the user presses the 'Cancel' button. In
response, the system removes the dialog from the screen without adding an instructor.
Prev: Instructor Database
| Next: Full Instructor Database
| Up: functional
| Top: index