The TestTool has a separate interface for students because students only require a few functions. Students should have access to tests they are required to take for their courses, practice tests provided by the instructor, and previously taken/graded tests. Students should not have access to most of the actions associated with instructors such as creating tests or viewing the online shared database.
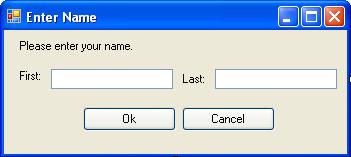
When taking a proctored test, the student comes to a computer that has already been set up by the proctor. Each computer in the proctor room will display the same screen as shown in Figure 2.7.1. Here, the student enters his or her name and clicks "ok" to begin the test. The proctor has already chosen which test to take and the time limit, so the main test taking interface comes up which is shown in Figure 2.7.2.
There are four main areas of interest in the main test taking interface. The first, and most important, is the subwindow with questions and answer space. This is where the students will read the questions and fill in their answers. This panel has two tabs at the top for viewing the entire test in one window or viewing a single question at a time. To the left of the question panel is a submenu for skipping to certain questions. Here, the questions are arranged under "answered" and "unanswered" questions. The currently selected question is shown in bold in this list. This menu allows the student to skip a question if it is too difficult, but also serves to remind the student that they have not yet answered the question. Below the question menu is a box displaying the amount of time remaining for the test. Lastly, in the lower right of the screen is a button to submit the test.
Figure 2.7.1: Screen to enter student name.
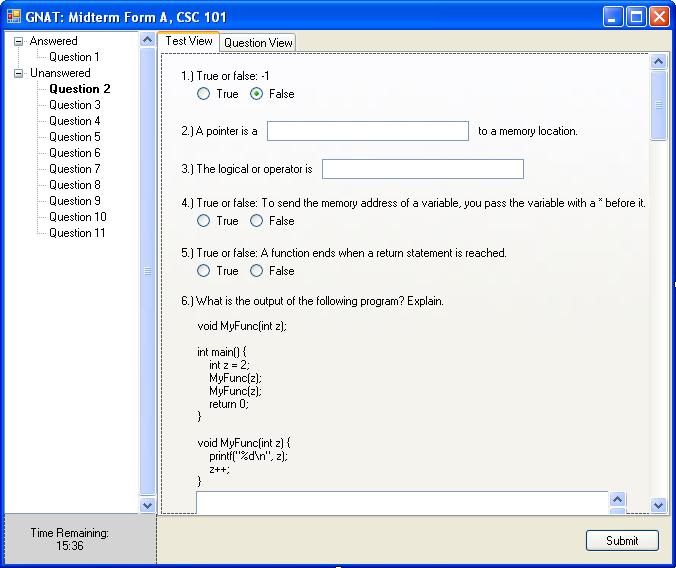
Figure 2.7.2: Main test taking interface.
For this scenario,the student has answered question one (a true/false question), and has ten remaining unanswered questions. Each different type of question has a different method for answering it. Figure 2.7.2 shows three of the different types of questions: true/false, fill-in-the-blank and essay. True/false questions are answered by selecting the radio button with either true or false. Fill-in-the-blank questions have a textbox for the answer to be typed into. Essay questions have a larger textbox for the answer to be typed into. The remaining types of questions are described below.
The student has decided to try to submit the test before completing it. After hitting submit, the student is given the dialog box in Figure 2.7.3 asking if he or she really meant to leave questions two and three blank. Here the student decides that he or she does want to answer the remaining questions and clicks the “No” button. This brings back Figure 2.7.2.

Figure 2.7.3: Warning for remaining unanswered questions.
Now, the student has decided to view the test question by question as opposed to all the questions at once. To do this, the student selects the "Question View" tab at the top of the question panel. This gives the student the alternate view of the main test taking interface as shown in Figure 2.5.4. Here, the selected question (in this case question 6, an essay question), is the only one shown in the question panel. The other questions can be accessed by either clicking them in the left menu, or changing the view back to "Test View".
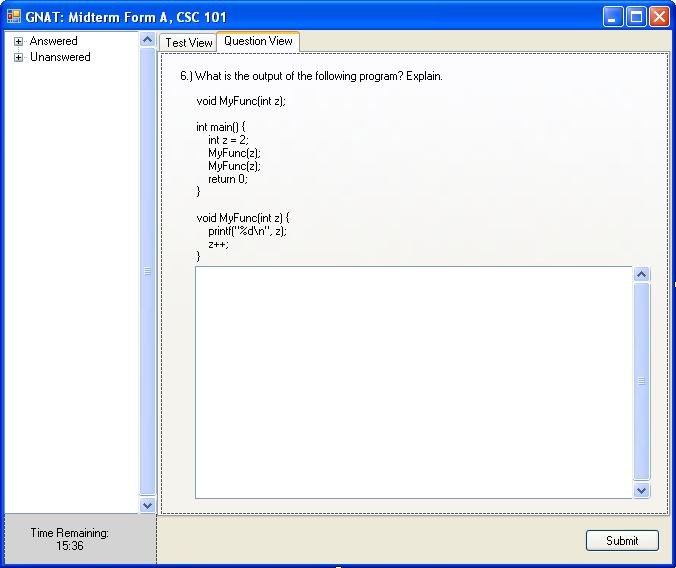
Figure 2.7.4: Question view for the main test taking interface.
The student finishes answering questions one through seven and switches back to the test view, which is shown in Figure 2.7.5. This shows another different type of question: multiple choice. Similar to the true/false questions, multiple choice questions are answered by selecting the radio button beside the desired answer.
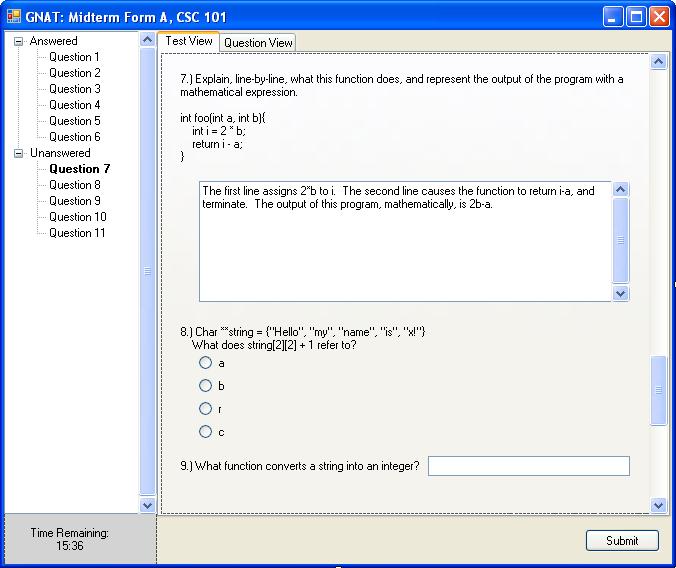
Figure 2.7.5: Back to the test view of the main interface to see the remaining questions.
After completing the remaining questions, the student clicks “Submit” again and is given the dialog box shown in Figure 2.7.6. This dialog asks the student if they are ready to submit their answers to the test. After clicking “Yes” another dialog box comes up, Figure 2.7.7, telling the student that the test has been submitted, and asking if they would like a receipt. The student can save receipts to their computer to view whenever they wish. Figure 2.7.8 shows the format of the receipt after the student has decided to save the receipt. Reciepts contain information that about the test that the student just turned in; including what the test name is, the course, the instructor, and the delivery time and date. The student can save the reciept as a record of the test.

Figure 2.7.6: Last dialog before test submittal.

Figure 2.7.7: Test has been submitted.

Figure 2.7.8: Receipt for test submittal.
When taking a test from home, the student must log in to the TestTool system. This is done using the student's unix account user id and password. Starting up the TestTool from home, the student is presented with the login screen as shown in Figure 2.7.9. Here the student chooses the user type as student, enters his user id and password, and clicks "Login". After logging in the student sees the menu shown in Figure 2.7.10. This gives the student the choice of taking a test, reviewing a previously taken test or quitting the program.
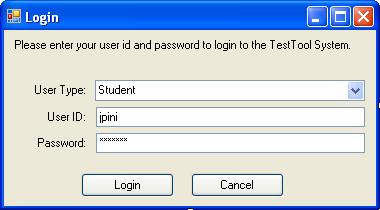
Figure 2.7.9: Student login screen.

Figure 2.7.10: Student welcome screen.
In this scenario, the student clicks on the “Take Test” button. This brings up another dialog box for the student to choose which test to take out of those available. Figure 2.7.11 shows the selection dialog box for making a selection of which test to take. Students choose which test to take by looking through the filesystem for where the test is stored. The figure shows that the student has a folder called "101" which contains four different test files to take. When the student has decided, he or she will highlight the test and click “Open”. After choosing which non-proctored test to take, the main test taking interface comes up as shown in Figure 2.7.2. From here, the test is taken just as that of the proctored test scenario in 2.7.1.
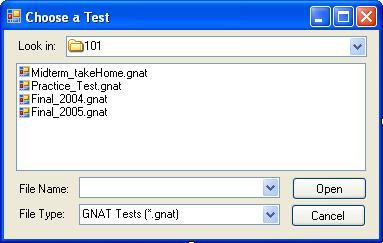
Figure 2.7.11: Available tests.
Figure 2.7.2: Main test taking interface.
The TestTool system has the option of letting students review their test results. To do this, the student must login and choose “Review Test” from the dialog in Figure 2.7.1. This brings up the dialog in Figure 2.7.12, which allows the student to choose which of the graded tests he or she would like to review. This dialog shows each graded test that the student has saved locally. Graded tests will be sent back to the student after the instructor has finished them, at which point the student can save a copy to their harddrive or network drive. Graded tests have the file type of *.ggnat for "Graded GNAT Test". To choose a test the student highlights the desired test and clicks “Open”
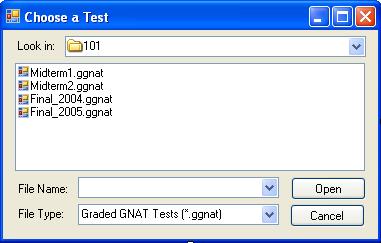
Figure 2.7.12: Selecting a test to review.
This brings up the window shown in Figure 2.7.13. This screen shows the questions, the student’s answer whether it was correct or not, and the points earned for the question. If the student did not answer the question correctly or only received partial credit, the correct answer is shown underneath the points.
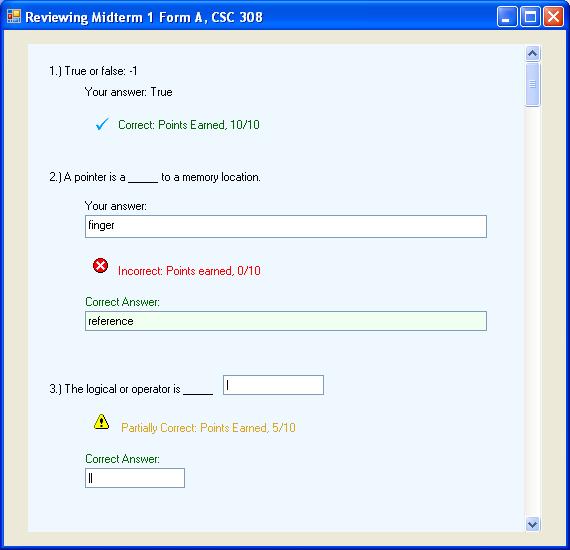
Figure 2.7.13: Main interface for reviewing a graded test.