2.5.0.1 Student Settings
The student now clicks Profile then clicks Settings Figure 2.1.3.3 shows the box that is now displayed. The first field is a name field, the default is set to the student
login ID. The name field cannot be edited, as this is the name the proctor will see. The second option is a check box for an overall Test timer. The default is checked, thus displaying a clock showing the time
remaining for the whole test, if unchecked the clock becomes hidden. The third option is another check box, relating to the timers of individual questions.
The default setting is unchecked, however if a student wishes to see a timer next to each question representing the time the question should take all the
student must do is check this option box. The fourth option from the top has a box where the student may enter a numeric value of when to display a warning box for the number of minutes before the test ends. For example, the default option is 15 minutes, when 15 minutes remain a warning box will pop up alerting the student. If the student were to change this value to five, then when five minutes remain in the test a warning would pop up indicating 5 minutes remain. Next comes an Edit Status Colors button, which when clicked pops up another screen (explained later) where the student may edit the colors representing the status of questions. Next is a pull down menu representing how questions are to be displayed. There are two options, Scrolling and One at a Time. If Scrolling is chosen the student may see the entire test at once, if One at a Time is chosen, then one questions will be displayed at a time. The Last option on this box is the IDE that the student wishes to use during code related questions. The default is Eclipse, however this can be changed by clicking the browse button and finding the .exe of a different IDE. The student now looks over the defaults and decides they are suitable to his needs.
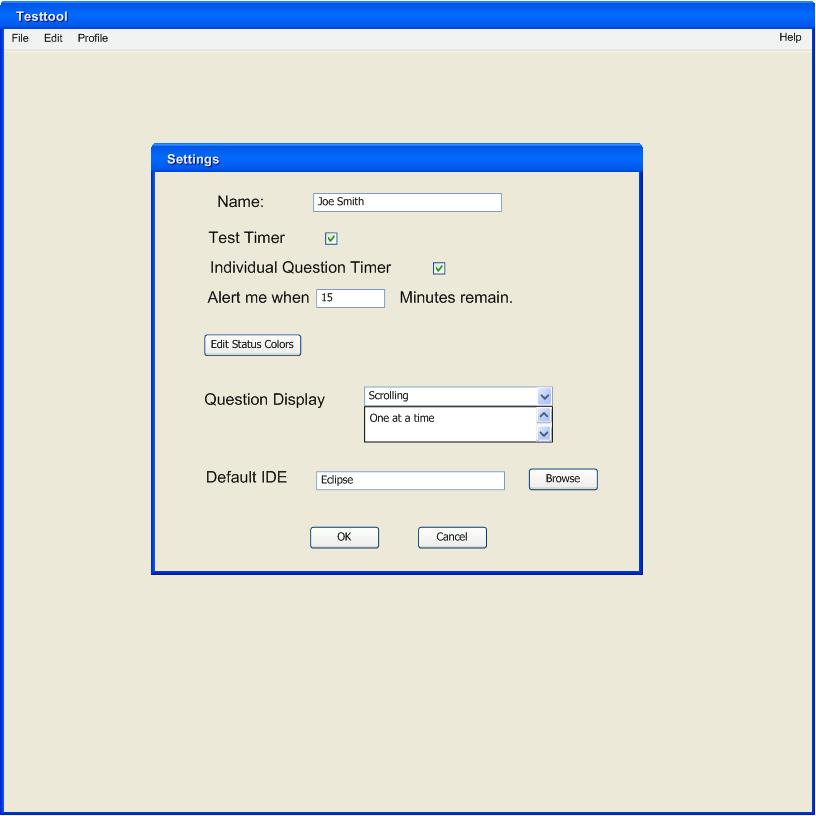
Figure 2.1.3.3
The student now clicks the Edit Status Colors button from Figure 2.2.3, Figure 2.1.3.4 is now displayed. There are three fields here, each of which may be changed by a pull down menu. When a student first is taking the test, each question status indicator will have the color specified by the Question Incomplete field. As the test goes on, the student may change the status of each question to complete, which is specified by the Question Complete field, or if they wish to revisit the question later for whatever reason they may mark the status the color indicated by Revisit Question Later. The default colors for these fields are green for a completed question, red for an incomplete question, and yellow for a question that needs revisiting. We recognize that some students may be colorblind or simply have a desire to customize their interface so we provide different colors which can be chosen by each pull down menu. The student clicks the arrow next to Revisit question later a menu is then displayed with the following color choices:
Black
Blue
Brown
Green
Orange
Purple
Red
Yellow
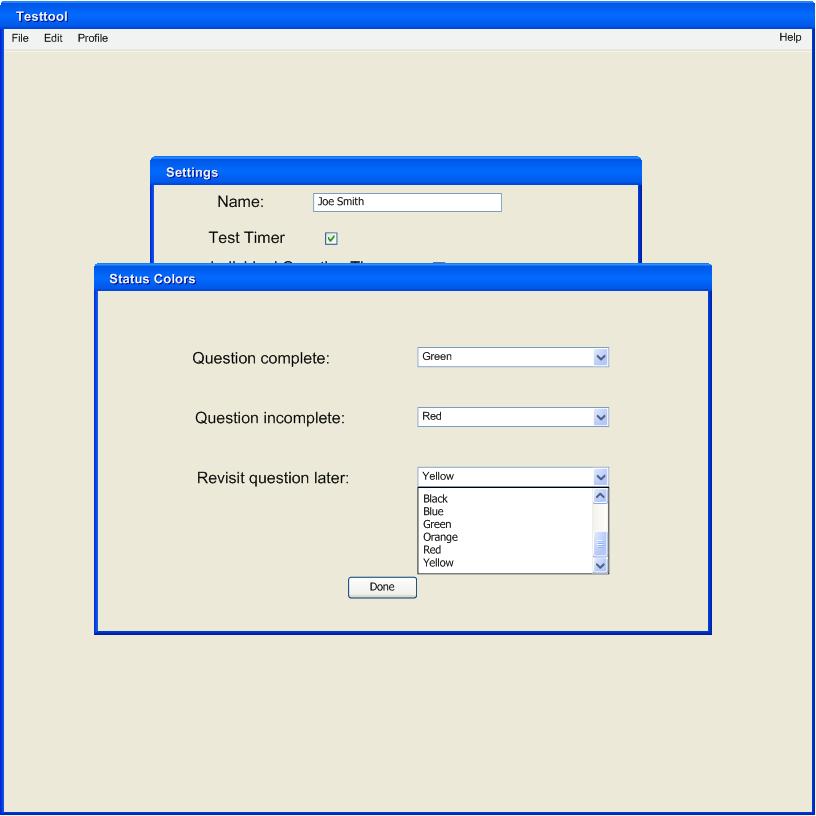
Figure 2.1.3.4
The student will now take the test and begin to answer questions, some possible errors in answering a question might be: invalid answer, or Answer field may not be empty.
A possible error to throw when trying to turn in an answered test would be to check if the test contains any non Answered questions: There are still un-answered questions, please be sure you wish to submit."
Prev: 2.5 Test Taking
| Next: In Class Proctored
| Up: index
| Top: index