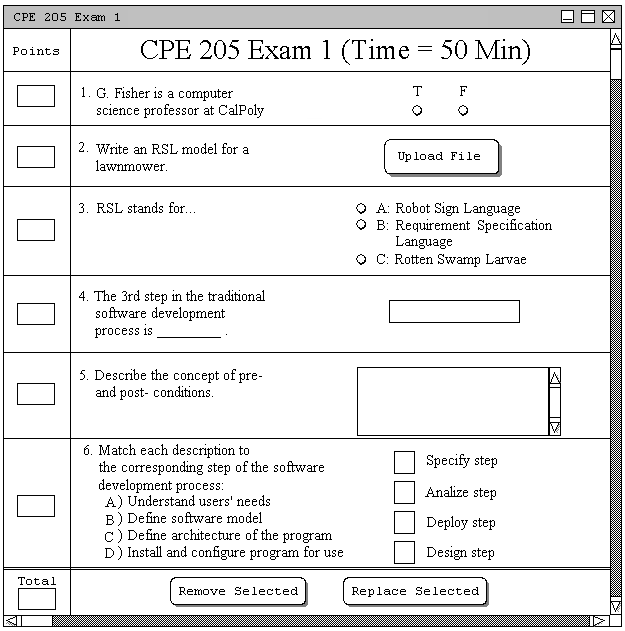
Figure 2.4.6.a.: Example Test.
This advanced tutorial shows an instructor assigning points to a test. Once a test has been created, either automatically or manually, there is a 'Points' column along the left hand side of the test. Figure 2.4.6.a. shows an example generated test.

Figure 2.4.6.a.: Example Test.
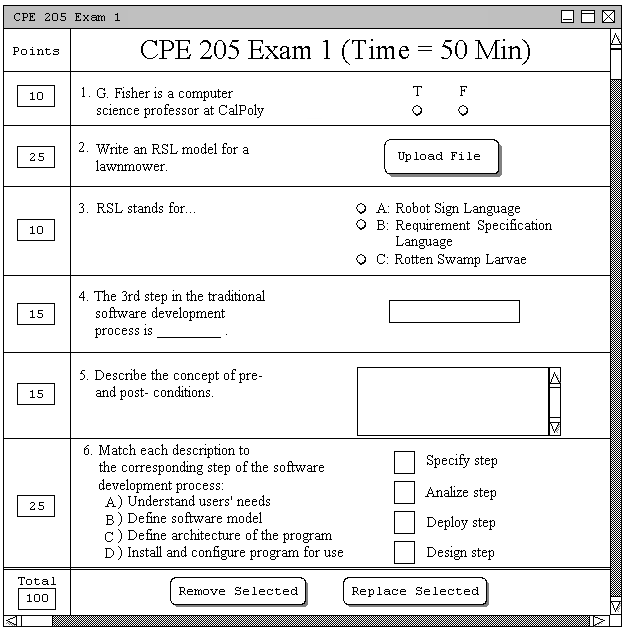
The figure shows an example test with the 'Points' column along the left side of the image. At this point, the user may enter a value for each individual question, or enter a single value for the entire test. Once the user enters a single value for the entire test under the 'Total' field, the rest of the points for each individual question are assigned automatically by the Test Tool, based on their difficulty and time. For example, if the user enters a value of '100' into the 'Total' field and presses the 'Return' key, the test will be populated with points as shown in Figure 2.4.6.b.

Figure 2.4.6.b.: Autofilling Points Fields.
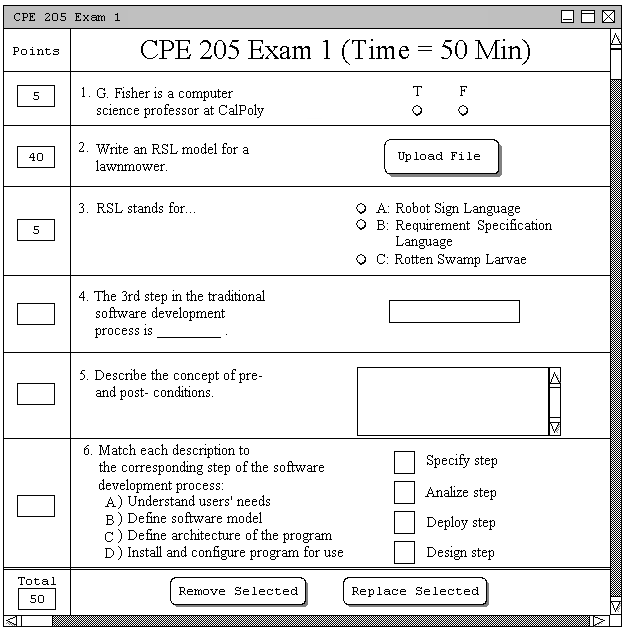
At this point, the user may adjust each question's point field as necessary. The user also has the option to fill in each point field manually, for each question. As the user fills in points fields for each question, the 'Total' field will update automatically as the sum of all the points for each question. Figure 2.4.6.c. shows an example of a partially filled in point assignment. Notice how the 'Total' field shows a running sum of the total points on the test.

Figure 2.4.6.c.: Manually Filling Points Fields.
Once the user is satisfied with the point assignment, the test is ready to be saved. However, a partially-assigned test may be saved as well. To save the test, the user simply uses the 'File -> Save Test ...' option in the menu bar.