Ray Tracer
Written By: Nikhil Kowshik
CPE 471 Spring 2009 Final Project
Ray Tracing In A Nutshell
The concept of ray tracing is actually quite simple. The idea is that we want to create a scene that looks realistic using computers.
In real life there are many things happening simultaneously. There are lights, reflections, shadows and more. How do we model this in
a computer? Basically we need to simulate and estimate the effects of all of these things. This is what raytracing does.
A ray tracer works like a camera. It traces light (in the form of rays/vectors) from the screen into the scene (see Figure 1) to determing
what color each pixel should be. We then use some vector calculations to determine which objects in the scene (if any) the ray intersects.
If an intersection is found, we use that color for the pixel.

Figure 1: Initial ray casting
The ray tracer is further enhanced by bouncing rays of of surfaces (reflecting them, implemented in this version) and refracting them
(not implemented in this version) to get a more realistic image (see Figure 2).
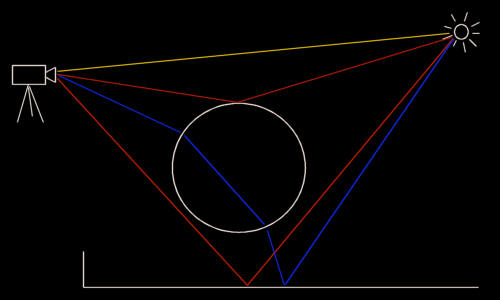
Figure 2: Reflections and Refractions
Design
Since a ray tracer is a very complicated application, I decided to do it in stages. The stages are listed below, and detailed in the
sections below.
Stage 1: Flat Shading
Stage 2: Phong Lighting
Stage 3: Shadows
Stage 4: Reflections
Stage 1: Flat Shading
The first stage is flat shading. Flat shading ONLY follows initial rays (see Figure 1). In this stage we follow the initial rays (one per pixel)
and determine which object in the scene (if any) it intersects. We then get the color of that object and use that color for the pixel (see Figure 3).
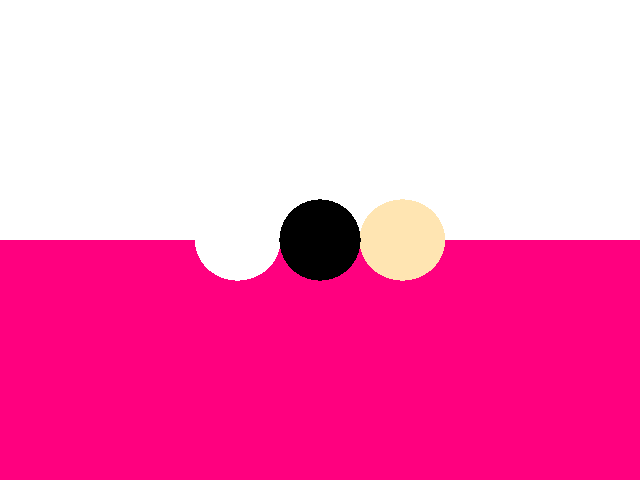
Figure 3: Flat shading
Stage 2: Phong Lighting
The second stage is using the Phong shading model. In this stage, when we find an intersection point we loop through each light source and cast another ray from this
ntersection point to each light source (called the light vector. For each light source we calculate a diffuse lighting, specular lighting, and ambient lighting.
We calculate diffuse lighting by first calculating the dot product of the light vector with the surface normal (for a plane it is where A/B/C are from the plane
equation: Ax + By + Cz + D = 0; for a sphere it is the vector perpendicular to the tangent at the intersection point). We the take this value and multiply it by the objects diffuse
coefficient, the objects diffuese color, and the light sources color (see EQ 1).
EQ 1: Diffuse = Kd * DOT(N, L) * Od * Ld
We calculate specular lighting by first calculating the dot product of the view vector (the vector from the intersection point to the origin of the vector that intersected the object) with
the reflection vector. But we do not know the reflection vector off-hand. Thus we need to calculate it. To do this we use a the equation is EQ 2.
EQ 2: R = 2 * DOT(N, L) * N - L
We then take take the dot product of this with the view vector. Then we raise this value byt the objects roughness value. If the object has a roughness value of 1, it is smooth,
if it is lower than one it has a roughness. Then we multiply this value by the objects specular coefficient and the lights color and the objects color (see EQ 3).
EQ 3: Specular = Ks * (DOT(V, R))^roughness * Od * Ld = Ks * (DOT(V, 2 * DOT(N, L) * N - L))^roughness * Od * Ld
Now We calculate the ambient lighting. Ambient lighting is just the light amount that is added to all pixels to account for the scattering of light in the real world.
Ambient lighting is merely the the objects color multiplied by the the objects ambient coefficient multiplied by the lights color (see EQ 4).
EQ 4: Ambient = Ka * Od * Ld
In the above lighting equations Od represents the the objects color, Kd is the objects diffuse coefficient, Ks is the objects specular coefficient, Ka is the objects ambient coefficient, and Ld is the light's color. Remember that we can do these equations on each color value (red, green, blue) separately.
Figure 4 shows the results of these calculations.

Figure 4: Phong shading
Stage 3: Shadows
After lighting comes shadows. To calculate shadows we, again, loop through each light source and shoot a vector/ray from the intersection point to the light source
a light vector. Then we test this ray for intersections with each object. This is similar to the initial ray casting. If the ray intersects an object we
test to see if it is obstructing the light. To do this we first calculate the distance from the intersection point to the light source. Then we calculate the distance
from the object we intersected with the light vector to the intersection point we are currently working on. If the distance to the light source is greater than the
intersection distance we have an obstructed light and this pixel obnly gets ambient lighting. If no object is obstructing the light we give the pixel diffuse, specular,
and ambient lighting (see FIgure 5.
Note that as a performance enhancement we do not nee dto test all objects necesarily. If we find an object that is obstructing the light we can stop the testing.
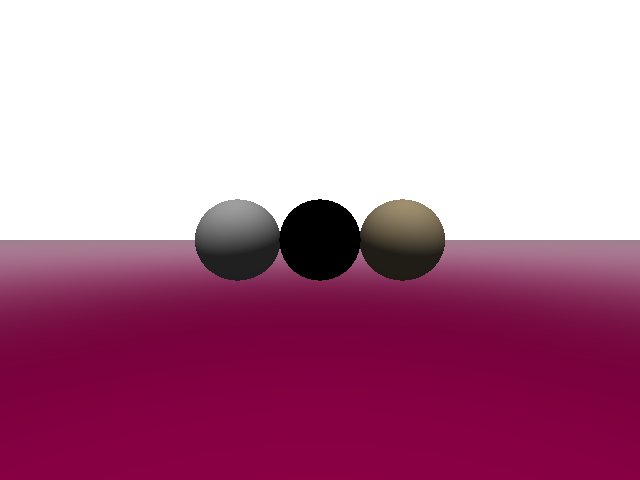
Figure 4: Shadows
You will notice that there are no shadows in this image. I could not get it to work properly. Initially when I was calculating shadows every object came out black.
Then I changed something (I don't remember what now...) and it changed to standard Phong lighting. I have no idea why.....
Stage 4: Reflections
The final stage of my ray tracer is reflections. Reflections is done via recursion. To do reflections we follow the steps below:
- Cast out rays from screen
- Find intersection point of ray
- If intersection found, reflect ray across surface normal (see EQ 2
- Cast out reflected ray
- If MAX_RECURSE_DEPTH not met, goto step 2
- Calculate contribution of this point to original objects color
- Return up the recursion stack and add this color to the overall color
You will notice that step 4 goes back to step 2 with the reflection ray. After step 4 we have this step: "Calculate contribution of this point to original objects color".
This means that once we have recursed as deep as we want to go we need to find out how much the current pixel's color affects the original objects color at the intersection
point. To do this we multiply the pixel's color by the objects reflectivity coefficient ad add it to the objects overall color(see EQ 5).
EQ 4: Color = Color + (color_of_current_pixel_in_recursion * Kr)
In the above lighting equation Kr represents the the objects reflectivity coefficient.
Figure 5 shows reflections in my ray tracer. You will notice, again, that they do not really work. They work on the sides that point towards the center of the screen,
but on the sides that face towards the edged there are reflections that should not be there; not to mentiopn the gound plane is pretty messed up. I spent hours trying to figure
out why this was happening, but could not find a solution... yet.
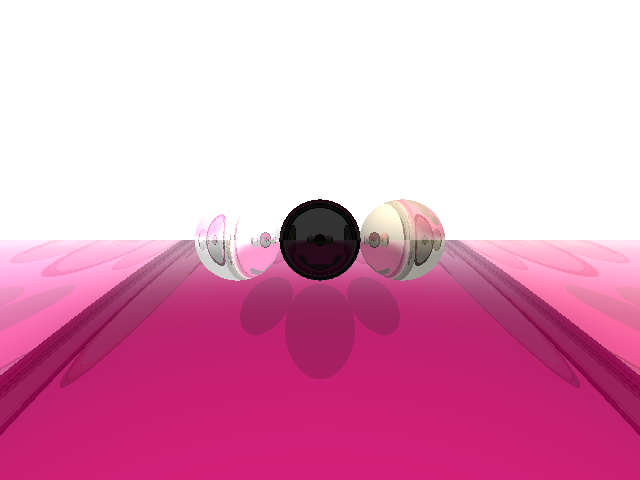
Figure 4: Feflections
Future Developments
This project was very difficult, and if I had more time I would have definitely gotten the shadows and reflections to work properly. I think those two are my main concerns
right now. Once I get those to work I would love to add support for more shapes and even refraction.
Source
The ray tracer has only been tested on linux, so you experiences may vary. Download the source and compile it with the following command line;
> gcc -lGL -lglut -lm *.cpp
Running the Ray Tracer
The ray tracer is quite strict in its command line requirements. Some parameters are mandatory and some are optional. To run the ray tracer use the following command line parameters
> ./a.out [-stages={1|2|3|4}] -width WIDTH -height HEIGHT -in POVRAY_FILE.txt* -out OUTPUT.ppm*
- stages is optional
- the povray file supported is a subset of the povray file specification and the layout is VERY specific. Please use this file as a guidline,
as all fields are mandatory. the ".txt" extension must be included as well.
- the output file name can be anything but you must include the ".ppm" extension
Resources
Below are some resources that i found very helpful for this project.
DevMaster.net - Raytracing: Theory & Implementation Part 1, Introduction
SIGGRAPH - Ray Tracing
Ray Tracing Tutorial: Section 1 - The Basics
Lighthouse 3D - Intersection Formulas
Ray Tracing Formulas - Ray-Sphere Intersection
GameDev.net - Phong Illumination Explained