Overview
Photon mapping is a global illumination technique to render scenes with some accurate lighting quickly. This method takes longer than vanilla ray tracing but is much less resource intensive than traditional Monte Carlo Ray Tracing. Monte Carlo ray tracing traces rays to a scene and conducts multiple bounces before returning a color to the camera. This is extremely time consuming and many rays are cast. Monte Carlo Ray Tracing also makes it hard to render certain lighting effects such as caustics. Photon mapping is able to quickly estimate global illumination by shooting rays from the light's position. These rays are effectively photons that bounce throughout the scenes. Photon mapping makes it easy to render color bleeding as well as caustics. I have developed a photon mapping program that renders spheres in a Cornell Box. This photon map implements color bleeding and reflective surfaces but not caustics.
Method
Much of the method for photon mapping was found from Henrik Jensen's "A Practical Guide to Global Illumination using Photon Maps" as well as this site: photon mapping tutorial
The general method involves three steps: photon emission, photon gathering, and rendering. These are separated into two passes, one pass generates the photon map, and the next pass renders a scene using the photon map.
Photon emission emits photons from the light source in various directions. Depending on the type of light source, photons can travel in different ways. Point lights shoot photons in any general direction. Area lights shoot photons from a given area in a random direction that is less than 90 degrees of the normal. My photon map shoots photons from an area light that is 4x4 from the box ceiling which has dimensions 20x20.

When photons hit an object, they can either specularly reflect, diffusely reflect, or be absorbed. I use Russian Roulette to determine whether photons are reflected or absorbed. Russian Roulette is a Monte Carlo technique. Basically, it is done by choosing a random number between 0 and 1. I use this number to test against the diffuse and specular coefficient of the surface hit. Depending on the value of my number, the photon will either specularly reflect, diffusely reflect, or get absorbed. Photons are only stored with a diffuse reflection or an absorption. Once all photons are emitted they are stored in a photon map.
The next pass is rendering using general ray tracing. Direct specular reflection is just calculated with ray tracing, while diffuse reflection and global illumination is performed with the photon map.
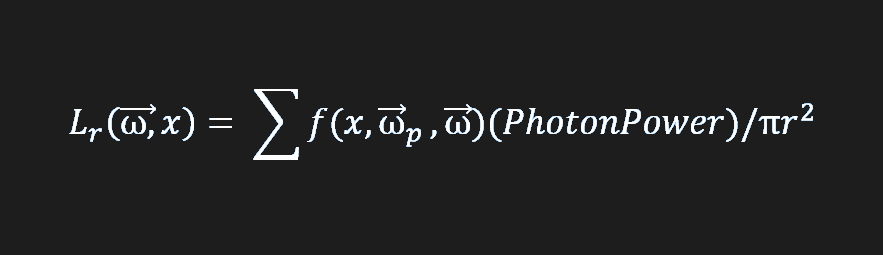
For the rendering step, photons need to be gathered based on their location. In order to do this efficiently, I constructed a kd-tree for the photon map so that photons are sorted based on their position in the scene. When rendering, ray tracing is done to find an intersection point. At that point, the N closest photons are found within a given radius, and their radiance values are estimated by their power multiplied by the BRDF in that photon's incident direction. Then these values are divided by the radius of the photon search. A simplified equation can be seen below.
For the BRDF I just used general diffuse phong.
Results
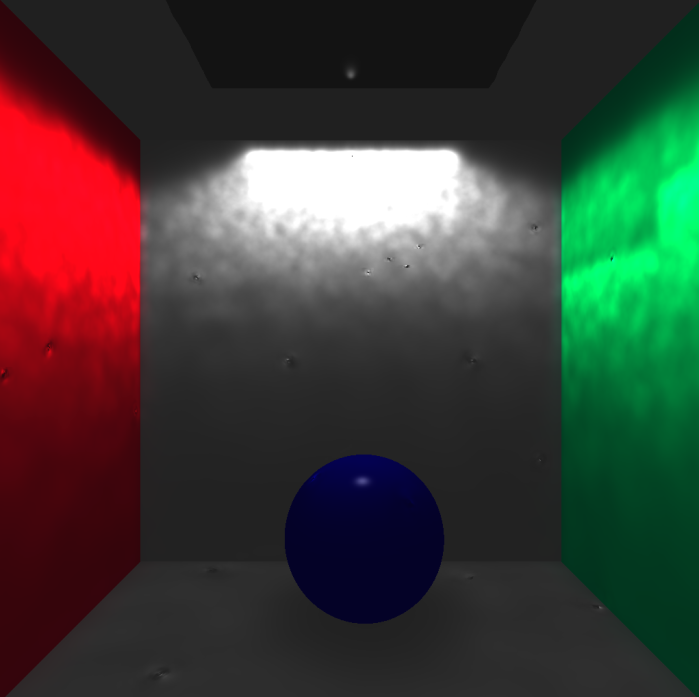
My photon map is successful in conducting global illumination in a small scene. The renders include color bleeding and soft shadows. For shadows I am still using shadow ray techniques however I still check for indirect illumination at those shadow points. This is why soft shadows occur.
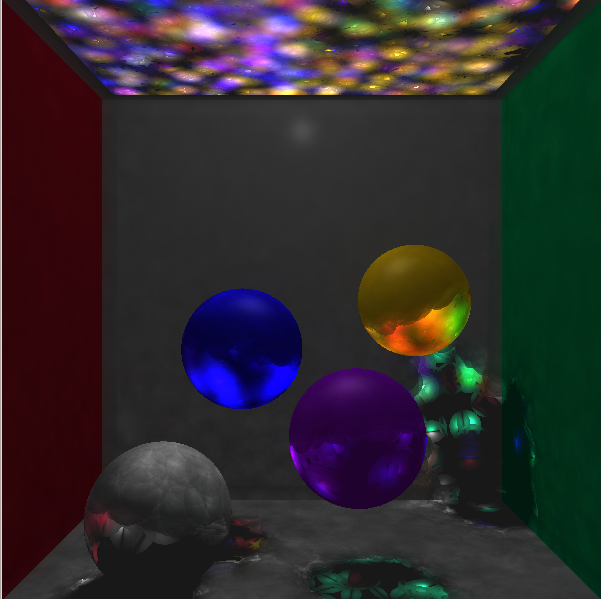
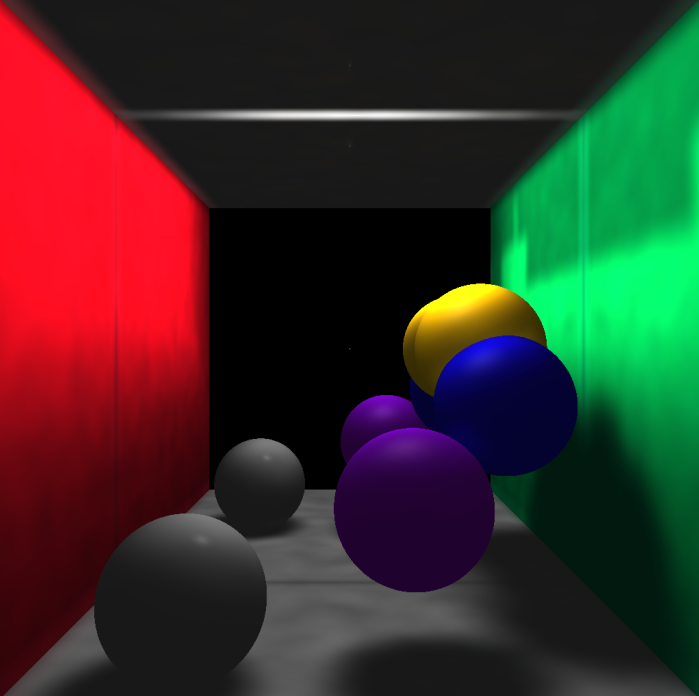
Here are a couple of mess ups:
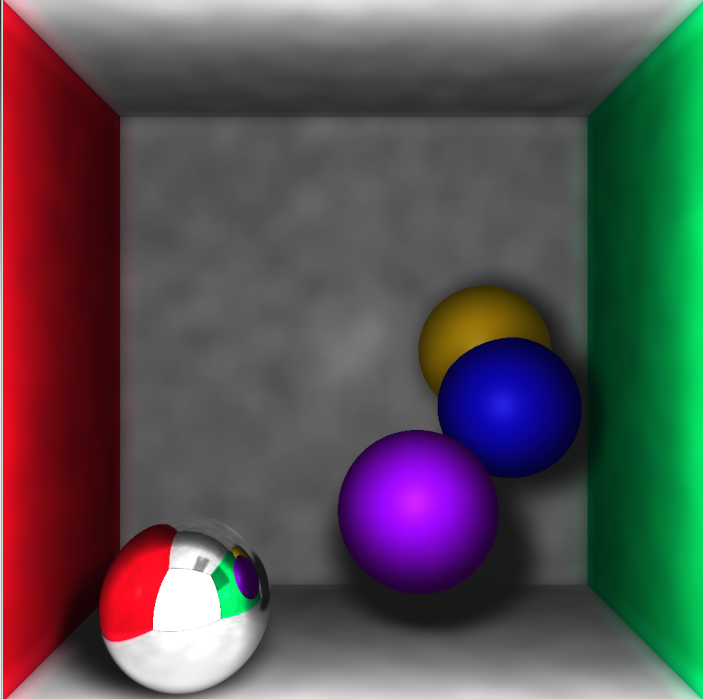
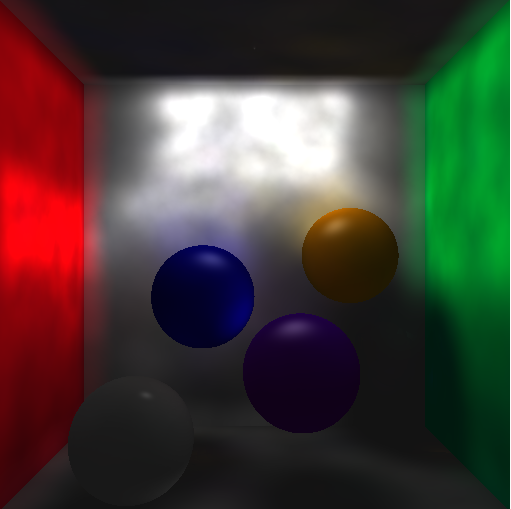
Here is an example with intense color bleeding. Notice the yellow sphere color emitting light onto the back wall. Also the red and green walls emit color onto the back wall. This render is 512x512 with 100,000 photons. The render time was less than 30 seconds:
Examples with reflective surfaces:
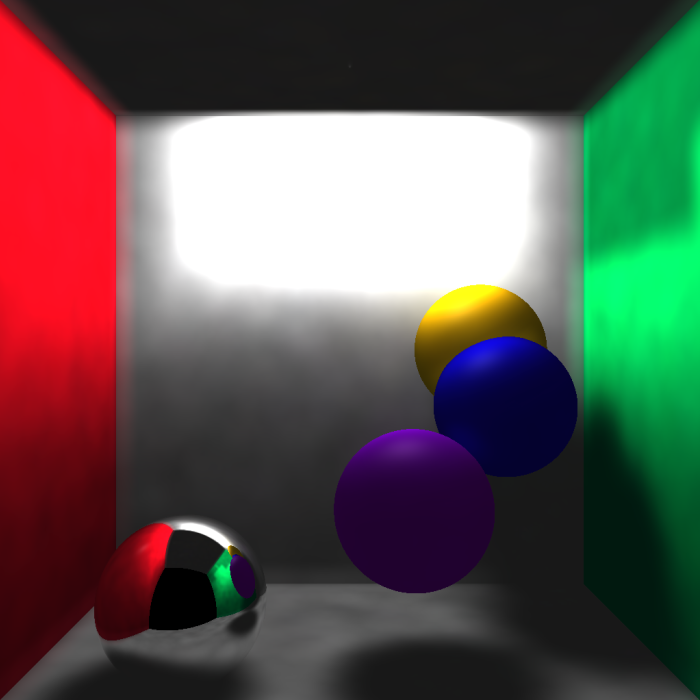
My best render is a 1024x1024 scene with box dimensions of 20x20x20. All of my spheres have a radius of 2.5 and the light source has an area of 16 (4x4). For the image in the slideshow below, I shoot 1,000,000 photons into the scene. At each intersection point, I sample the closest 10,000 photons starting with an initial radius search of 1.0. These same parameters are used for the reflectance images above and at the top of the page. These renders took about 5 minutes.
My photon power was really dark so I had to give the radiance estimate at each point a scale boost of about 10,000 to get good results. I also used an attenuation technique for each photon radiance. This multiplies the radiance of a photon by: 1.0 - (dist*dist) / (radius*radius), where dist is the distance from the point and the photon, and radius is the max radius of the sample.
Future Work
This photon map render does not currently support caustics. Caustics did not get implemented due to time constraints on the project. I would like to also render a water mesh in the future with caustics to simulate a swimming pool scene. Lastly, I could also extend this program to shoot shadow photons and check for them.


