
Item-level viewing for appointments was introduced in Section 2.3.1.5. This section covers further details of appointment viewing, as well as item views for meetings, tasks, and events. Independent of item type, the user views an item by selecting its time or title in any larger-grain view, and then executing the `View Item' menu command. This series of interactions is illustrated in Figures 24 and 25 A short cut to view an item is to double click on the item time or title. Complete details of target item selection are covered in Section .
Common to all item views are change, delete, and clear buttons at the bottom of
the display. In the initial viewing state, the change and clear buttons are
disabled, and the delete button is enabled. If the user edits one or more data
fields, the button states are reversed, with change and clear enabled, delete
disabled. The scenarios of this section focus on viewing scheduled items prior
to any editing by the user. Hence all item-level displays are shown in the
initial change-disabled state. Complete details of changing and deleting items
are covered in
Section 2.5.2
2.5.1.1. Viewing Appointment Items
Figure 132 shows the result of the user viewing the item for 8 AM September 25.

Figure 132: Item-level appointment view.
The item-level appointment display has the same data fields as the appointment scheduling dialog shown in Figure 5. The item display differs from the scheduling dialog as follows:
At the far left of the time/date header are the Previous/Today/Next buttons that appear in all calendar views. These buttons are used to navigate among scheduled items, as described in Section 2.3.2. The `Change', `Delete', and `Clear' commands are covered in Section 2.5.2.1.
Figure 133 shows the item-level view of a recurring appointment.
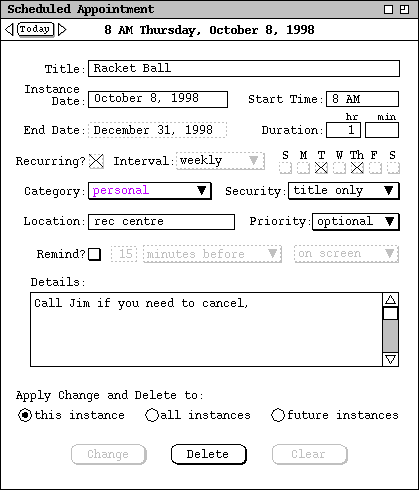
Figure 133: Item-level view of a recurring appointment.
The primary difference in a recurring versus non-recurring display is the addition of the three radio buttons above the command buttons. The radio button setting indicates how many recurring instances the `Change' and `Delete' commands apply to. For viewing purposes, the setting of these radio buttons affects the format of the display.
When `this instance' is selected, the first date field is labeled `Instance Date'. This indicates that a change or delete affects this one instance only. The value for the `End Date' field is shown in the display, but typing in the text field is disabled, as indicated by the greyed and dashed border. This is the case because changing the end date is not meaningful when only a single instance is in view. The values for the recurring information are shown, but the data edit fields are disabled. Again, this is because changing the recurring information is not meaningful when only a single instance is in view.
Figure 134 shows the October 8 item display when the user selects the `all
instances' radio button.
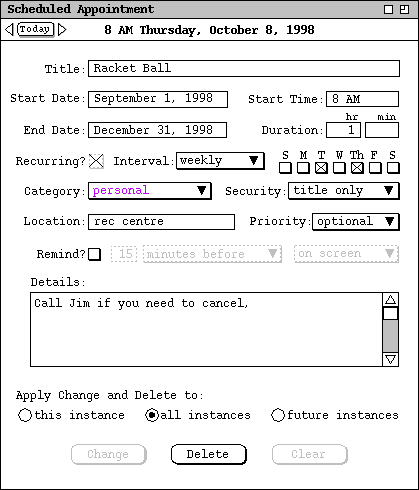
Figure 134: Item-level view of a recurring appointment, all instances setting.
Figure 135 shows the October 8 item display when the user selects the
`future instances' radio button.
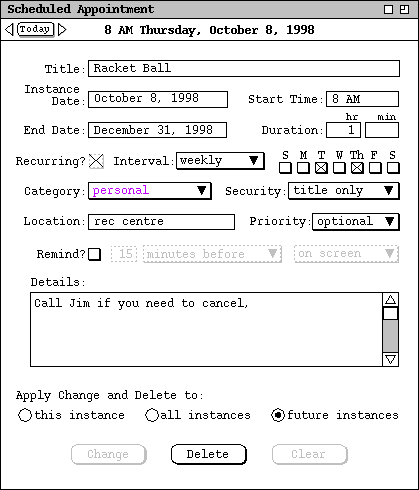
Figure 135: Item-level view of a recurring appointment, future instances setting.
Prior to any changes in a recurring appointment, the same data values appear
for all instances, except for the differences between instance date versus
start date described above. When the `all instances' radio button is
selected, the data values for each and every unchanged instance are identical.
The only display distinction between two different instances is the time and
date header. For example, Figure 136 shows the racket ball racket instance for
December 15.
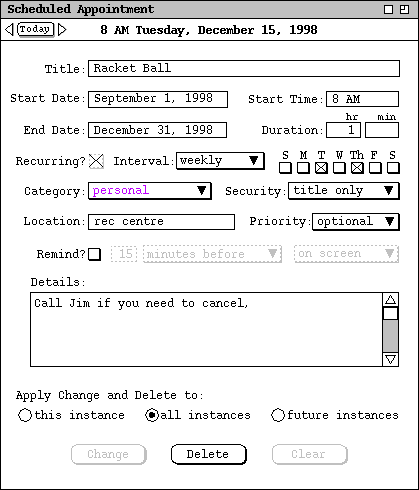
Figure 136: Item-level view of another recurring instance..
Of note for recurring items is that the `Next' and `Previous'
commands do not specifically lead to the next and previous recurring instances.
Rather, `Next' and `Previous' move consistently among all
scheduled items, including not-yet-accepted meetings, in the order described in
Section 2.3.2.1.
2.5.1.2. Viewing Meeting Items
Figure 137 shows the result of the user viewing the item for 8 AM September 23.
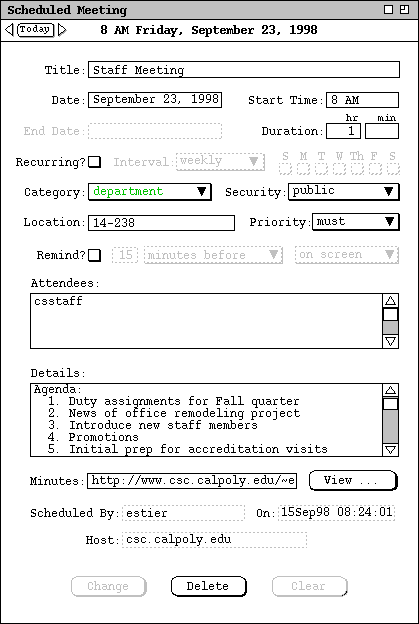
Figure 137: Item-level meeting view.
At the far left of the time/date header are the Previous/Today/Next buttons, as described above for the appointment item. The `Change', `Delete', and `Clear' buttons provide editing functionality, as covered in Sections and 2.5.2.2.5.
As introduced in Section 2.4.1.1, the value entered in the `Minutes' text field is a WWW URL. If the minutes text field is non-empty, then the `View' button is enabled. If the minutes field is empty, then there are no available meeting minutes and the `View' button is disabled. When the user presses an enabled `View' button, the system displays the minutes using an external web browser, open on the given URL. The name and location of the external browser program are set as a user option, as described in Section 2.7.4.3. The Calendar Tool system performs no validation of the URL entered in the minutes field. If the URL is invalid in any way, the error condition is handled entirely by the external browser, as discussed in Section .
The scheduler may initially enter the URL in the form of a file directory, and subsequently edit the minutes field to specify an individual file. If the scheduler does not change a directory URL to an individual file, the system opens the external browser on the entire directory. If the server on which the URL resides does not support directory browsing, then the web browser may signal an error, as discussed in Section . In any case, it is the responsibility of the meeting scheduler to specify a valid URL for the meeting minutes. If the scheduler leaves the minutes field as a directory, it is also the scheduler's responsibility to name the files in the directory such that users can understand which files correspond to which meeting occurrences. The Calendar Tool does not enforce any constraints on the naming or structure of meeting minutes directories or files.
By definition, meeting minutes contain meaningful information after a meeting has taken place. If the scheduler specifies a meeting minutes file in advance of a meeting being held, it is the scheduler's responsibility to define appropriate pre-meeting content for the file, such as an indication that the minutes are to appear. The Calendar Tool does not enforce any constraints on the content of meeting minutes files.
When the user views a not-yet-accepted meeting at the item level, the command
buttons at the bottom of the display are different. Specifically, the
`Change', and `Delete buttons are replaced with
`Accept' and `Decline' buttons. For example, Figure 138
shows the item-level view of the staff meeting of
Figure 137,
before it has been accepted by the viewing user.
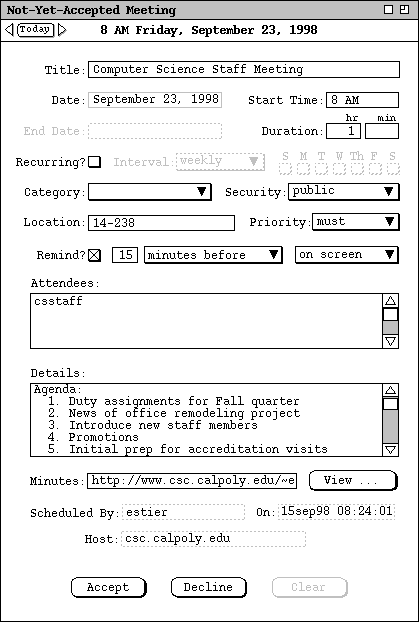
Figure 138: Item-level view of a not-yet-accepted meeting.
As noted in Section 2.4.1.5, the user cannot delay the accept/decline decision beyond the start date and time of a meeting. If the user fails to accept or decline within this time, the system automatically executes decline on the user's behalf, thereby deleting the meeting for the user.
Unless the user hides penciled-in meetings with a filter, such meetings appear at all viewing levels, including the item level. This means that not-yet- accepted meetings appear at the appropriate points in the next/previous item traversals described in Section 2.3.2.1.
Of note in this scenario is how the state of Figure 138 reflects the unedited state of the initial notification dialog in Figure 112. In contrast, the state of Figure 137 reflects the state of the edited notification dialog in Figure 113. The figure pairings represent two different phases of a scheduled meeting. Figures 112 and 138 represent an earlier phase, before the meeting has been accepted. Figures 113 and 137 represent a later phase, after the meeting has been accepted.
Figure 139 shows the item-level display of the recurring meeting scheduled in
Section 2.4.1.1.
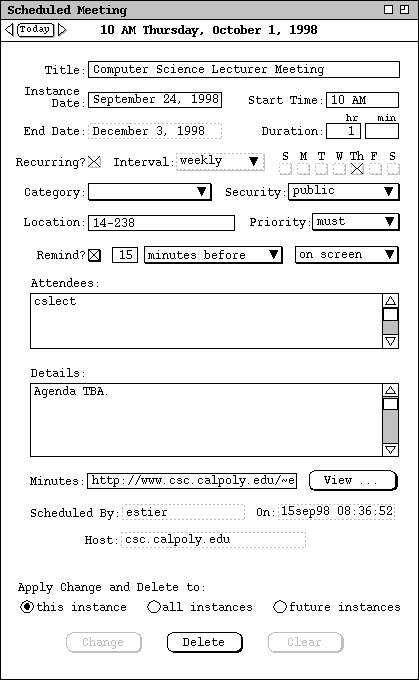
Figure 139: Item-level view of a recurring meeting.
When the user selects `View Item' for a task, the system displays a
view of the form shown in Figure 140.
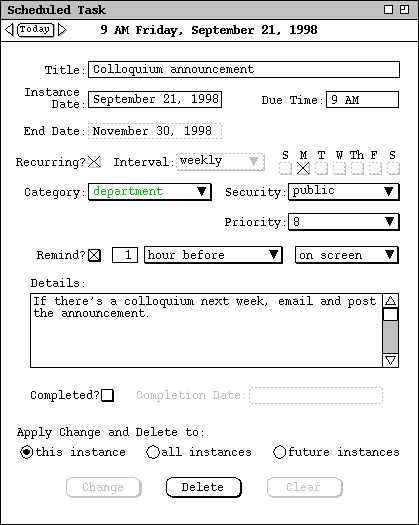
Figure 140: Item-level task view.
The `Completed?' and `Completion Date' data fields indicate
the completion status of a task or task instance. Details of how these fields
are set are presented in
Section 2.5.2.3.
The change/delete radio buttons have exactly the same functionality as in the
appointment view, including the same effects on the display format.
2.5.1.4. Viewing Event Items
Figure 141 shows the result of the user executing `View Item' for the
event scheduled in
Figure 128.
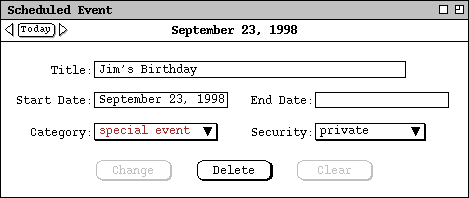
Figure 141: Item-level event view.
The event item display has no additional data fields than those in the event
scheduling dialog. Details of event change and deletion are covered in
Section 2.5.2.4.
2.5.1.5. Item-Level Viewing in Other Users' Calendars
Figure 142 shows the user viewing another user's calendar at the item level.
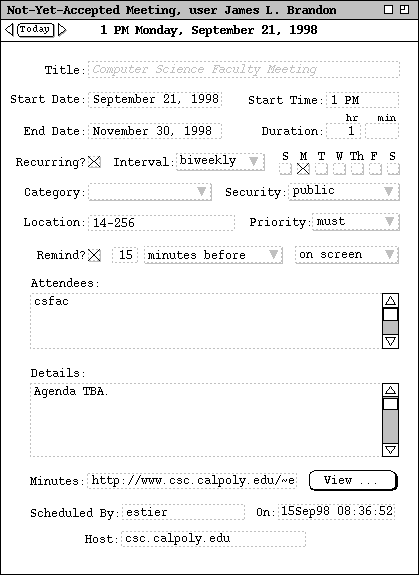
Figure 142: Item-level view of another user's calendar.
In a user's own calendar, the item view of not-yet-accepted meetings has
`Accept' and `Decline' command buttons instead of
`Change' and `Delete'. This distinction in buttons indicates
that an item is not yet accepted. Since the command buttons are missing in the
view of another user's items, the title text of another user's not-yet-accepted
item is shown in light-grey italics.