The scenario in this section demonstrates the admin function of adding a room. A room contains a building, room, room type, maximum capacity, required equipment, and availability.
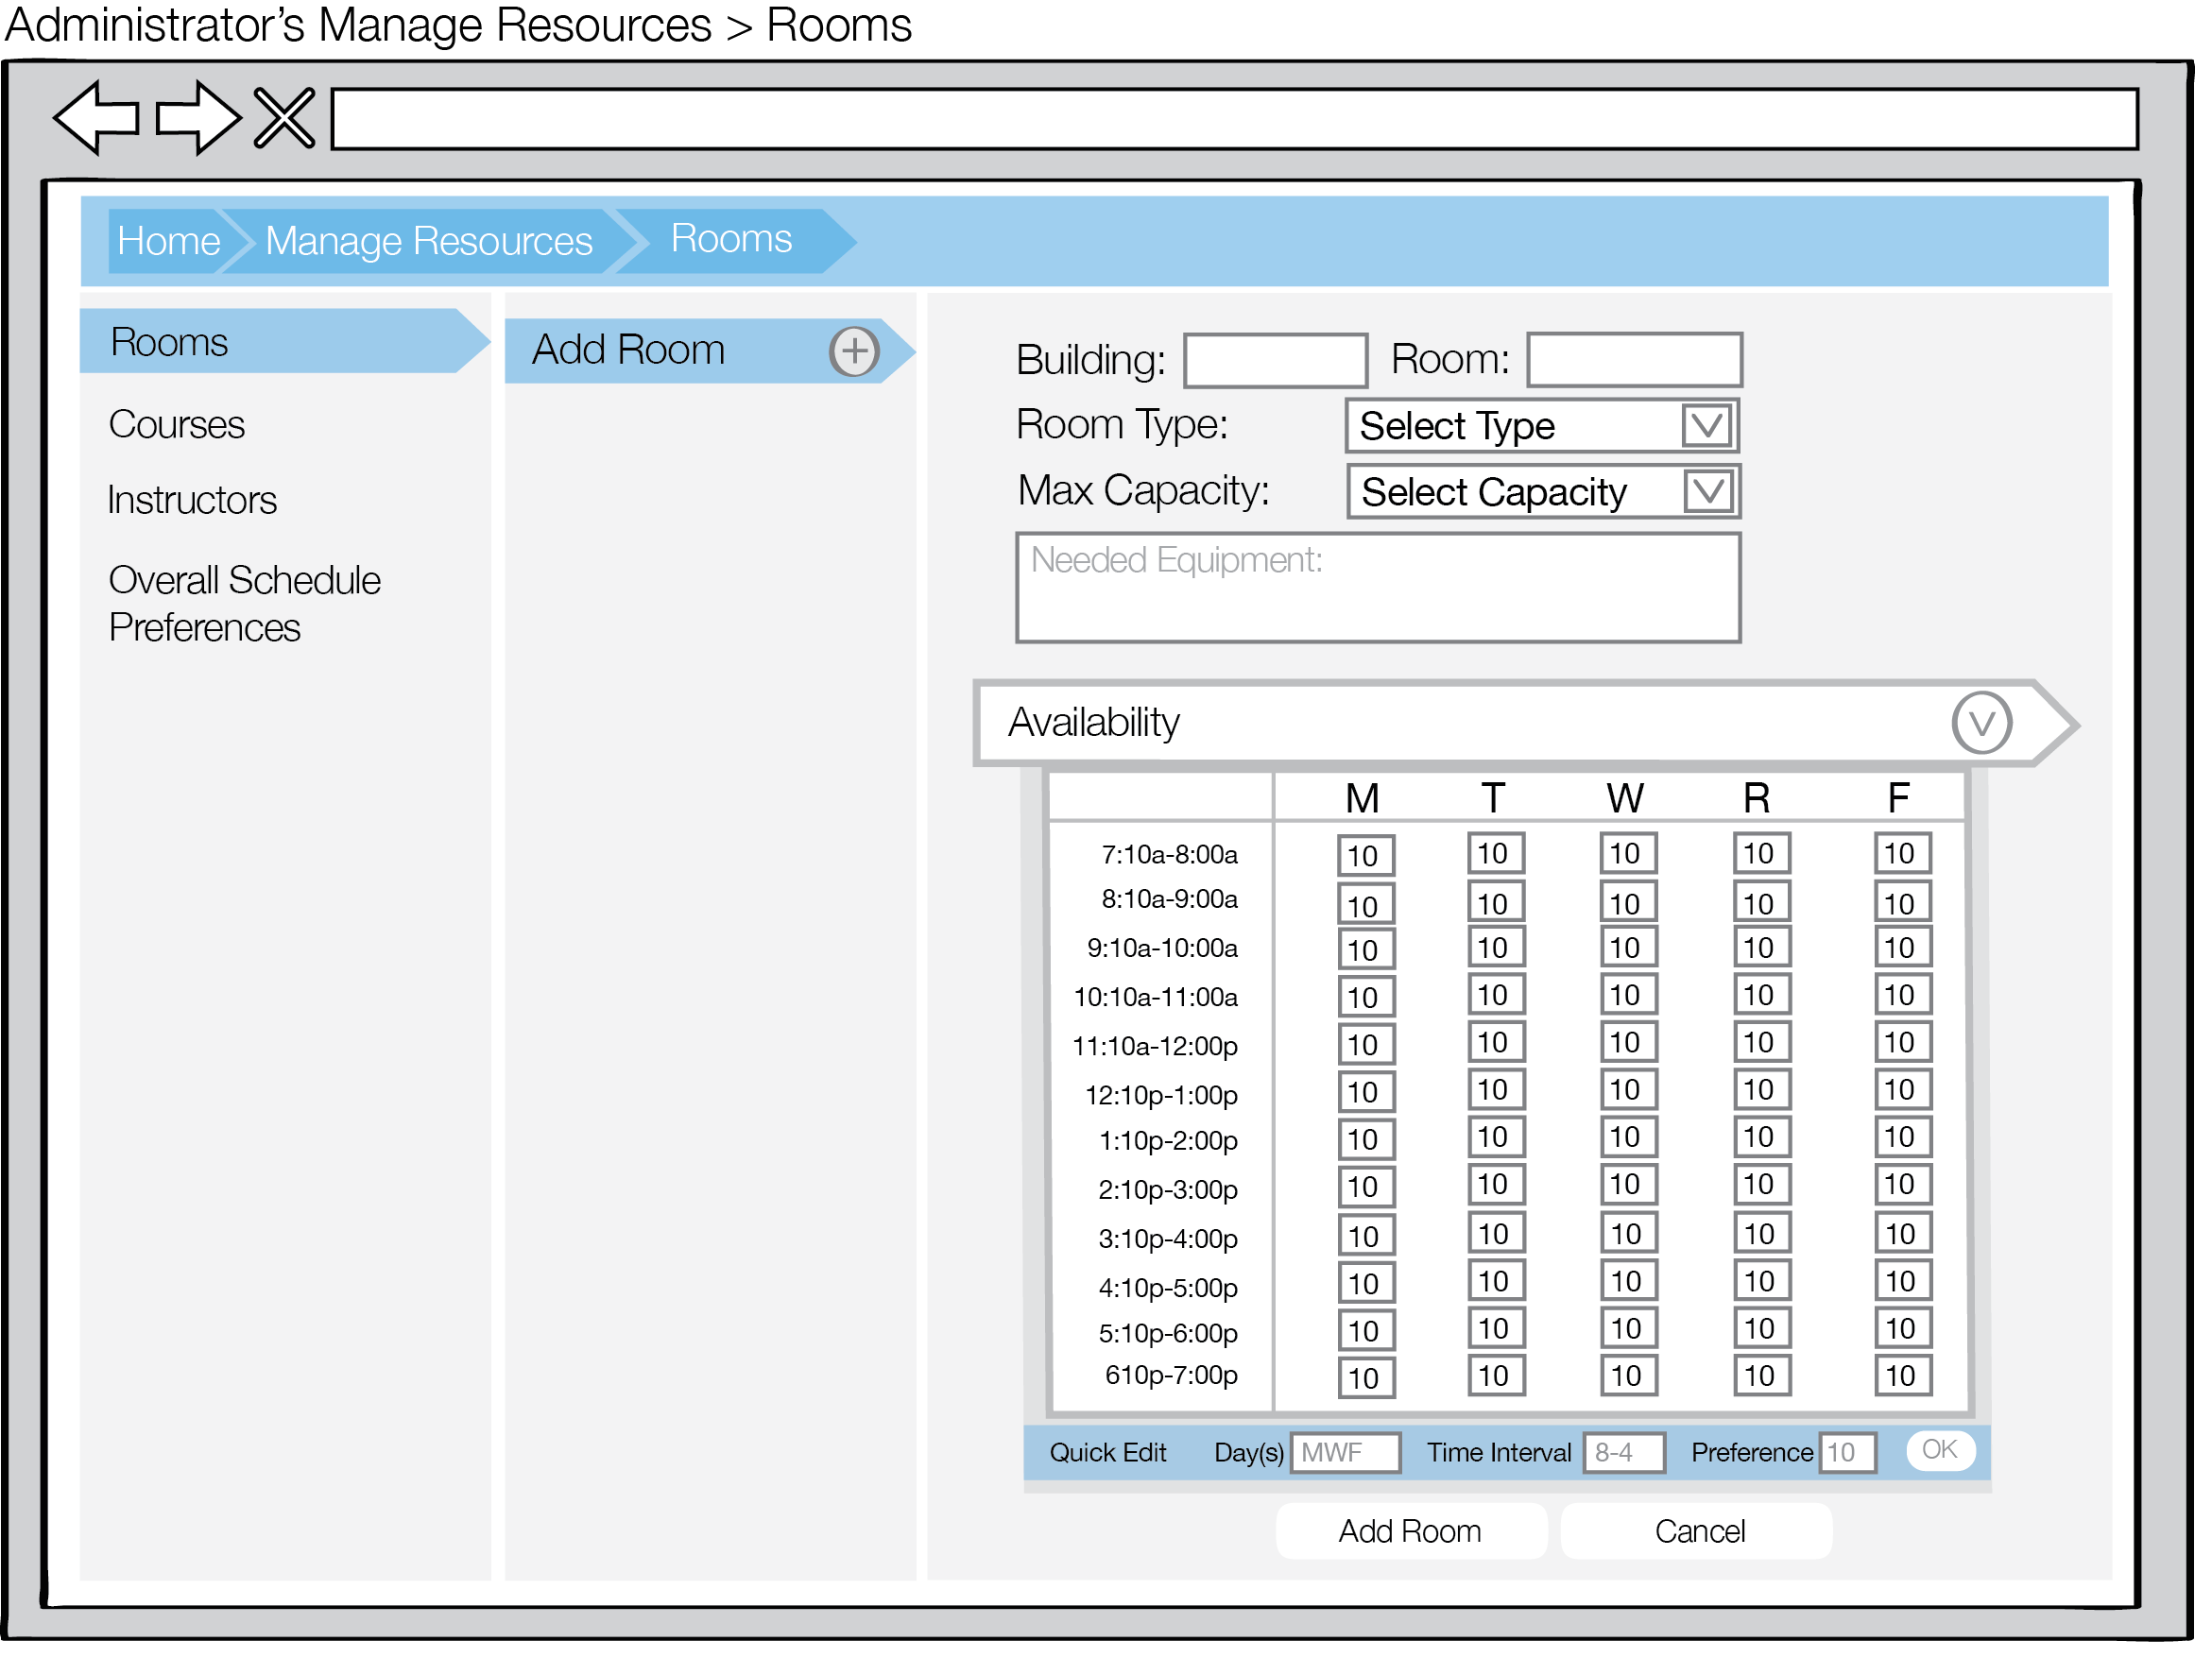
Upon selecting the Add Room button for the first time, the right column fills with a form as shown in Figure 1.

Figure 1: Initial add rooms view for administrators
A label New Building and New Room appear below the search bar. The New Room label as an accordian below the New Building label populates with a template for room information. This form includes:
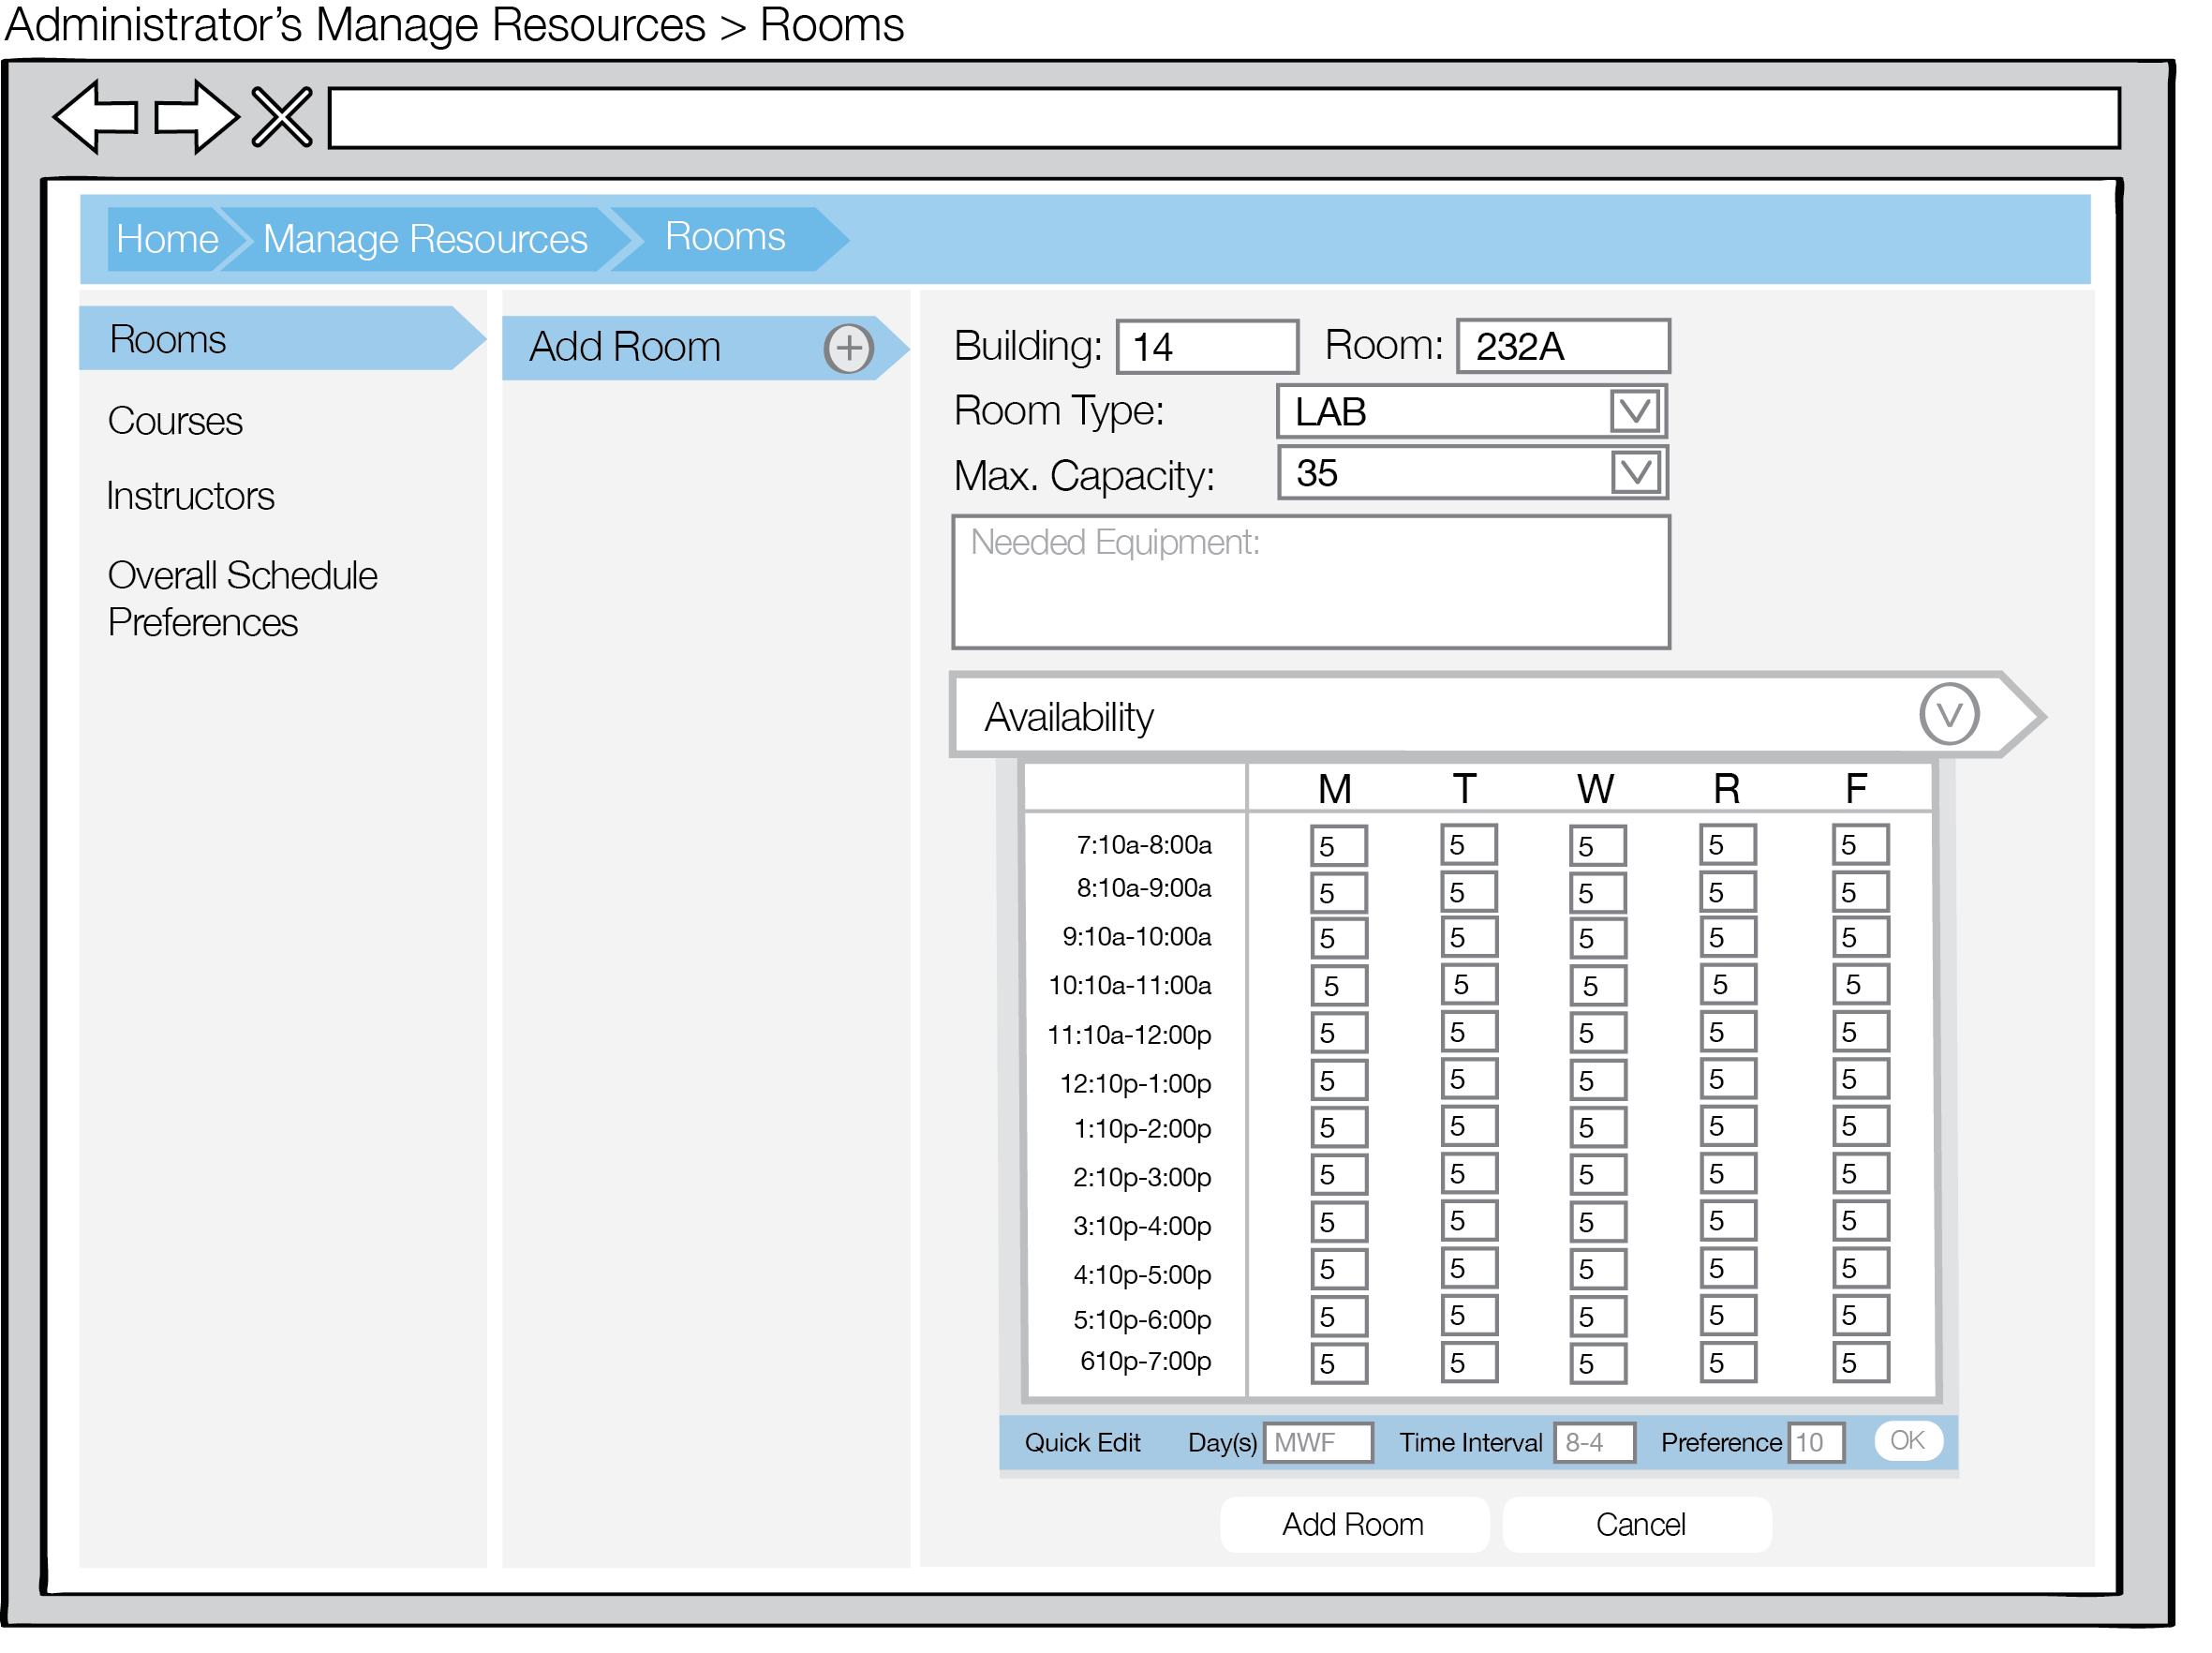
An example filled out form is shown in Figure 2.

Figure 2: Filled-out add rooms view for administrators
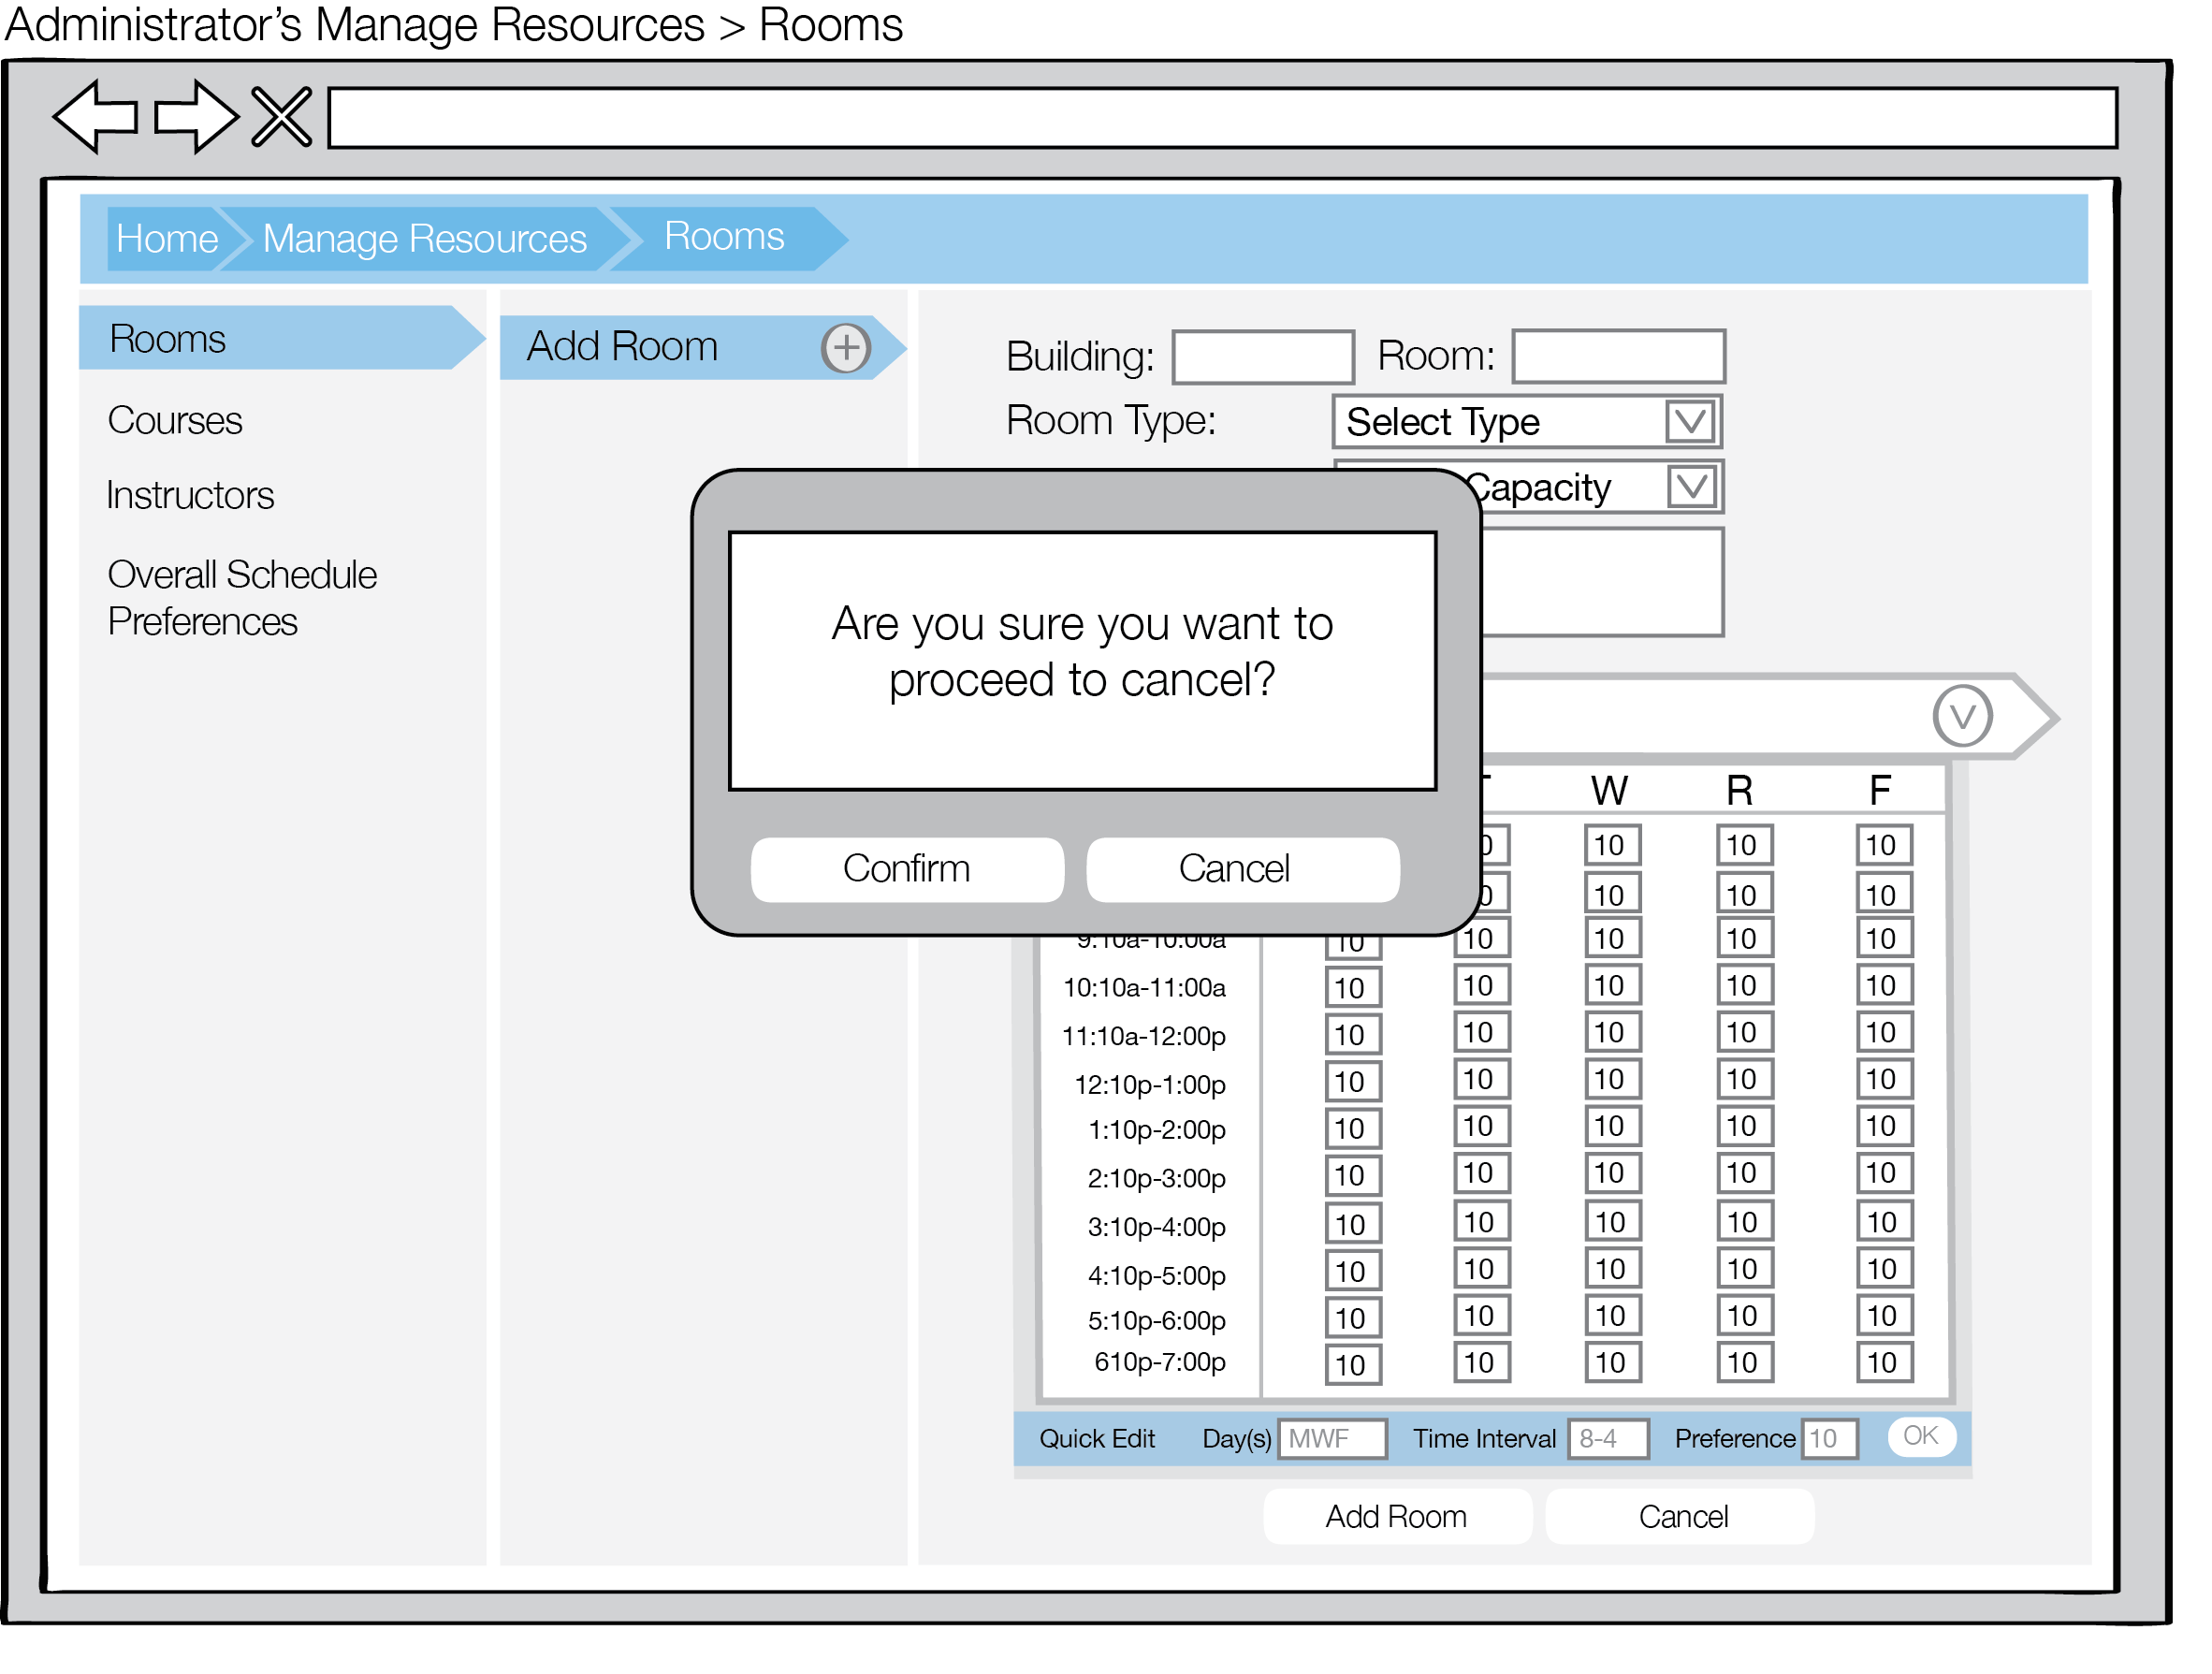
The Cancel button erases all data fields of the new administrator form. When the Cancel button is selected a pop-up view opens asking confirmation the user wants to cancel adding the room, as shown in Figure 3.

Figure 3: Rooms cancel add view for administrators
The pop-up view prints out Are you sure you want to proceed to cancel? All data about this room will be deleted. The user can select the Confirm to cancel adding the room. The user can select Cancel to continue adding the room.
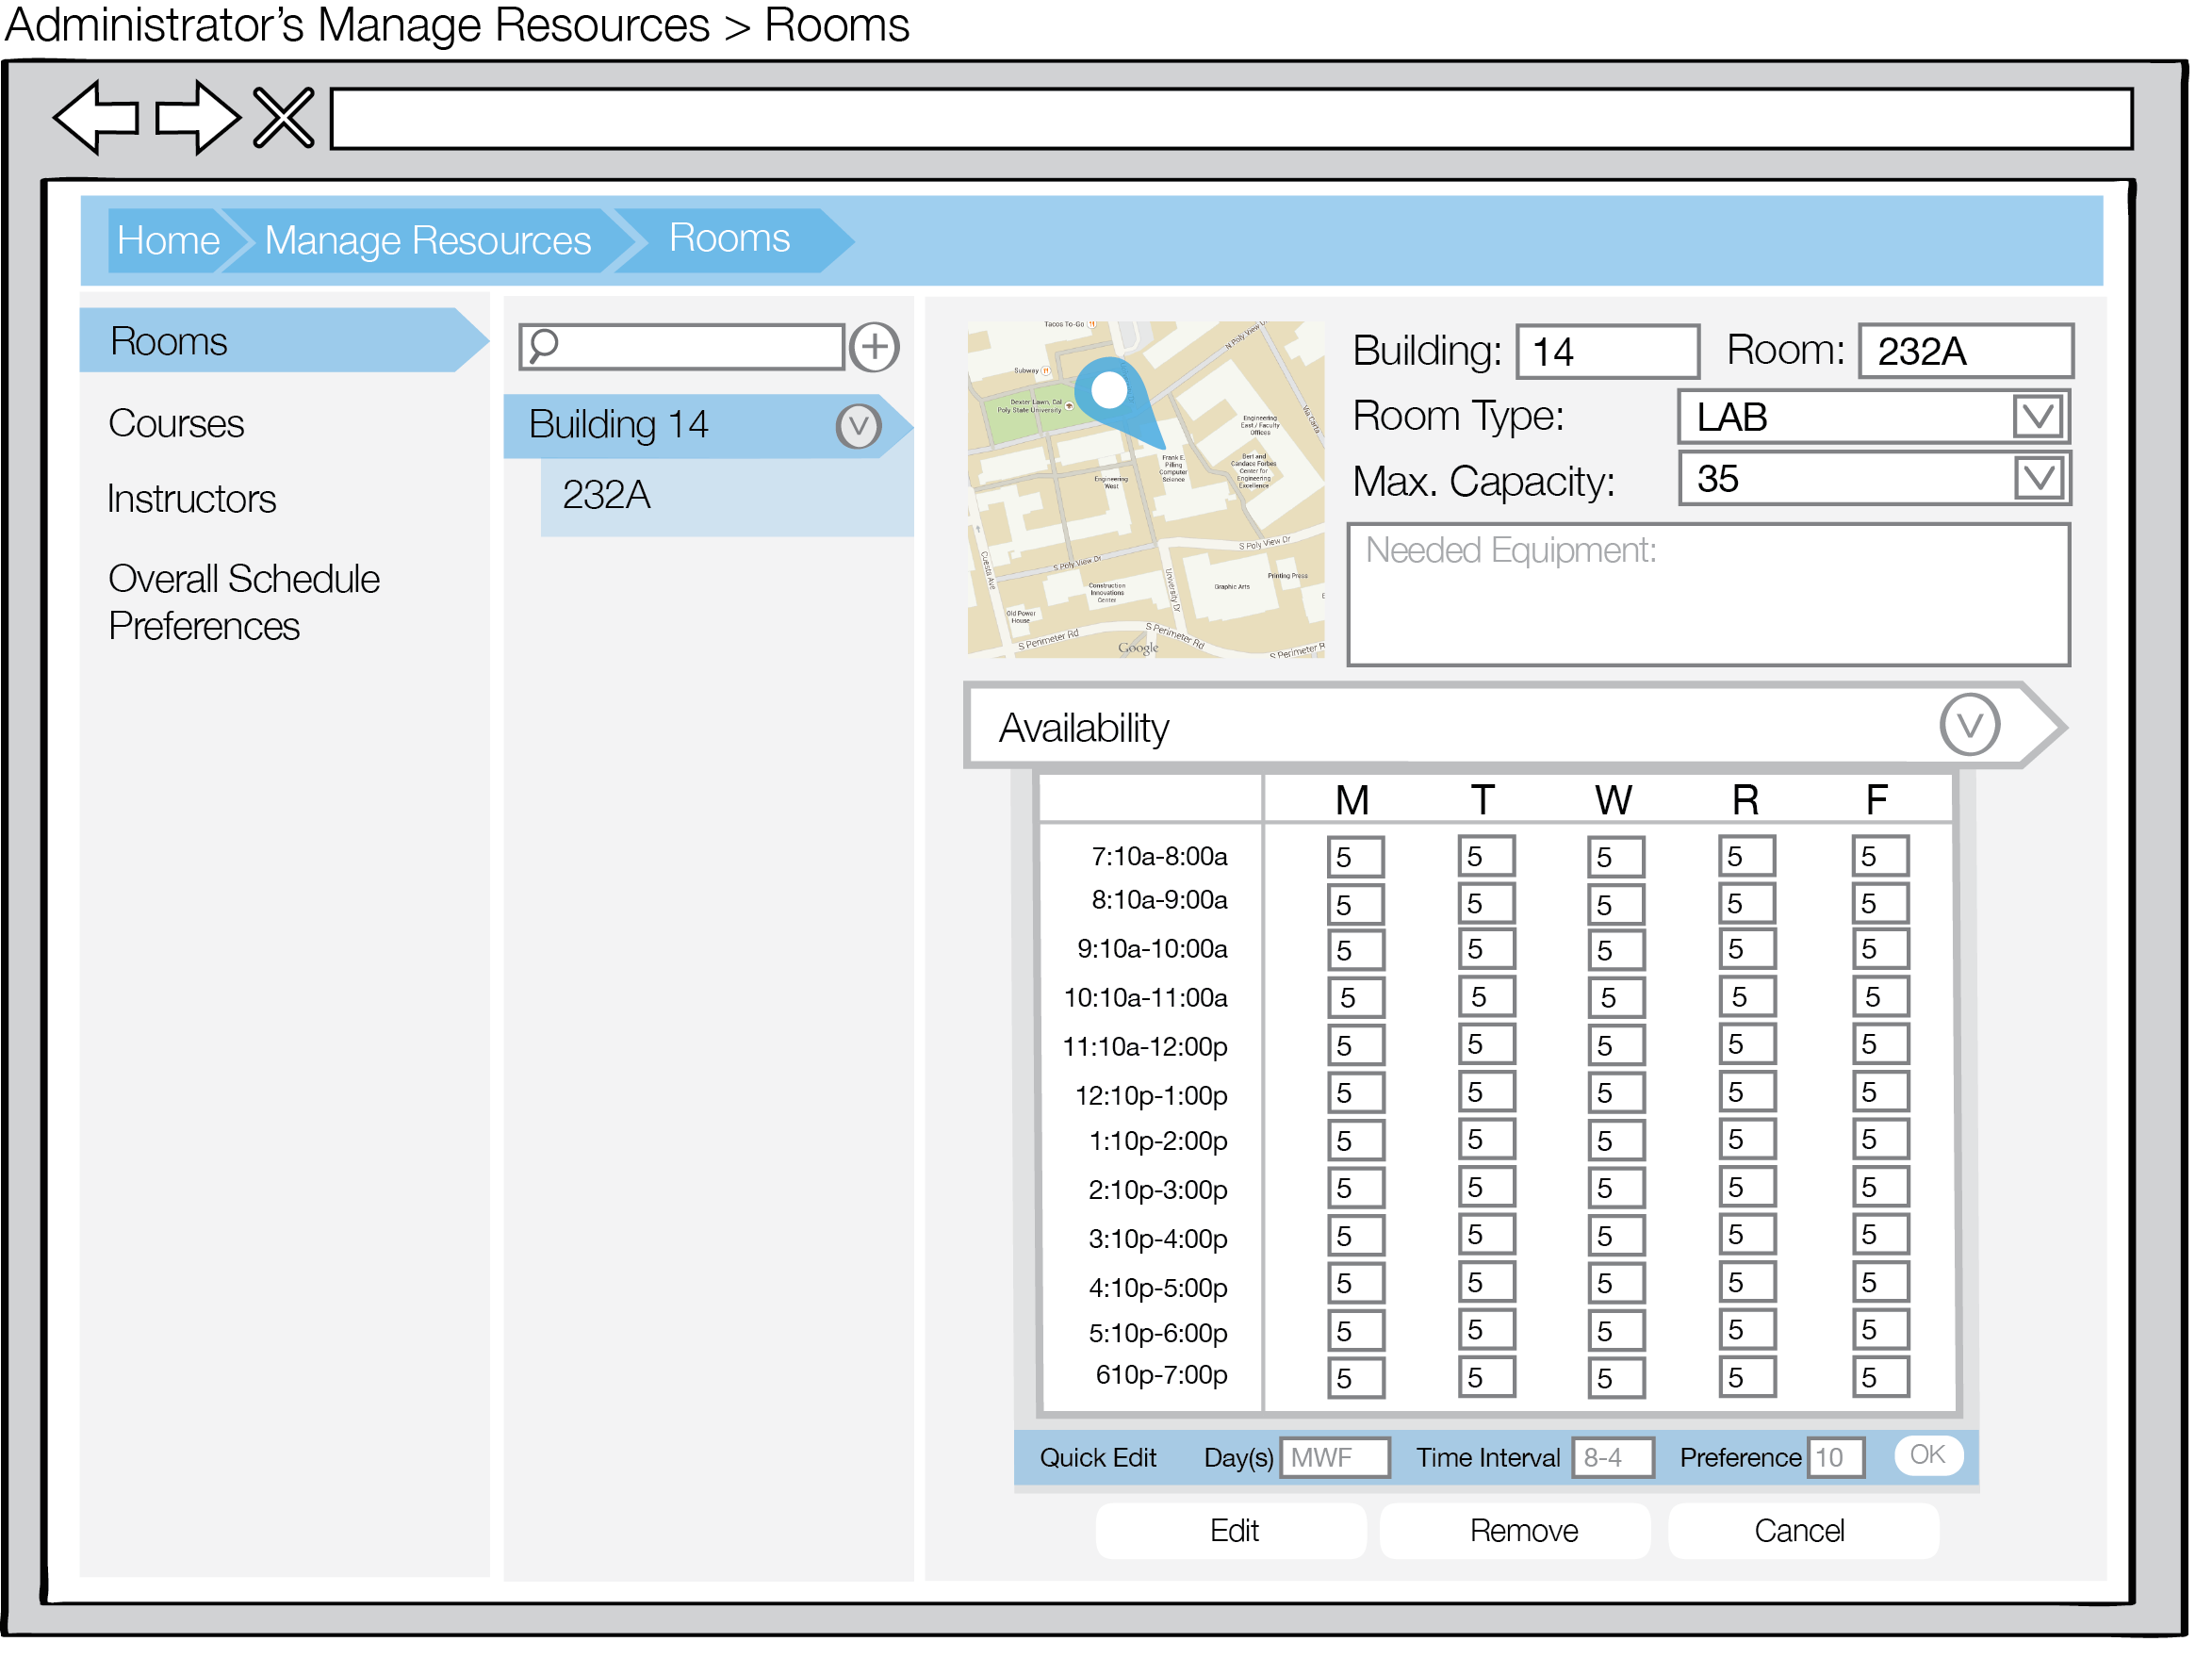
The Add Room button adds the new room to the database and populates the list within the middle panel as shown in Figure 4.

Figure 4: Rooms view for administrators populated with one room
A map showing the location of the building appears to the left of the form for future reference when editing room preferences as outlined in section 2.3.1.2. Manage Room. This map is automatically generated by Scheduler using the Building and Room information provided.
To add a room after the first value has been added, select the + button to the right of the search bar. Once the building for the room has been selected, the room gets filed under the building as shown in Figure 5

Figure 5: Rooms view to add rooms after the first room.